DIY BMS that interfaces with Victron

Who here has the common sense, skills and ability, the importing licenses and whatnot, to supply DIY lithium bank owners with a BMS that can do the following?

  1. BMS must have the ability to get to 100v en 80 000uf.
  2. Can balance the cells with more than 30mA.
  3. Interface with at least a Victron Venus.
  4. And does not cost a kidney?
1 Like

Why 100V?

I’m told that Victron recommends: 80v-100v and 60 000uf.

Hmm. If you are using a 48V Multi II 3kVA then it is specced for 48V with the battery side going up a reasonable range for a 48V system. That would be in the high 50s or maybe 60V. For 80V it could be a bit too much.

Perhaps someone with more insights into the actual limits of those electronics can give us a heads up, but 80V-100V sounds a bit too much. (It would be great for my SmartSolar Charger’s current limit though :slight_smile: )

I have seen my 250/100 push up to ±64v on the “DC Bus” when big loads go off. When that happens, my Daly BMS stops dead … and then I get DC Ripples.

If Victron says black, I ask how black.
Why? 47 years of experience must have taught them a thing or two. :grinning:

If I decide to go against their advised requirements, that is then 100% on me, and not a warranty matter.

Because recently I saw a BMS pop 'n MPPT, jip, one too many DC Ripples on a 5kva MPII and that 250/100 blew.

So I would strongly advocate for min 100v and 80 000uj … just to eliminate ANY potential issue as best one can.

1 Like

First, it is important to understand where DC ripple comes from. In order to form a 50Hz AC waveform, the inverter has to ramp the voltage (and current) from zero to a peak and down again. The effect is that a kind of rectified unsmoothed 100Hz DC ripple shows up on the DC side.

If the battery is big enough, the ripple will be small, a few tens of millivolts at most. If the battery is too small, then the ripple can be a volt or even more, because of the internal resistance of the battery.

Now imagine what happens when the BMS disconnects the cells from the DC bus in order to protect them. When this happens, the battery capacity “shrinks” to only as much as the capacitors on the DC bus can hold. With a battery that small, the ripple becomes much bigger, and if it gets more than about 1V the inverter will start to complain.

This is why a disconnecting BMS causes a ripple alarm/warning.

The trick is to find out why the BMS disconnected its cells. If this happened at a fairly low voltage (below 55.2V), it usually means you have an imbalance. One of the cells went over the maximum allowed limit and the BMS activated its protection mechanism.

Where I’ve seen this with commercial batteries, the trick is to lower the charge voltage and to monitor the minimum and maximum cell voltages each day (assuming that is possible). As you see them get closer to each other, you can raise the charge voltage slowly until all of them is around 3.45V.

I have it on good authority from a very good battery maker that 3.52V is the max sensible voltage. There is no real significant additional energy stored above 3.45V per cell.

I’e had two cases now with BYD Premium batteries that came from the factory with an imbalance. The high cell would peak at 3.75V while the lower cells were around 3.35V. The trick was to carefully adjust the charge voltage down until the highest cell was around 3.6V, then leave it like that for a few days. Move the charge voltage up by 100mV every few days. After some time, you’ll reach a charge voltage of 55.2V… and then you’re done. That’s 3.45V per cell.

1 Like

Valuable info!

On a few times on my system I saw the volts on the DC Bus jump up to over 60v (loads went off). The Daly can only handle max 60v. Therein, I’m told, get a BMS that has 80-100v capacity.

The imbalance, because one cannot see diddly squat on the my Daly BMS, having had the system for over a week on Keep Charged and low charge volts, it made no difference. Moment I up the charge volts, 0.1v at a time, and I get to 54.8/9v, and/or SOC gets to +95% and/or a big load goes off, that DC Ripple is just waiting to happen.
Did check all the connections as you suggested, with the Multimeter too (thanks for that education!) after I shortened the cabling substantially. My crimping was spot on! :smile:

Conclusion: Not only the balancing of the cells, a BMS better have some leeway ito max volts AND some amps to balance them cells faster.

To add onto the DC Ripple causes:
A user got DC Ripples on a 6.2kwh bank. Batt supplier refunded the client instantly.
A Revov 1st Life 11.2kwh bank was installed. Still it happened. Revov was all over the site. No luck.
Next move was the cabling, shortened by 2/3’s. The DC Ripple went away!!!
However, the moment the DC Ripple left the building, inverter started getting overloads. No warnings, dead switch off. Even with <300w loads.

LOM was discussed as the inverter checks for mains, gets a low volt reading, acts on that, next split second volts are ok and inverter comes to a “pletterstop”.

Conclusion: AC Ripples resulting in DC Ripple due to too long DC cabling.
It is either the distance from the transformer, as it is the last house on a long line.
And/or the Conlog meter.
That user is now running totally off-grid until Munic can check the above.

Sometimes the jump in voltage is not the reason the BMS disconnected. Rather, the disconnecting BMS caused the jump in voltage. Again, think about it critically. If the BMS disconnects, the DC bus is flapping in the wind, with only the capacitors acting like a very small battery. I’ve seen spikes over 70V…

Manually get in there with a multimeter…

What I see most commonly is 14 cells at the same voltage, one cell that is a little low, and one cell that is very high. They go in series, so whatever one cell fails to contribute in voltage, another has to take up. And LFP cells get really spikey above 3.5V.

There is a condition that could cause this, which will soon be monitored and logged.

YES, there is that too!
I must get a BMS with 100v capacity installed on my system, if I set the charge volts to normal as per your suggestions, and the DC Ripples are gone, then one problem sorted.

Here is the thing though: On my list of things I’ve blown, I can now add a BMS.

  1. Get the new BMS with 100v option and interface with Victron. I blew it. A salient teeny weeny detail was left out, overlooked, on cell 9, the black wire is going to the negative of batt 9 … not the positive.
  2. BMS 2 arrives, I fit it like a master … dead as a donkey. I get Gerlach in as a 2nd opinion to double-check my work, Gerlach concurred, I did not blow this one. :smiley:

So I’m waiting for BMS no 3 …

I do, did, the new multimeter I bought, only has 2 after the digit, 3 is better, and on that basis, all 16 cells, when I do test, are spot on in sync. New BMS will give me each cell’s info on a display.

Brilliant!!!
The times this happened there was NO record of diddly squat anywhere. I even sent the data to a dealer to help check.
And that was on loads <300w, we saw that on the Venus, because we were testing at the time. House runs happily at 250w … wham, inverter goes dead whilst watching the Venus display … yeah, computer on which we were watching, also goes off. :smile:

The best way to connect your Cells to the BMS is this:

  1. Unplug your balance leads
  2. Connect all the leads to the cells
  3. Use the multimeter to measure the voltage differences on the plug side from negative to each cable in sequence.
  4. If each sequence measurement does not increase by the 3.2V you expect, then something is wrong and you need to redo steps 1-4
  5. If all is OK, connect balance plug to BMS.

Works perfect every time!

1 Like

PS. The BMS I use have models available up to 20 cells. They can also switch between 3.2V LiFePo4 cells and normal 3.7V LIFe/Lipo cells. And someone :wink: :wink: created a driver for these BMS to talk to Victron systems.
20 cells x 4.2V = 84V (closest to 100V I can suggest for you)

2 Likes

Very good salient advice … after the horse, cow, wife and the dog bolted. After that fiasco, now I do. :laughing:

The 100v I’m referring to, as per Victron, and I’m a complete noob on this, it is what I deduced in my ignorance, are these thingy magics on the board … I THINK … re the 100v.

BMS must not switch off with volts like ±64 or Plonsters +70v, when the Victron system does what the Victron system must do.

That’s an electrolytic capacitor. They are usually rated for 1) voltage, 2) temperature, 3) hours it will last at this voltage/temperature).

Capacitor voltage ratings are standard. Usually you get 6.3V, 10V, 16V, 25V, 35V, 47V, 64V, 75V, 100V, etc etc…

You pick the next highest number for your project. Quite a few cheap things use the cheaper lower one. That other Taiwanese inverter for example used 63V caps (6000 hours at 105°C) in the earlier models… then later uprated to 75V. Same sorta thing.

So a 63V capacitor on any 48V project… not a good idea.

1 Like

I was wondering where the micro Farad came into the spec. You were talking about the capacitors.
Caps only come in certain sizes. One of those sizes are the voltages. Those are the absolute max voltage the cap can work with, but it does not mean the rest of the components work at those voltages. Rather stick to the spec of the system.

1 Like

And that brings forward a question, so let me reset and ask: What are the hardware specs for a BMS to properly work with a say 5kva Victron system.
We know comms are absolutely first prize.

100%.
This is so over my head, just need a picture that says “TTT, you just stick to that buttercup, and you are fine!” :wink:
Once the picture makes sense, the rest will follow.

What does Victron then mean when they allegedly said 80-100v 60 000uj for a BMS?

Your DC system must be tolerant of higher voltages. That is all. When a BMS disconnects, the spike can be as high as 75V. Anything that cannot handle that will probably go pop. Including any components in the BMS that’s on the wrong side of the disconnect.

The 60 000µF spec… I suppose that’s just the preferred amount of additional capacitors on the DC side. It also helps to dampen the spike (the capacitors absorb the energy and stop the voltage from rising too much). Capacitors charge linearly, the voltage goes up proportional to the energy. Double the capacitors == half the voltage rise.

60 000µF is quite a lot. Your average small PSU (in the old days) probably had a 1000µF cap for smoothing, maybe 2200 if the designers felt especially generous. Up to 4700 is common enough. So you’re talking 12 or so of these in parallel… and they are big fist-sized capacitors and not cheap.

I suspect this isn’t a cast in stone “spec”, it was probably just good advice from a guy probably called Daniël (if I had to guess). He knows a thing or two about batteries. I suppose you should take it not so much as cas in stone, but more as "a good BMS will have at least a few large “water-tanks” around to smooth things…

1 Like

Right, let’s document this journey here.
I’m asking for insights, as I’m so gatvol of letting the smoke out it is not funny anymore.

IF this BMS is all it appears to be, and it can interface either via CANbus and/or UART with Venus, having ample balancing current, higher voltage cutout than 60v, this could be a real option at $76, about ±R3500 delivered to one’s door.

Point One: These wires are allegedly Galvanically Isolated CANbus connection, as requested to be added … but to be confirmed with an expert on CANbus interfacing - or give me step by step pictures.

So it has:

  1. UART or Bluetooth, use either - to be confirmed with a UART interfacing expert - or give me step by step pictures.
  2. With galvanically isolated CANbus added - on request.

Point Two: This BMS can go either 48v or 24v … I’m floored! (… not 12v though.)
See wiring for 24v below.

So having read the manual, actually kind of re-wrote it to fix the English, I still could not figure what this means:
Start wiring from the first BC0 on the right, the first wire is connected to the total negative electrode of the battery, and the second wire is connected to the total negative electrode of the battery, that is, the positive electrode of the first battery and so on, starting from the 15th wire. Connect the 15th wire, 16th wire, 17th wire, 18th wire and 19th wire to the battery positive electrode of the 14th series, and the 20th wire to the positive electrode of the 15th series. The 21st and 22nd wires are connected to the battery positive.

I got the wiring diagram for 48v

My understanding:


And 24v:

And my understanding:
image

Question:

  1. Do the wiring diagrams above, translated, make sense to all SA DIY’ers?

More Questions:

  1. It also seems that one can add more cells like 9 (31.5v) instead of 8 (28v) for 24 or 18 (63v) for 48v instead of 16 (56v). Using 3.5v to calculate the max charged volts to keep within the Victron kit’s max DC volt i.e. 33v for 24v and 66 for 48v.
  2. The connecting wires are ±1m (2 x 500m) and comes with a 400amp fuse.
    Now battery cables must be the same length so I need to alter the existing positive battery cable to accommodate this extra meter. Agreed?
    Have 200amp fuses already installed on Pos and Neg, keeping that in place instead of the supplied 400amp fuse?

Yes your understanding is correct. Connect each wire to the positive poles of the cells except the very first one that connect to the first negative (your battery’s negative).
The BMS can handle up to 20 cells, but for 48v you will use 16 cells which mean you need to connect lead 15-19 to the same cell. The idea is the same for 24V but you are not going to use that.

You could add more cells to this BMS yes. As long as this is within limits of the Victron to be able to charge and discharge it will work. However just remember that this will then use custom values in your setup. So you if you keep at 16 cells then you can use the Lithium pre sets in Ve.Config.

My understanding is that you want to keep the connections between cells the same length, and also if you parallel 2 batteries or parallel cells then you want those lengths to the batteries to be the same lengths. But it will not matter if the positive battery lead is longer than the negative one.
It is all about electricity choosing the shortest path if there is a choice (so one side works harder in a parallel). If there is no path choice the all work the same.

As long as your cable is protected by a fuse that is rated smaller than what the cable can handle, this will be fine. So you can use the 200A fuses (smaller is fine, bigger can be an issue).
Just make sure you will not use more than 200A from the battery or those fuse will blow.

1 Like

One side will be longer by a meter, so it is substantial.
Flipside, these long thick BMS cables, and balancing wires, makes for easier mounting, less cramped.

On a 5kva that is a remote possibility … but if I increase the battery bank, no still, max is 100amps from MPPT or 70a from the inverter. So 200amps is by far more than adequate.

Got the idea from a Revov install to get a fuse size to help protect the BMS, therefore the existing 200amp fuses.

:smiley:

I recently acquired a 12v 500va as wells as a 24v 800va. Did some horse-trading and all that …

This one falls under the Hobby category:
The 12v MP I want to use in the car, for:

  1. certain types of camps as the car can recharge the battery when driving
  2. and one has 220v AC in the car if there is a need
  3. And now I have a larger 12v charger to recharge a cars battery faster … had to do that twice during Covid.

This one falls under the Want’s category:
The 24v 800va MP is going to have a 24v 100ah lithium bank, 2nd hand.

  1. Get a Rpi Venus going and use it as a UPS daytime and in the evenings, to power my PC’s and stuff with scheduled charging daytime when the main system has spare power, of which I have a lot!
  2. Cheaper option than to get 16 x 150ah cells and what not for the main system …

Also, have a 100/50 MPPT part of the mix, this could become the proper off-grid camping system … but for that, I need another BMS and panels … 2021.

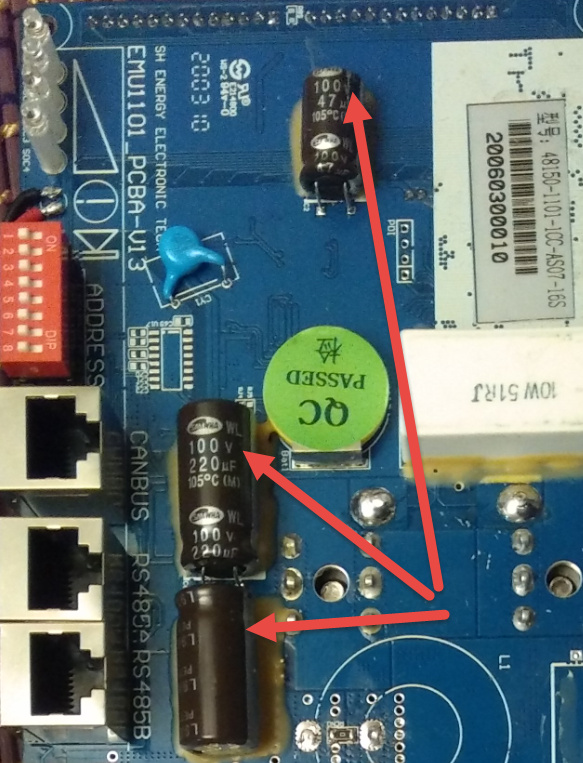
The point is that by this weekend I will have a 24v system to try this new BMS out on, “oefen eers so bietjie”, before I put it into the main system … or … IF it is as good as it sounds, CANbus works, UART works, well then get another one in 2021. :wink:

Hold on … I also have some 7ah 3.5v cells, maybe start there first … get all the testing and stuff done, then the 800va, and then the main system … that is an idea!

YES! I’m ducking and diving touching the main system. It WORKS.