Well to be honest, the TH16 with the eWeLink firmware should give you the temperature reading out of the box. Closest to plug-and-play you can get without going something like a Geyserwise.
I went a different route with my Apollo solar geyser. It came with a really cheap probe and temperature reading which had zero intelligence (it was literally just click the on-button, wait until it shows the temperature and turn it off again).
Not wanting to mess with the geyser and stick in my own probe, I decided to focus on the existing temperature probe until I could figure out how it works.
Eventually narrowed it down to a NTC thermistor. Bought a D1 Pro (which has a barrel socket and runs directly from a normal 12v PSU), built a voltage divider, connected it to the D1’s A0 (analog) input, put ESPHome on it and calibrated it by borrowing another probe from the installer and testing different water (tap, refrigerated and boiled water) temperatures with the other probe and another thermometer.
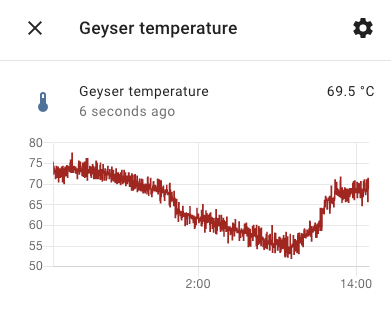
It might not be super accurate (hell and it is even quite noisy) but it is enough for me to know if I need to worry about cold water tonight. And I just left the original probe in the geyser where the installer fit it.
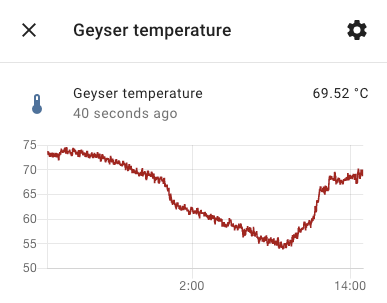
I did run it through a low pass filter in home assistant (basically a moving average) which gives a slightly better signal:
I’ve done a lot of these in various configs at own house and clients. Here’s my general advice/experience:
TH16 nice for temp monitoring and control - I use mostly on ring mains; found on geyser switching they tend to fail; POW R2 very reliable to switch geysers of 3kW and below - measures power consumption but not temp
4 ways for probe positioning:
a. stick onto flange at thermostat or (my preferred) drill small hole in plastic end cover of geyser, use screwdriver to push through insulation till feel geyser shell, continue along shell for 100mm or so, remove screwdriver and insert probe along channel created - nestling under insulation against shell is as good as inside
b. Replace existing thermostat with temp probe - not recommended when going to do switching as don’t trust TH16 to ‘fail to safe’ but if only for monitoring like in solar water or with micro probe as per @plonkster for heat pumps then okay
c. attached to hot water out pipe on top of geyser and cover with insulation
d. install dedicated probe pocket - can buy from solar water providers - bit more difficult and skills required
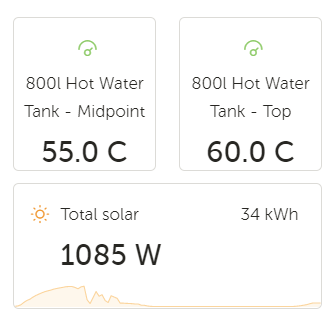
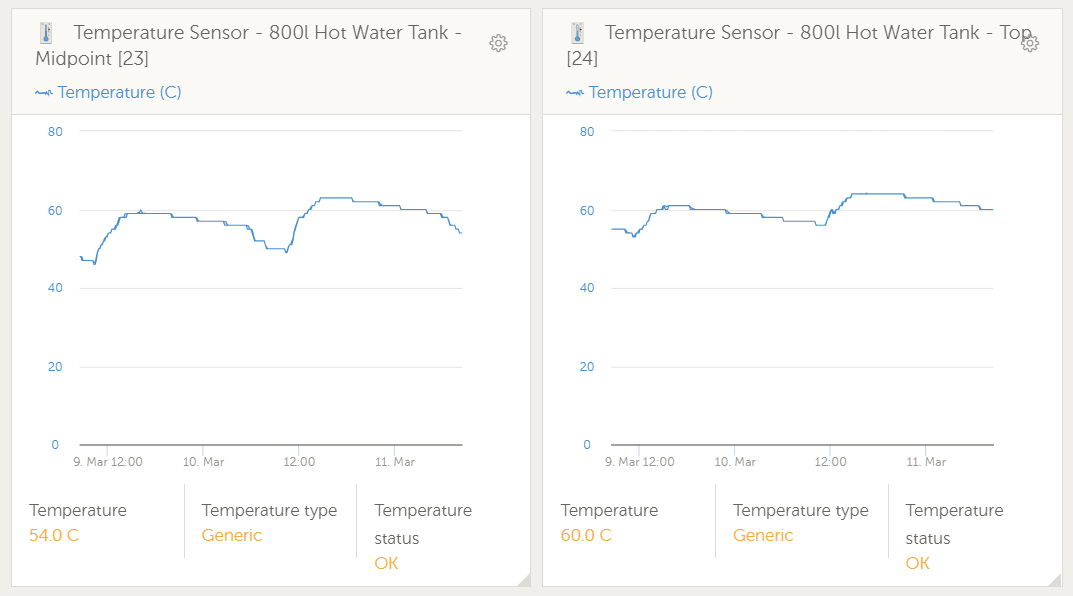
If have Victron install use one of Victron Pb-acid battery temp probes, take off lug, locate as per above, wire and configure to GX device and display and log on VRM - QED!! This is my solution on my 800l bulk hot water tank - have mid and top probe. If want to see how works - look here VRM Portal - Victron Energy
starting to experiment with Shelly now but early days - looks promising though - nice and small…
This is a nice option if you have a VenusGX or CerboGX, although those temp probes cost quite a bit more than the other options and you should keep the max temp to <70Deg.
The Cerbo GX has four temperature terminals, and the Venus GX has two. They can be used to measure & monitor all kinds of temperature-inputs. Temperature senders are not included. The required sensor is ASS000001000 - Temperature Sensor QUA/PMP/Venus GX. (Note that this is not the same as the BMV temperature accessory.). Temperature range is -20C to +70C. Actually it can measure up to 100C, but the sensor is not made to withstand temperatures above 70C long term. Note that this is intended as a crude temperature sensor, and not calibrated. A deviation of +/- 2C is to be expected.
Yes. Internally it’s an LM335. You feed it 5V through a resistor (edit: The GX device already includes that resistor, it’s called a pull-up resistor), and it pulls that 5V down for you to a voltage corresponding to the temperature.
The datasheet indicates that it can go well over 100°C, but that’s the LM335 chip itself. My guess would be that the packaging of the sensor is probably rated lower.
After spending most of the evening in the ceiling I can tell you that the TH16 is rubbish with those fiddly connections nor can it read its probe even when selected in GPIO14. Well my one cant.
Install Sonoff POW R2’s on power supply to heat pump. Use Victron programmable relay to trigger switch on Sonoff Mini if battery SOC < switch-off value. Set up Scene in Ewelink where triggering of the Mini triggers the POW R2.
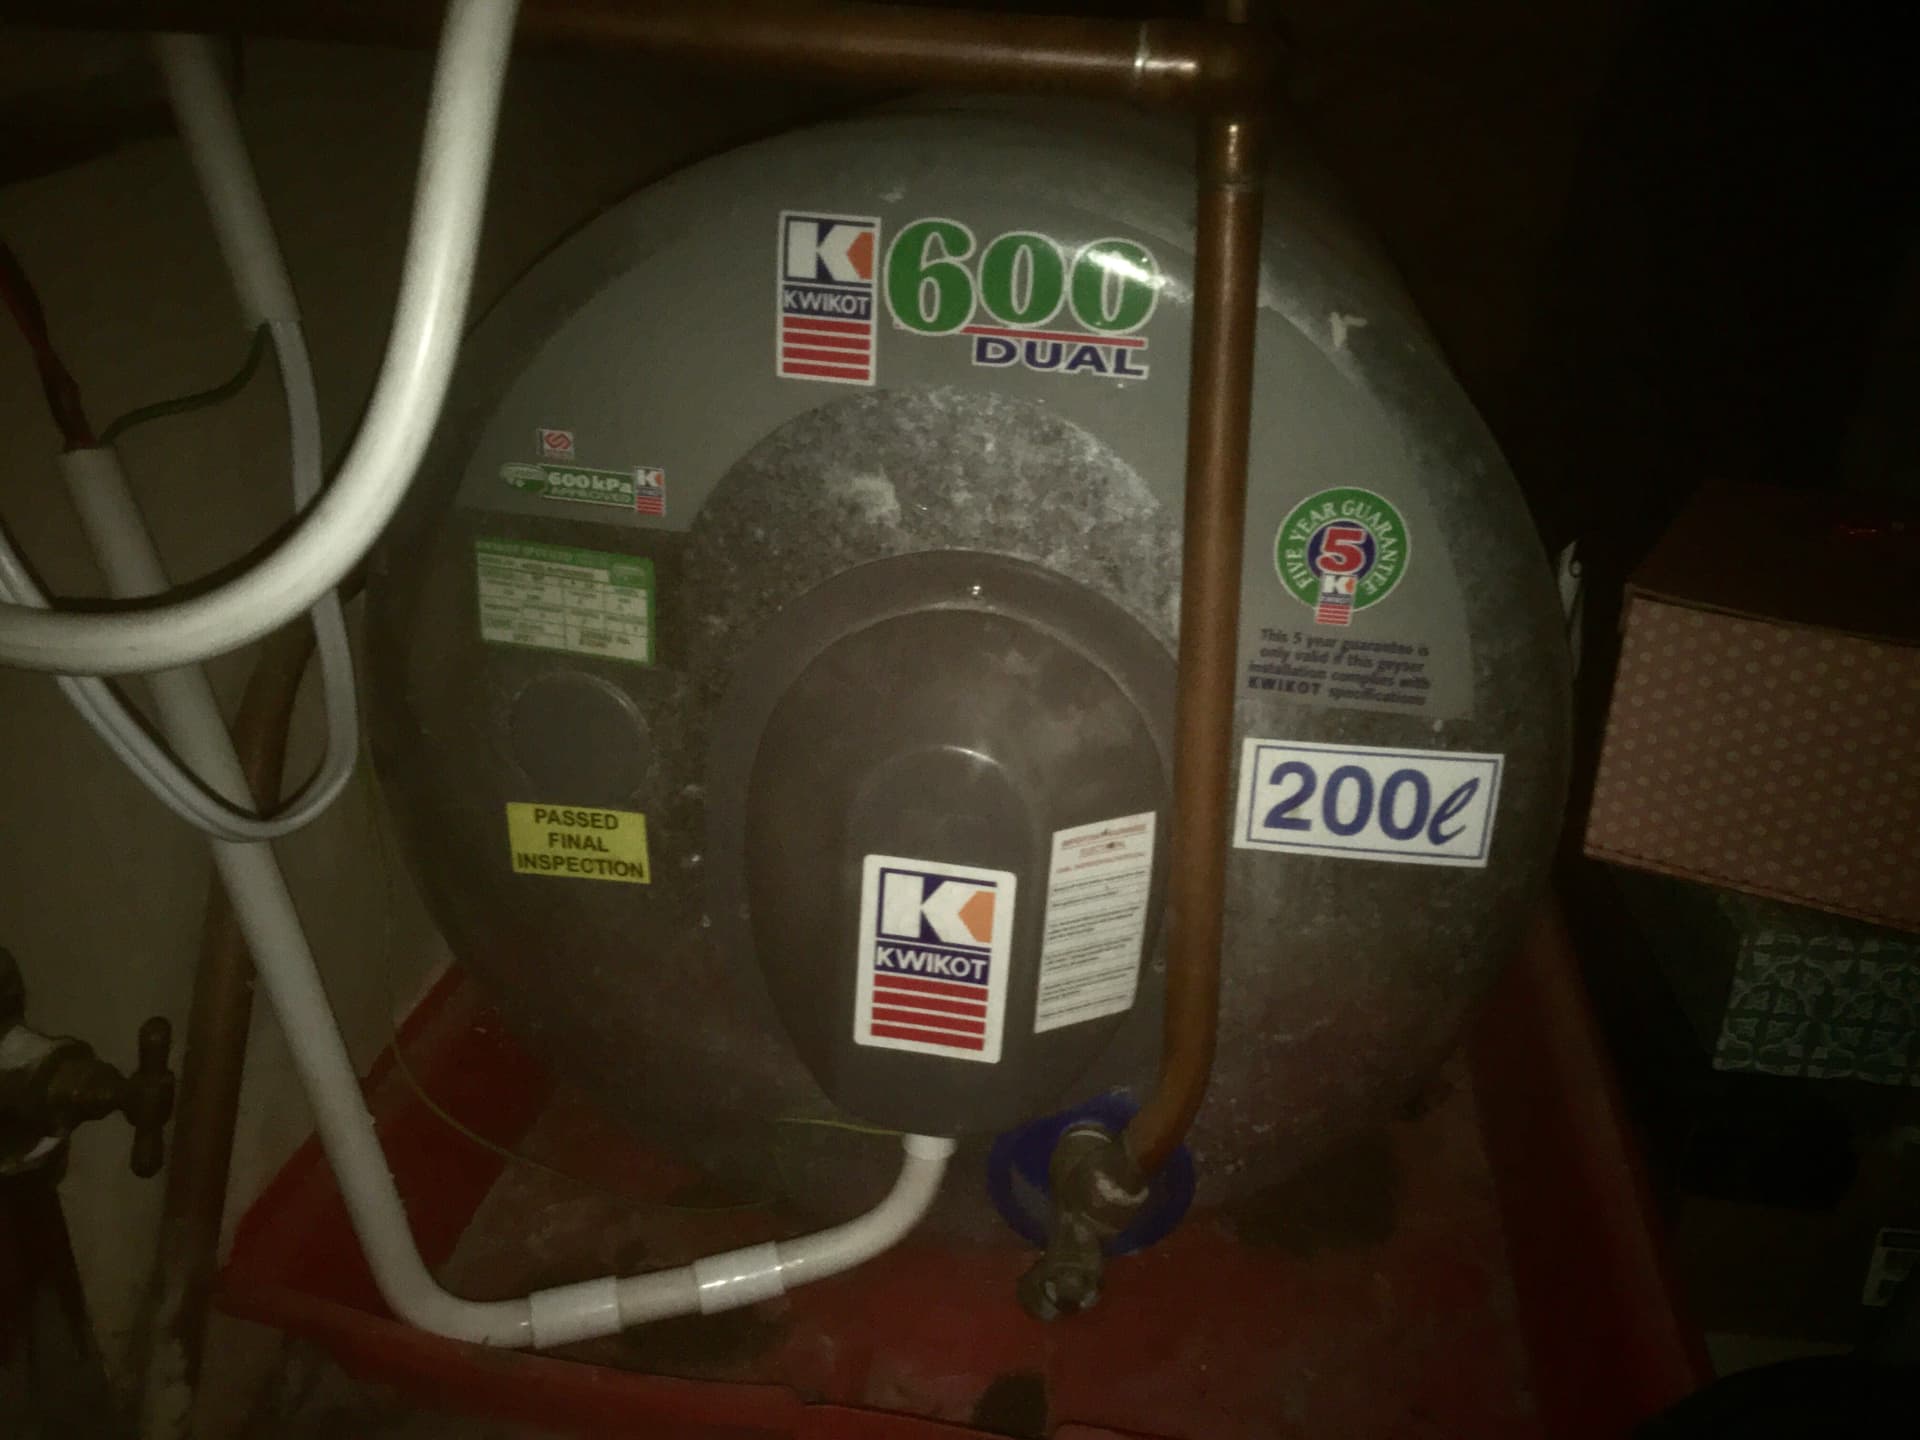
@Langou thank you for this helpful post. I would like to place the probe up against the shell but am unsure about the plastic end cover you are referring to. I have a picture of my geyser. Can you let me know if it the blue plastic at the bottom right where the cold water pipe is. Or is the small grey cover on the middle left in between the 2 labels?
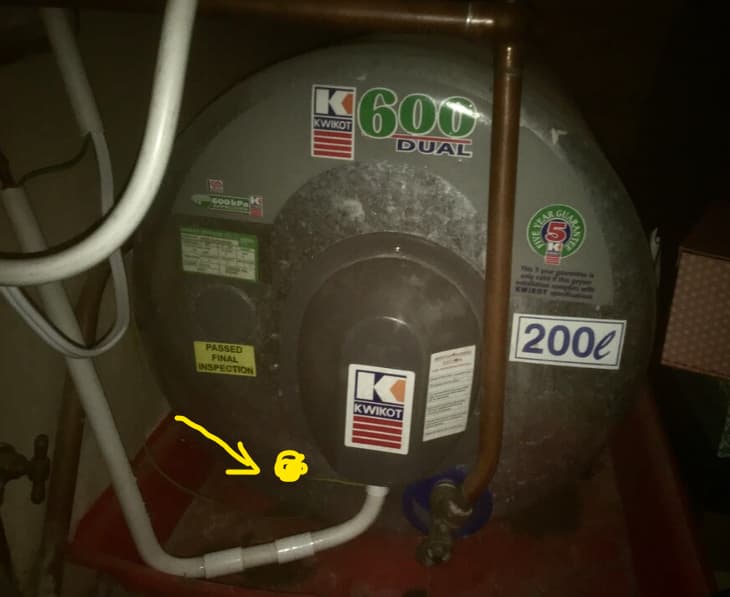
Hi G On newer geysers whole end dome cover of geyser is plastic, not galv plate like yours - is what I was referring to. You can drill small hole (size of probe) at position as indicated and then push screwdriver in making tunnel through the insulation till you reach the tank wall and then slide along bottom edge of the tank. Then push in your probe… The metal outer cover you see is not the tank, just the thin’ish plate covering the insulation.
I would suggest mounting it beneath the grey plastic in the middle, where there is a steel flange that does not have isolation. (using something like aluminium tape)
That way, you don’t have to drill into your geyser.
Insert a temp sensor in there. Need these parts I’m told:
Stainless Steel Sensor Tube ± R131,25
Brass pocket for temperature probes ±R103,13
Then insert the probe of your choice into the brass pocket.
I just taped the Sonoff TH16 temp probe to the hot water outlet pipe from my geyser using insulation tape and then sandwiched the pipe and probe between 20mm polystyrene to isolate it from the roof air temperature.
I then measured the water temperature at the tap and adjusted the values in home assistant to read the same.
Just note that that method will give you premature high values. The hot water rises, so if you use that to determine when to stop heating, you will only have a couple of liters of actual hot water.