A while back, on this very forum, I stumbled across the nifty little gadget called the ‘Geyserwala’. Long story short, I ordered, I received, I installed, and it works flawlessly. GREAT aftersales service, if not the best I’ve ever experienced. I had a ton of programming questions (this was my first node-red project), and I started to feel bad for bothering them so much with my newbie questions, but they always replied promptly and with good advice. Hence this ‘tutorial’, I’d like to share my node-red project with you. Hopefully, I can learn even more from your input, and maybe this can help another newbie out there.
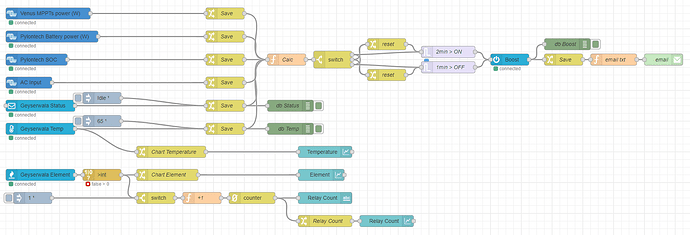
So firstly, my flow. See attached ‘Geyserwala Boost.zip’
Geyserwala BOOST.zip (3.7 KB)
It started out simple, but quickly got more complex when I added filters and debounce timers to protect the geyserwise relay from switching on/off/on too often. Currently, the geyserwise boost mode will only be turned on if the correct conditions are met for a full minute. The same goes for switching it off. It’s working perfectly for my setup, even when clouds are causing havoc.
(note: The developers from Geyserwala did advise me rather use the remote-setpoint and remote-demand nodes, since they have already some protection built into them. I tried it, but I personally prefer the boost mode node. Just be aware of the dangers of using it)
My boost temperature is set to 65’C in the geyserwala, and I also have a timer set inside the geyserwala to always keep the water at a minimum 40’C. But that timer almost never kicks in if the system is boosted at least once a day to 65’C.
You will see there are 2x once-off injections, these are to put some initial useful data into the flow so that it can start crunching the numbers. It will update itself accordingly in due course, regardless of the actual state of what the geyserwala is in when you deploy the flow.
In the calculation node, I added the ‘SOC != 88’, so that the boost mode is not activated while the pylontech batteries are getting their cells balanced. This might be different for whichever battery system you are using, or feel free to take it out.
I also added an email node so that I can track the flow’s work for the time being. If you want to do the same, have a look at this website for creating the appropriate passwords:
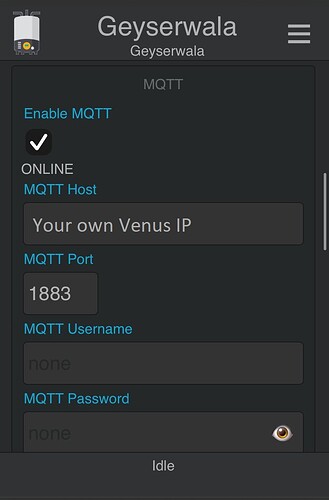
To set up the MQTT handshakes, you’ll need to do the following on the geserwala:
- Select ‘Enable MQTT’
- Add your Venus or Cerbo IP into ‘MQTT HOST’
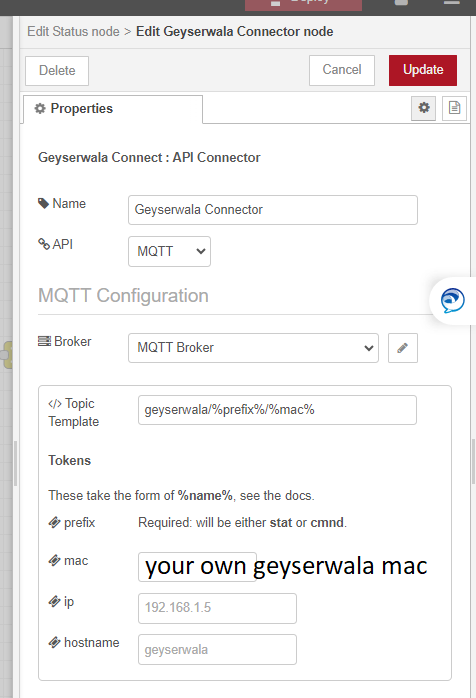
In node-red, Edit the Geyserwala Connector node as:
And the MQTT broker as:
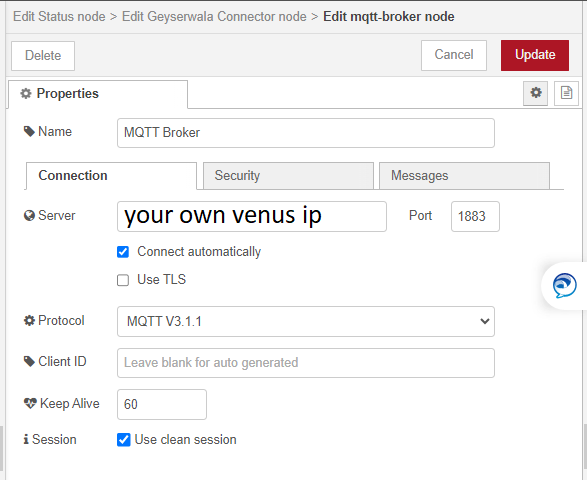
At one point I accidentally made/import a duplicate broker. That caused my flow to say that it was not connected, but it was in fact working via the other broker. I deleted everything (flows and connection and brokers, everything I could find), imported my flow again, created the broker and all was good.
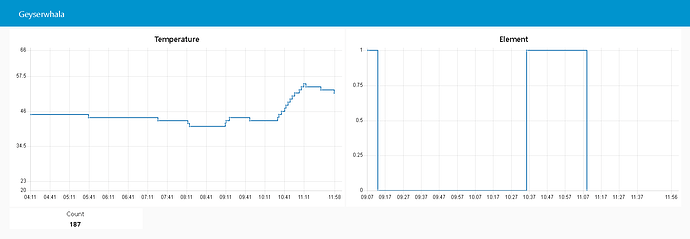
I added a GUI to the dashboard to keep track of the temperature and switching cycles. For now, it only shows the last 24h worth of data. The only flaw here is that the cycle count is lost every time you restart the flow. (seems like Victron does not want us to store those values in permanent memory) So for now I just update the counter to one less of the current value before I make a change.
That’s all I can think of for now, I think the flow should be mostly self-explanatory. But feel free to post any other recommendations or questions.
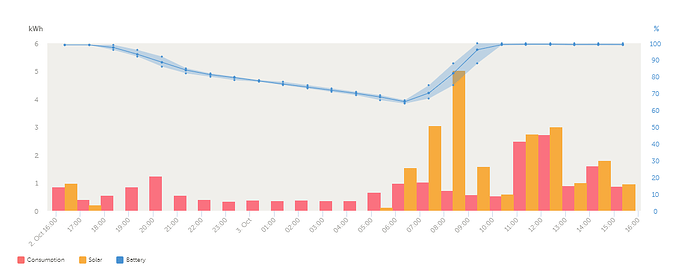
Just on a side note, to give you an idea of what to expect, this is how erratic my power usage was normally:
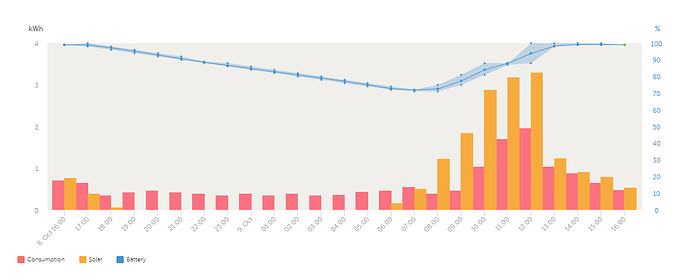
Now, after adding the node-red control, the power consumption is much more in sync with my solar input:
