@JacoDeJongh Jip, I will post more in the next few weeks.  I Wanted to post something ells quickly and this post was in the save registry and by accident it posted this. Lets say, It will be a massive array and 2 big MLT inverters and 2 Big Victron MPPT’s with the stuff that go’s with them and a big Lifepo4 bank.
1 Like
Where did this go, topic seems interesting.
@Gman , can we expect and better ending to this post?
1 Like
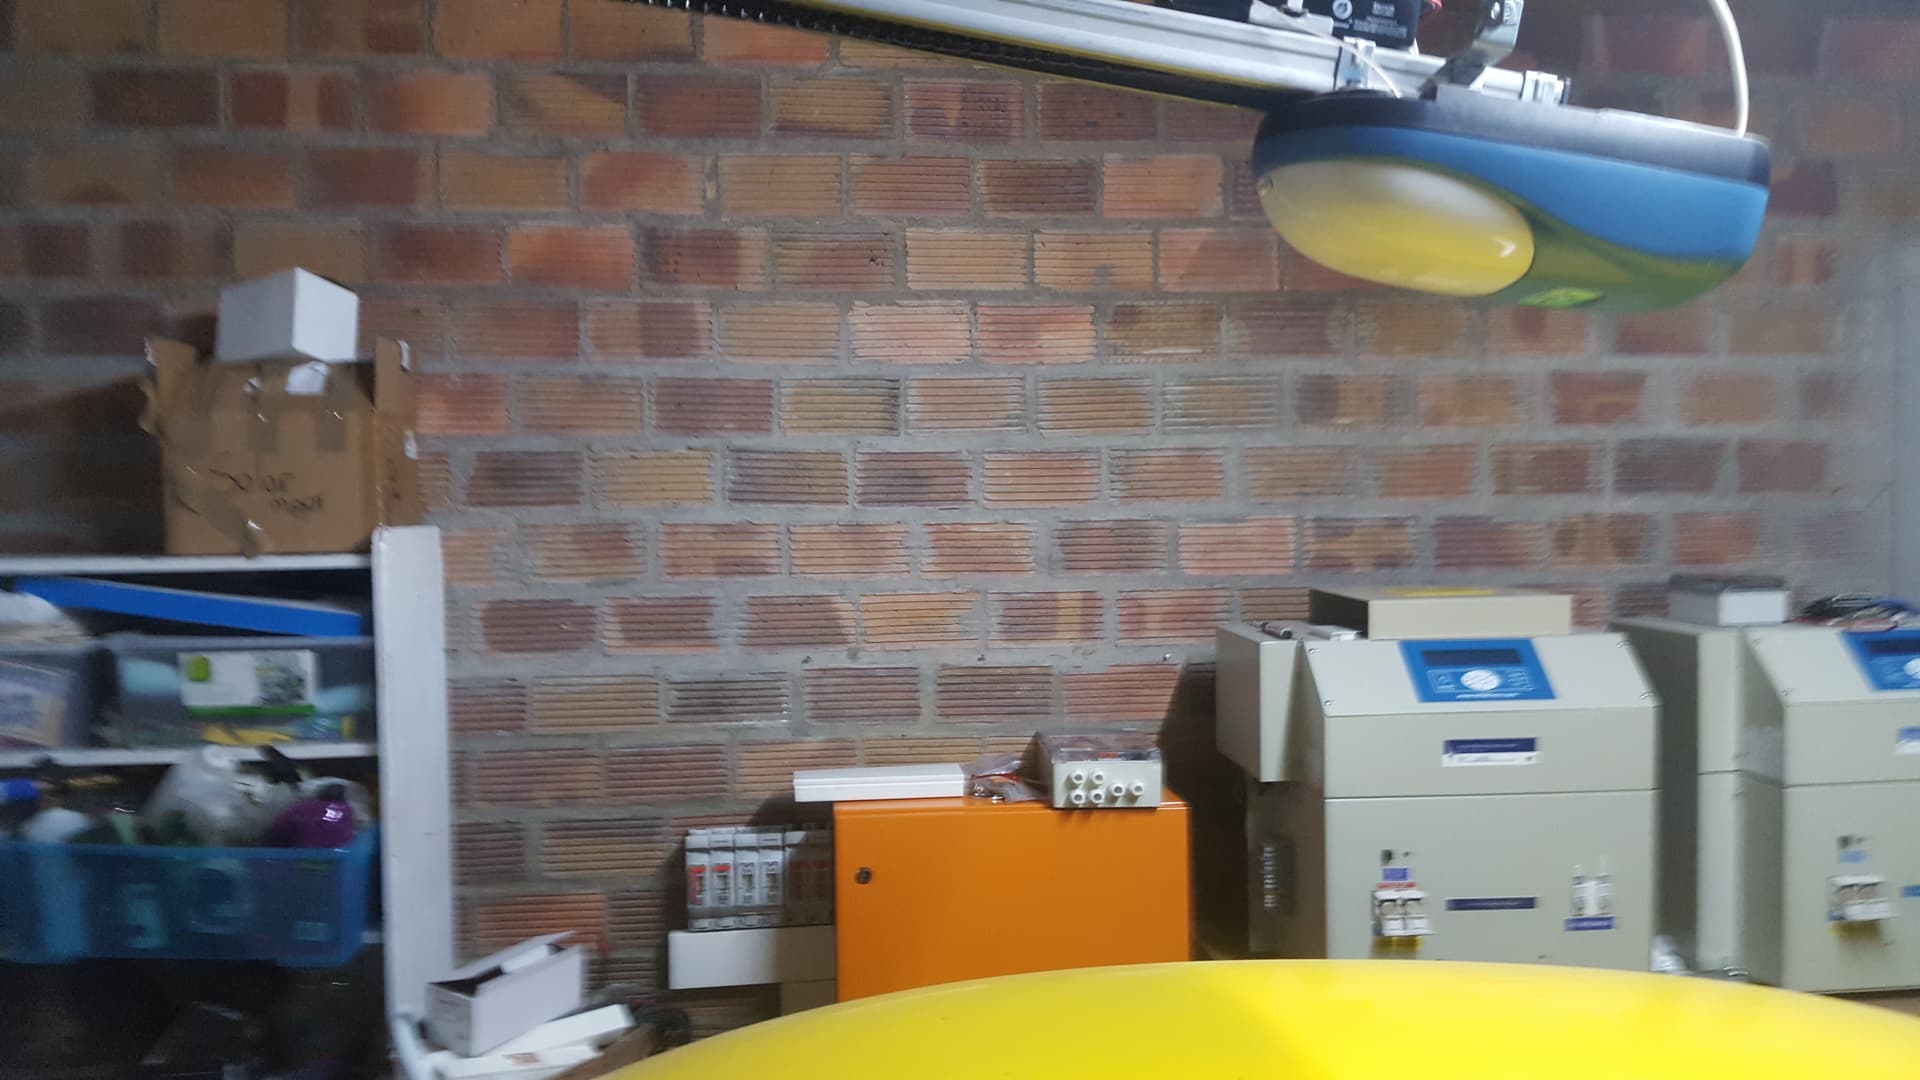
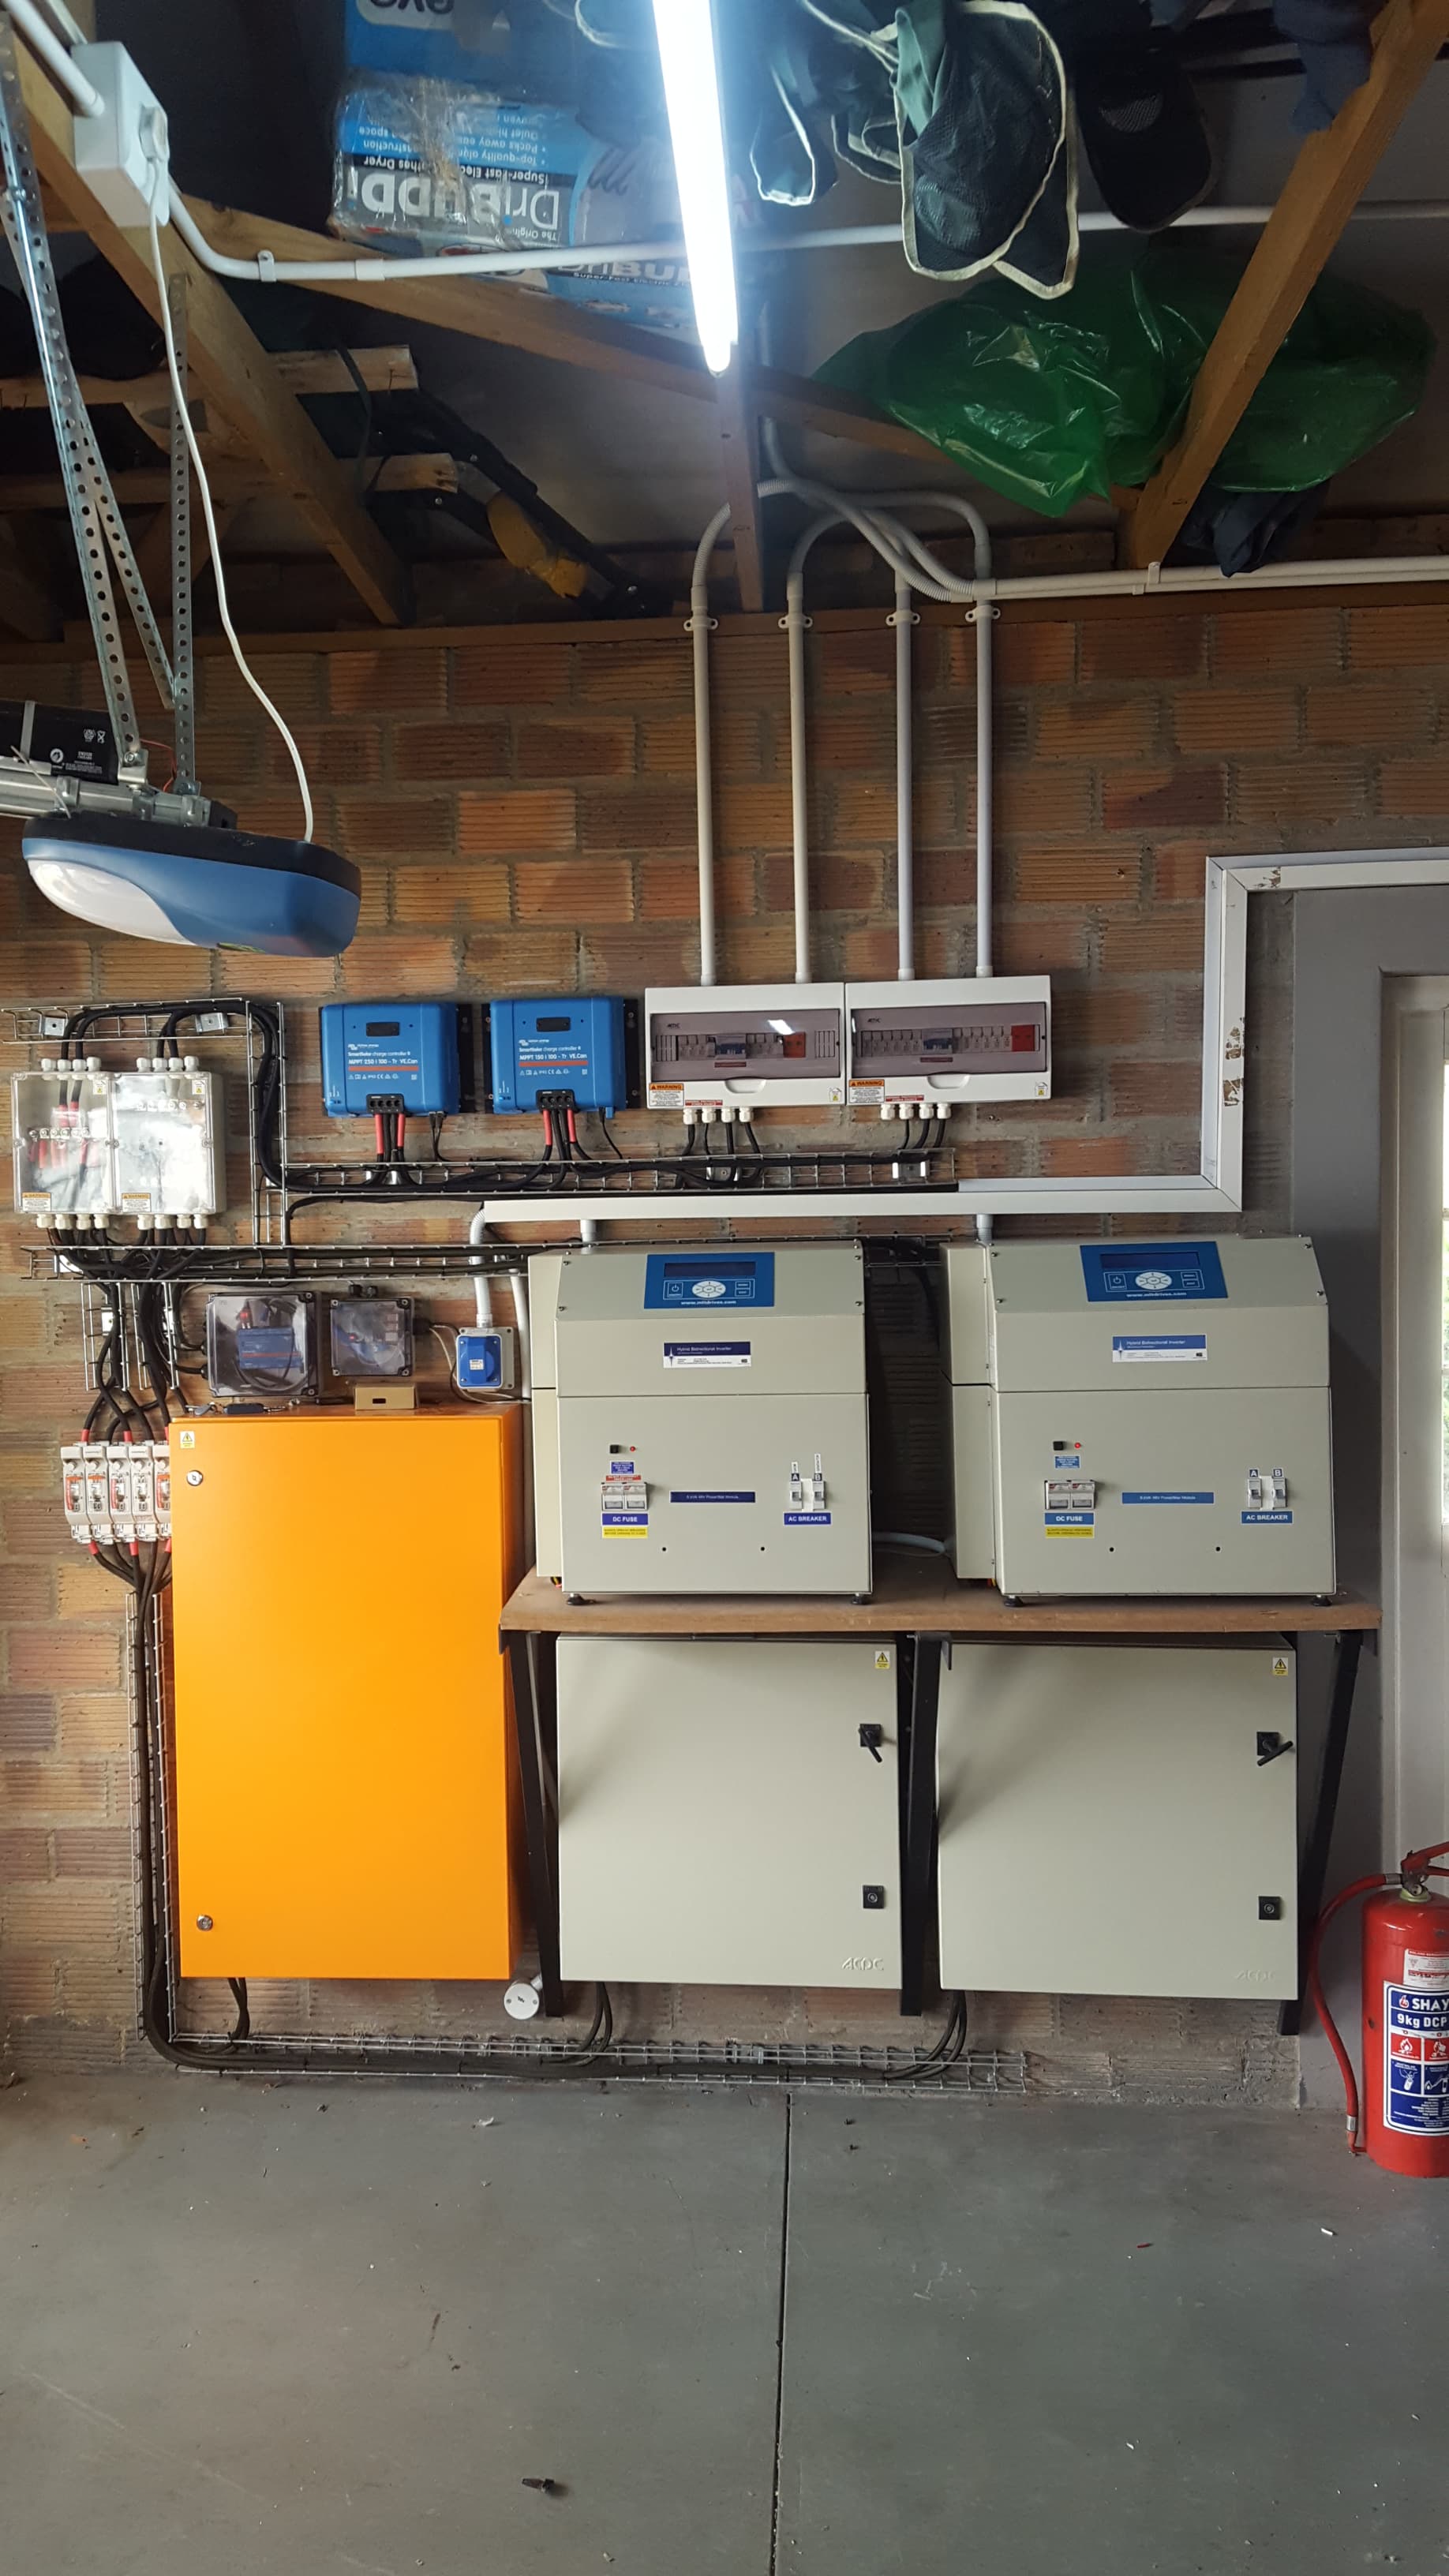
Ok. I guess it’s time to start posting about my setup. Still busy with it but aiming to have it all up and running by the end of Nov. We bought a bigger house and moved in begin of Aug into it. I took my setup out my house that I sold because to replace the stuff will not be cheap. Plans was to start building the system in September but that plans quickly flew out the window because my with had other plans with the house and needed my hand with it. So I did some stuff between all the other stuff like painting the house and taking the garden out and replacing with a new garden design. Last 3 to 4 weeks I started to get more time to work on the system.
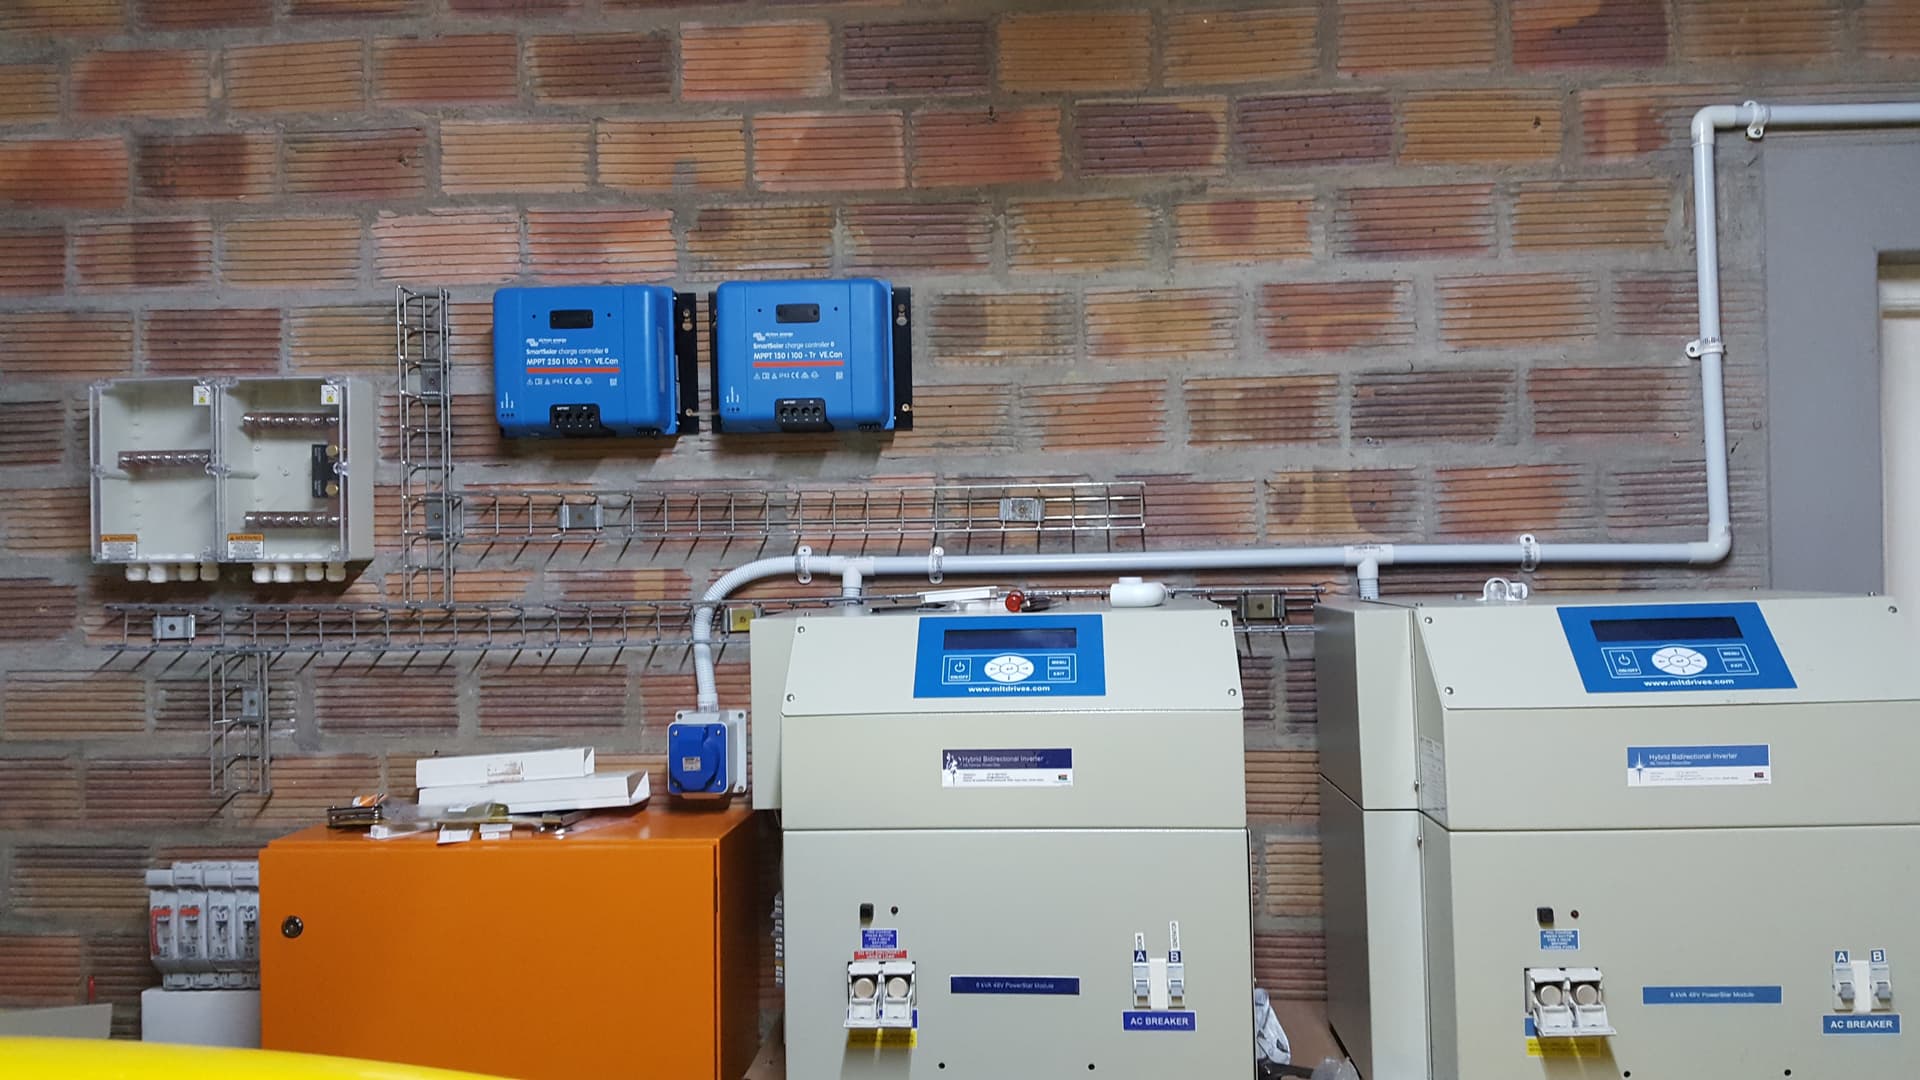
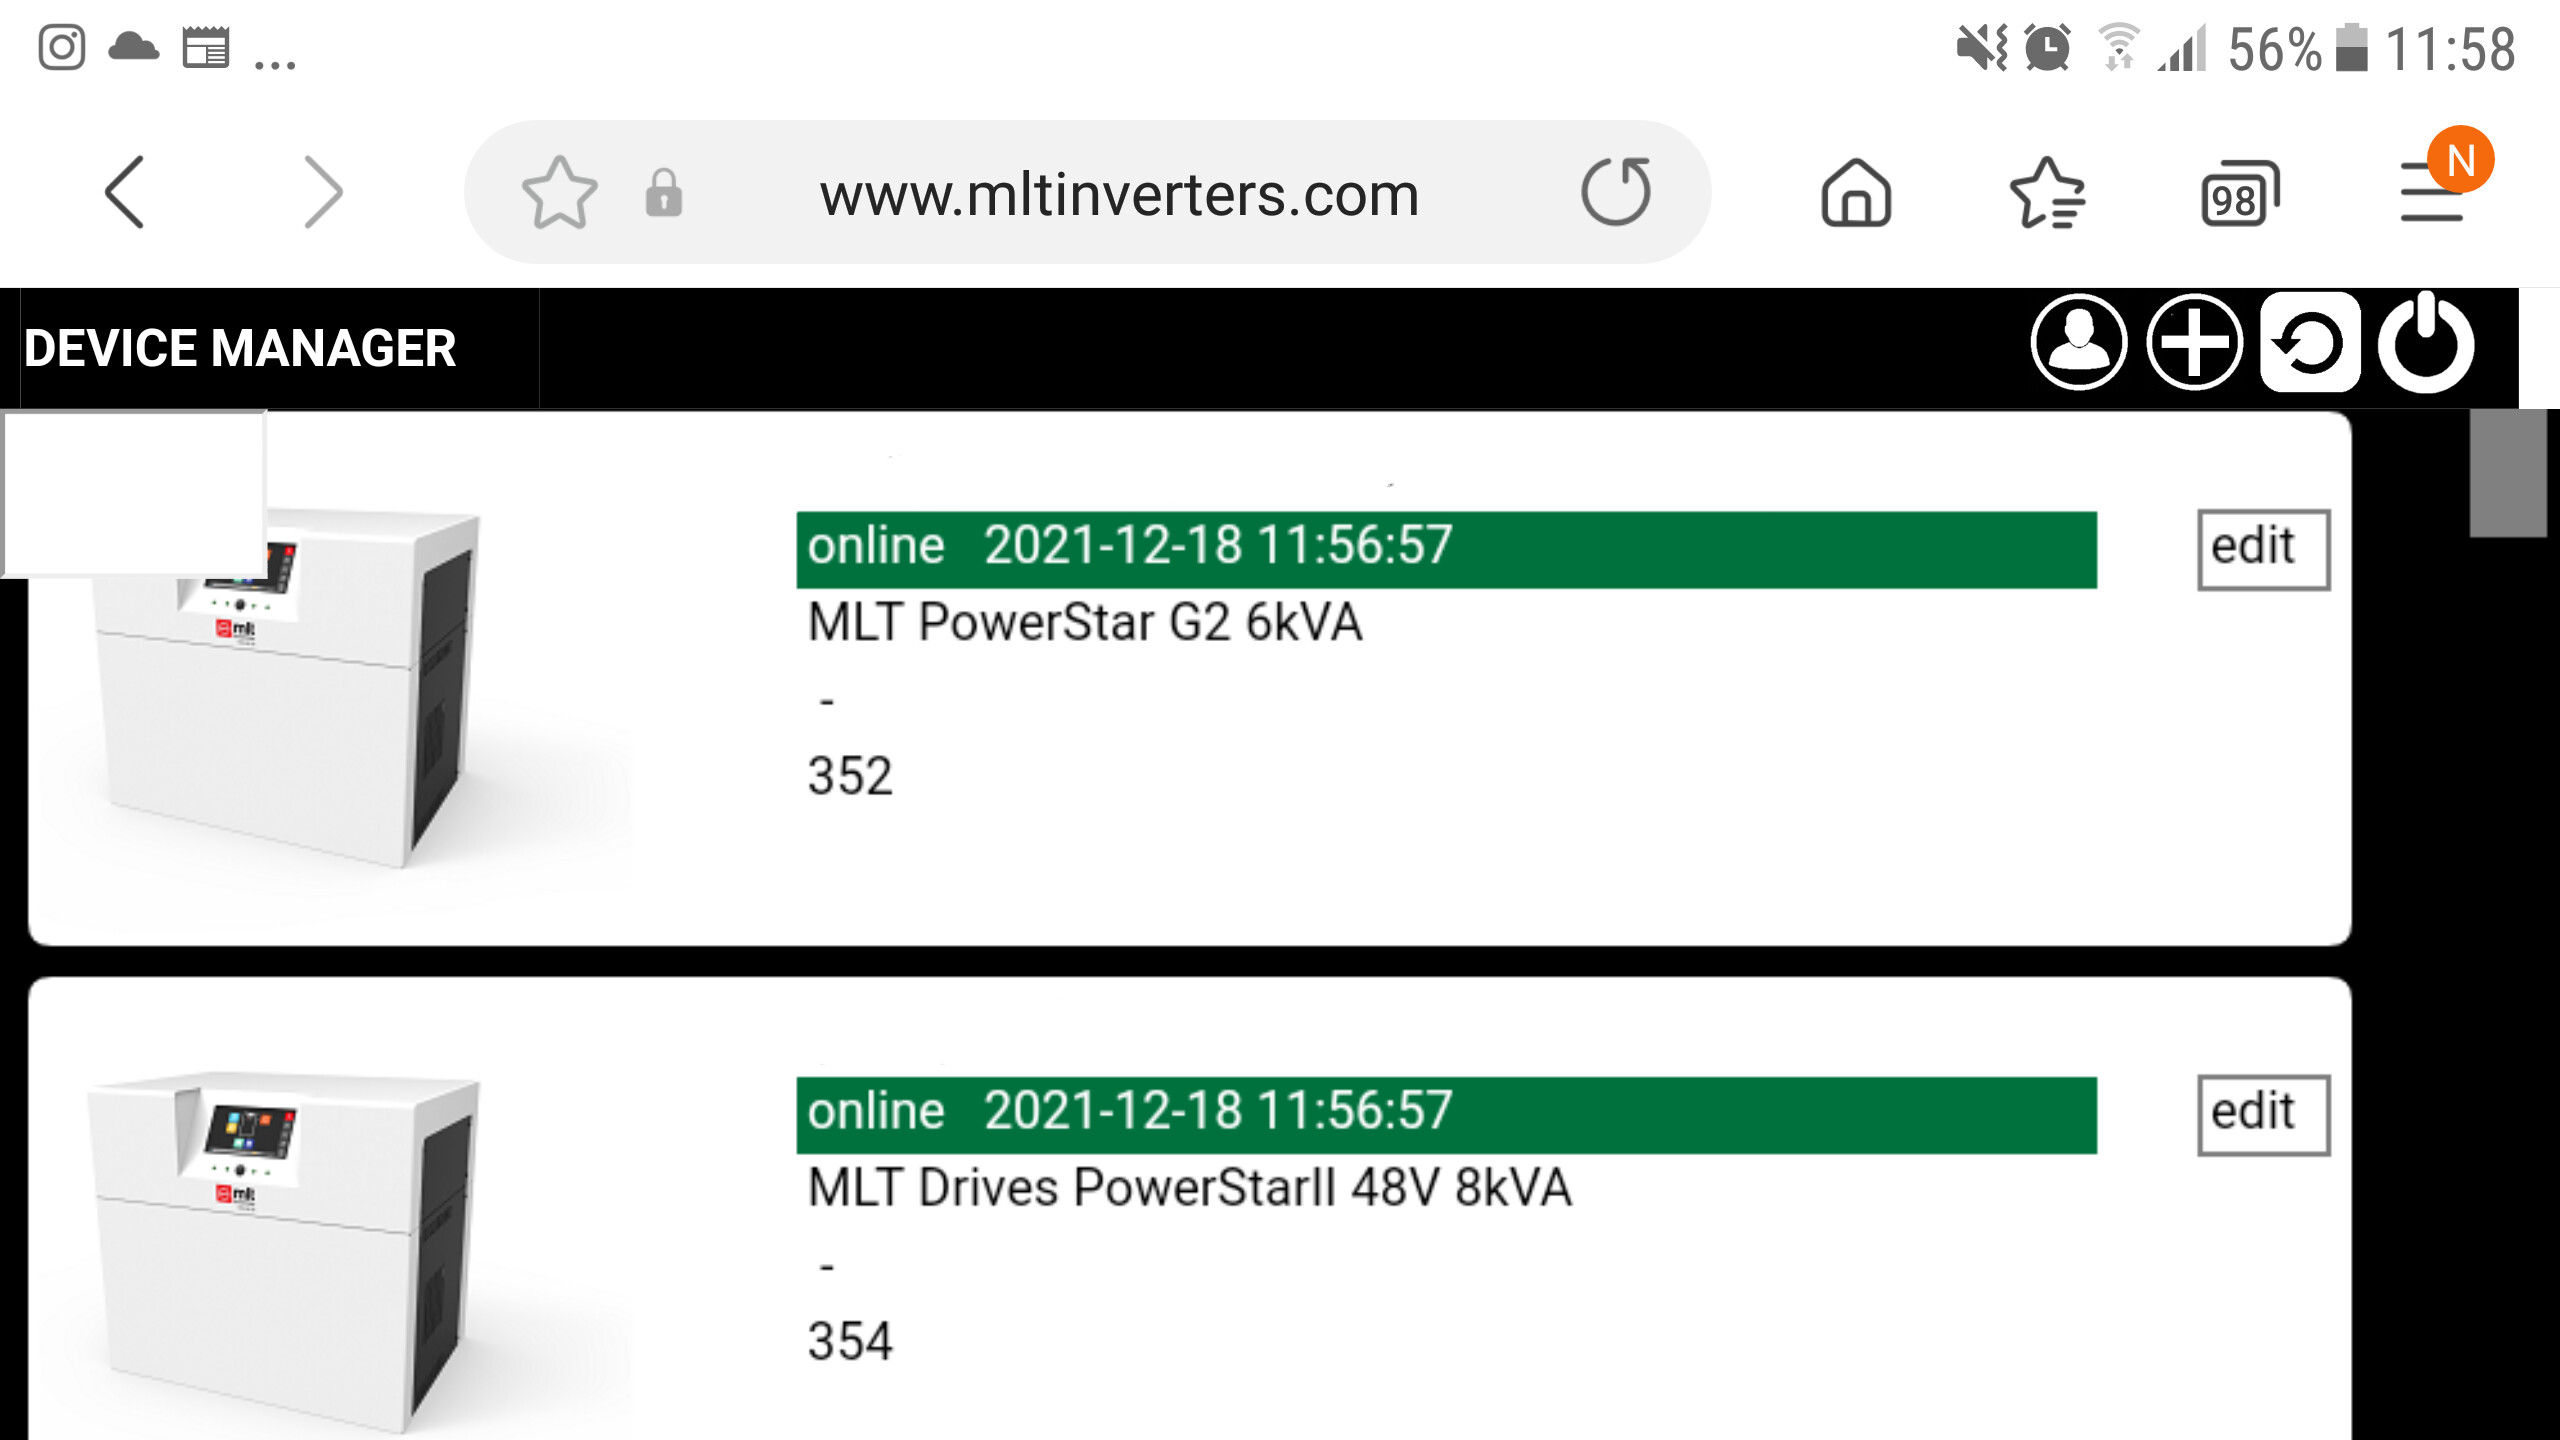
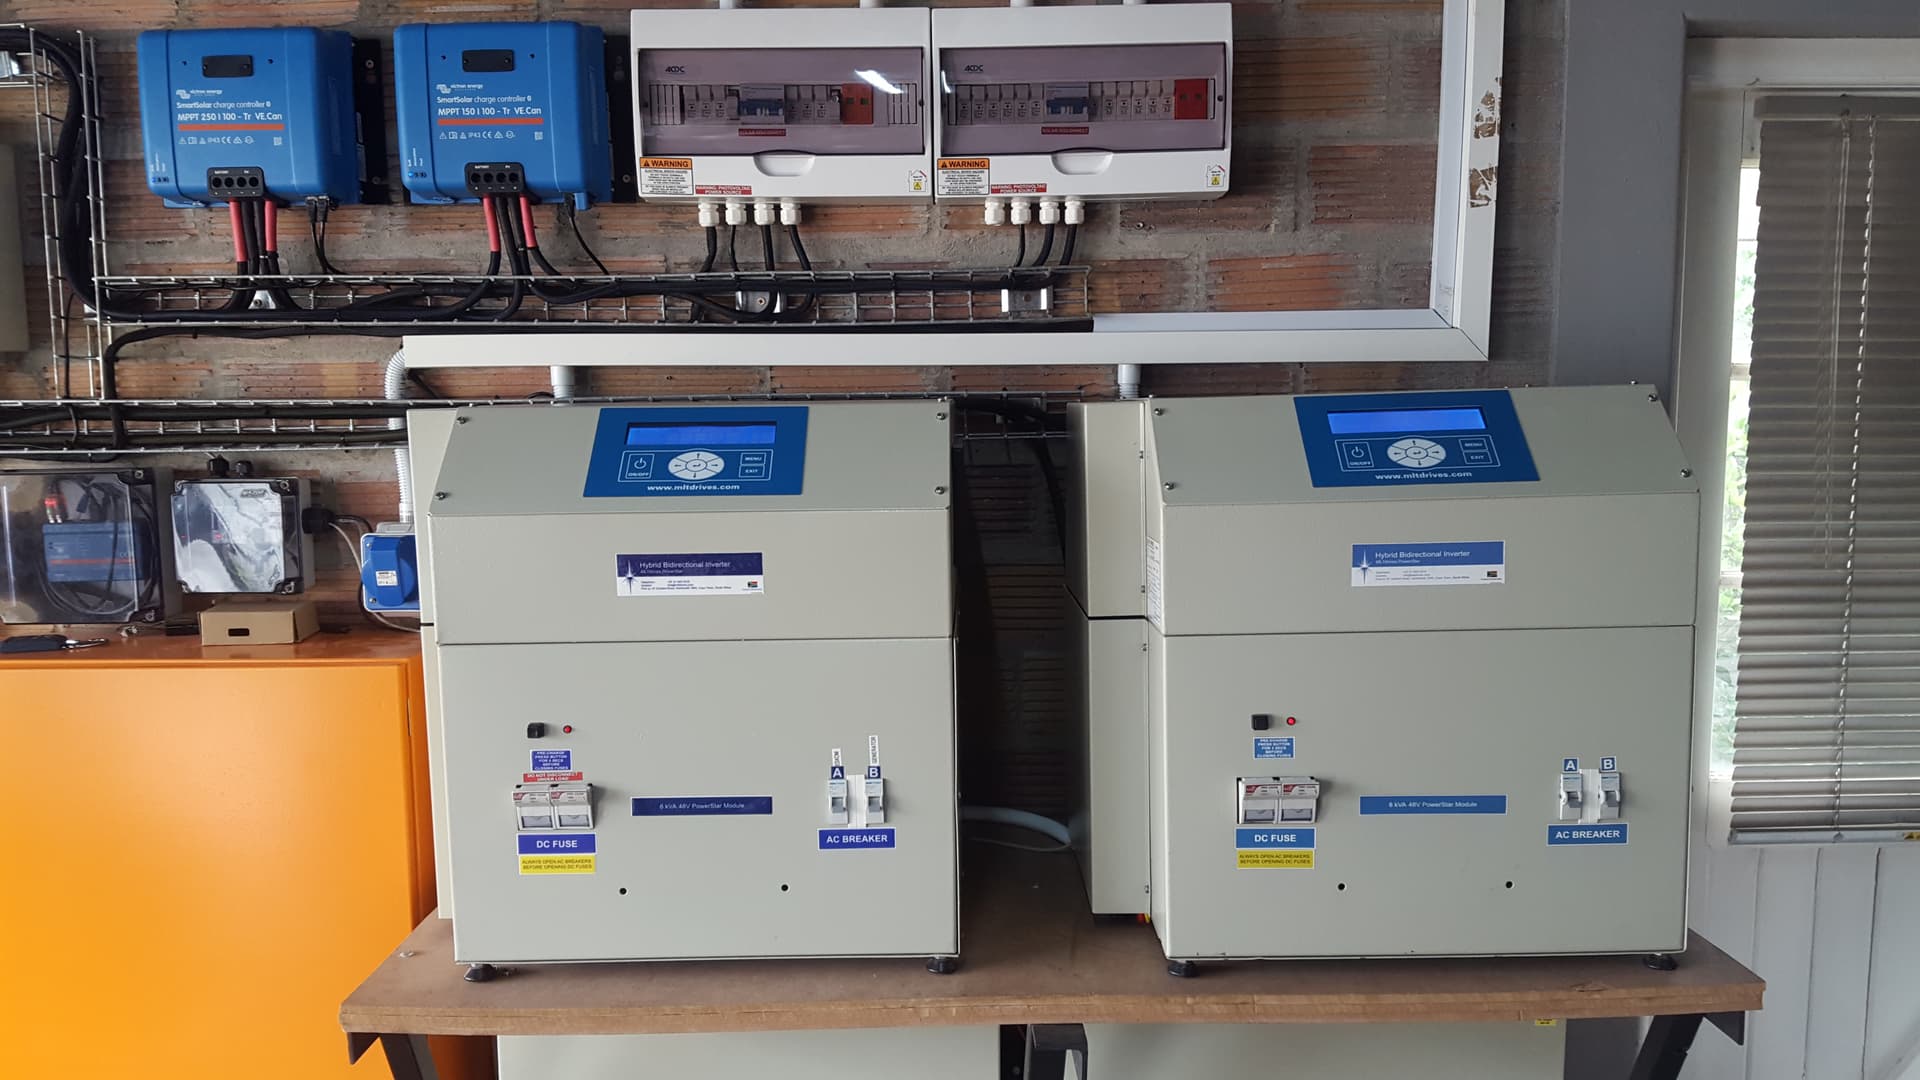
System consist 2 MLT inverters. One is H8.0 and the other one H10.0 It’s the older models of MLT but what I like about them are that they can work with MLT Bridge software so you can run them Online, and they are really robust units and I can send them in for repairs locally, MLT factory is around the corner of my work. And to add, I picked up this units for a good price.
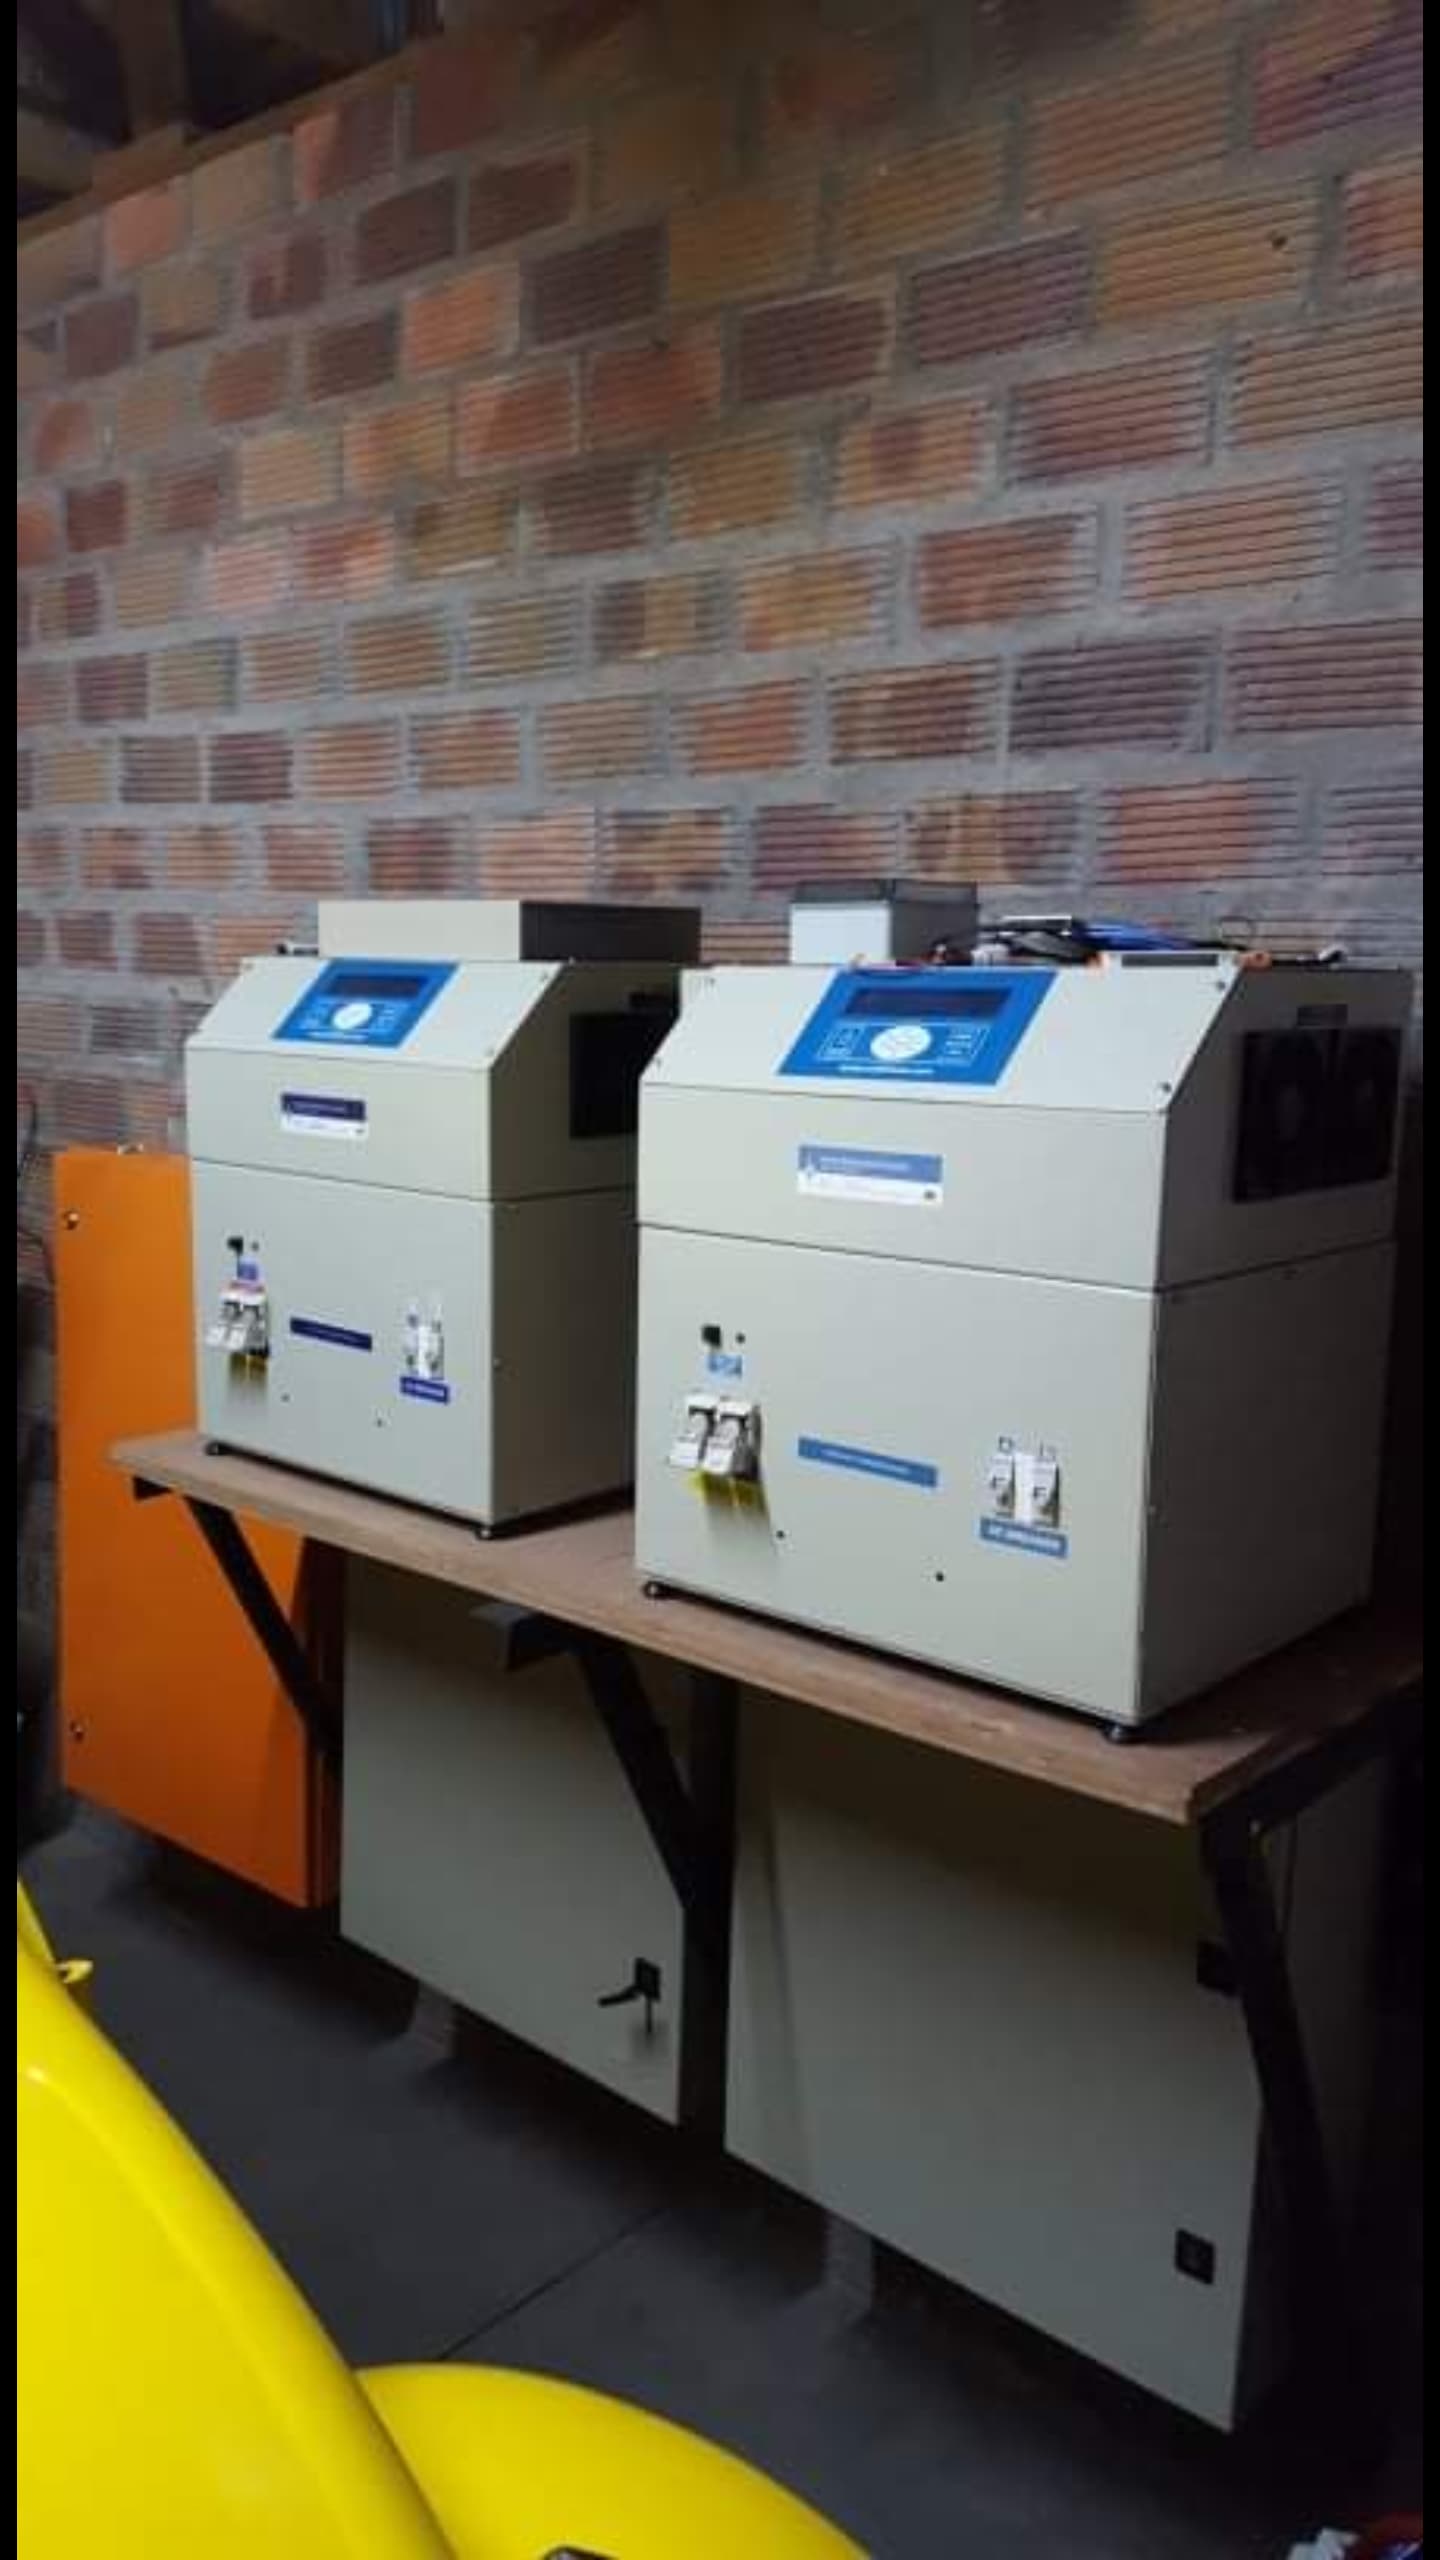
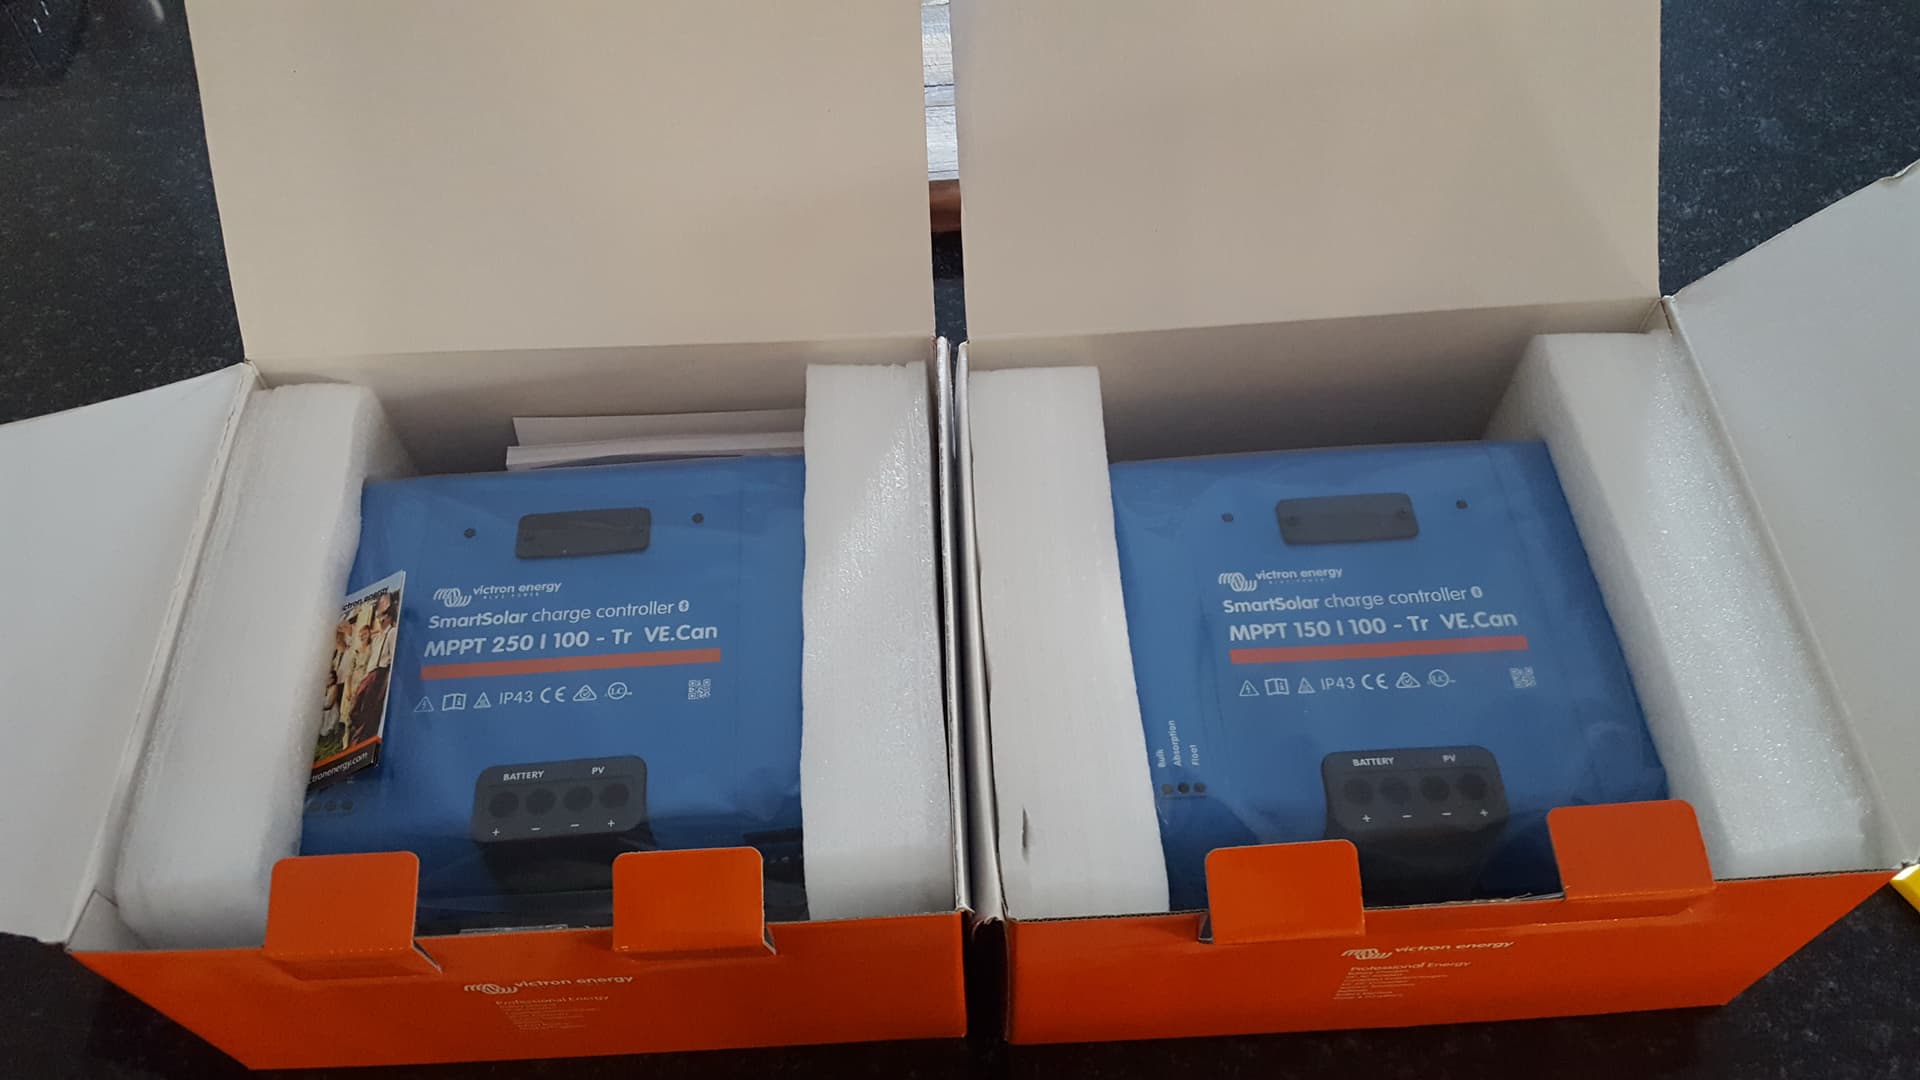
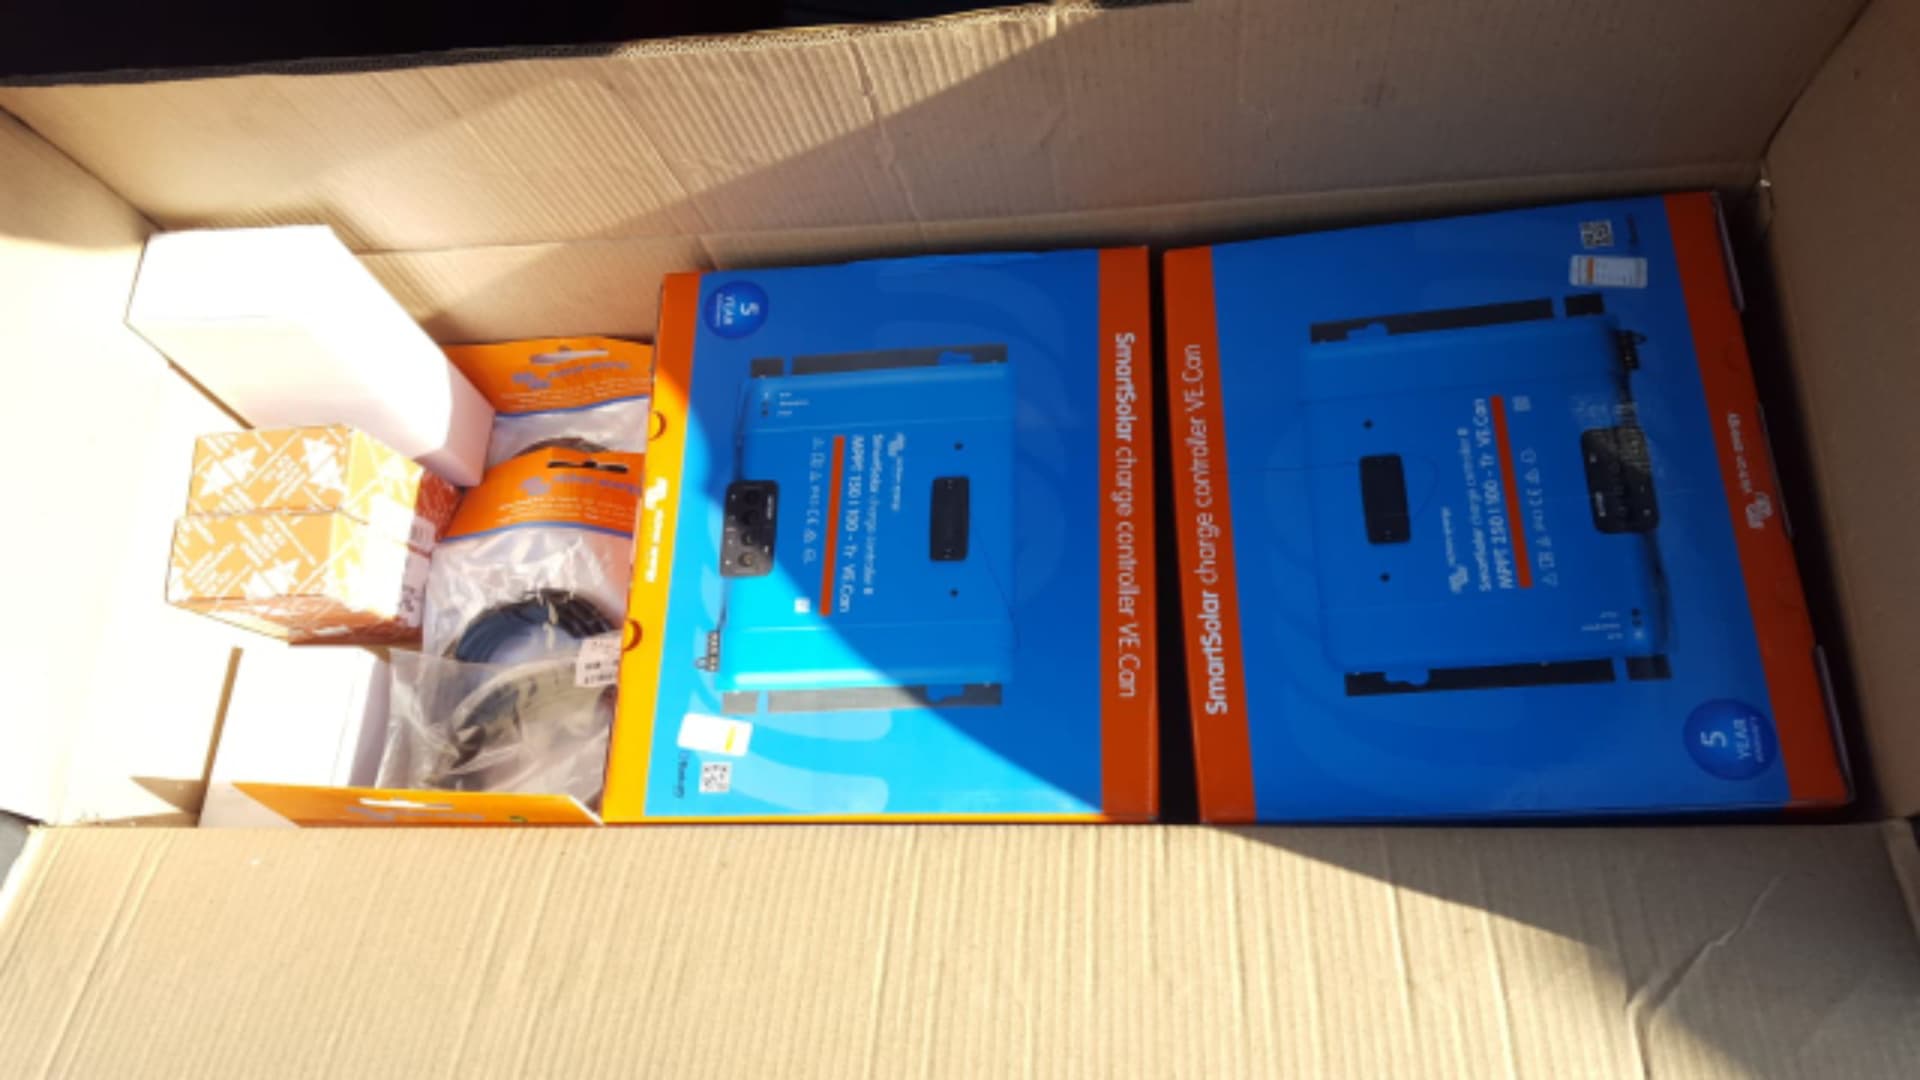
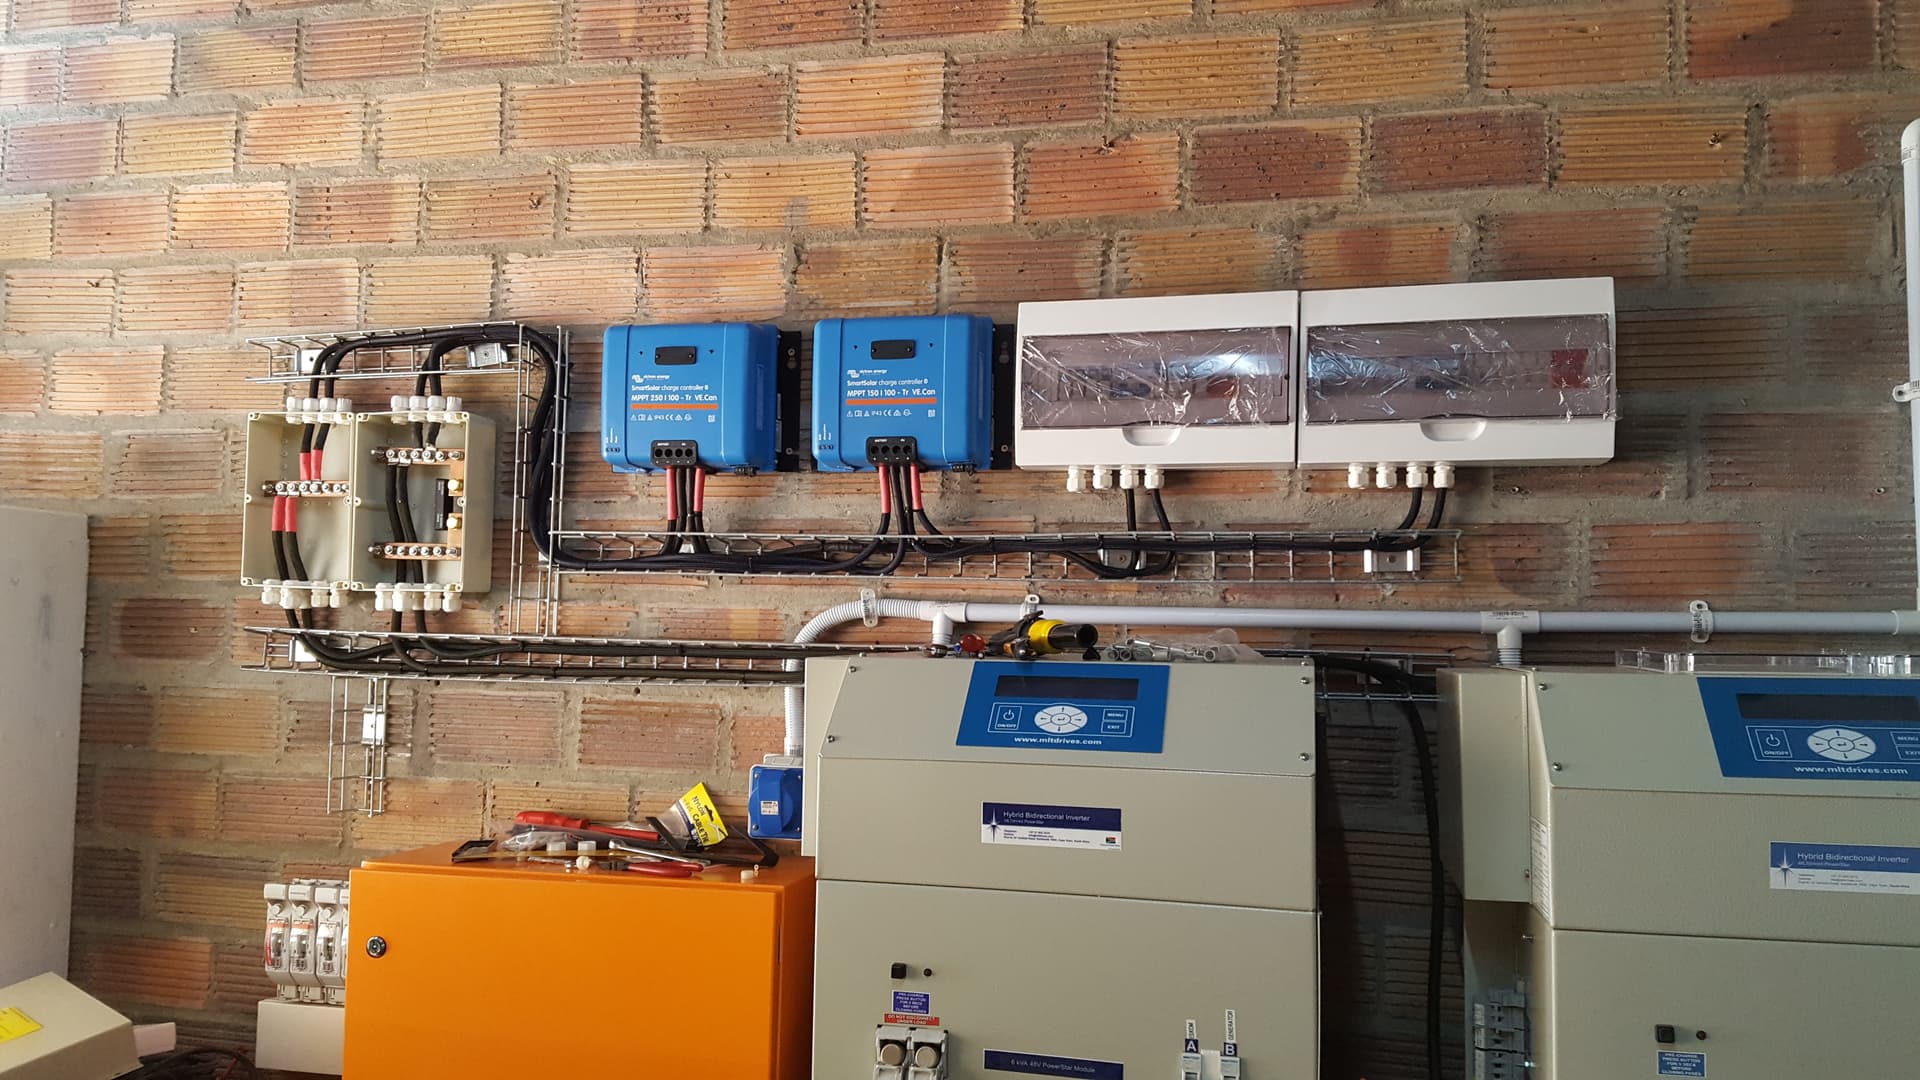
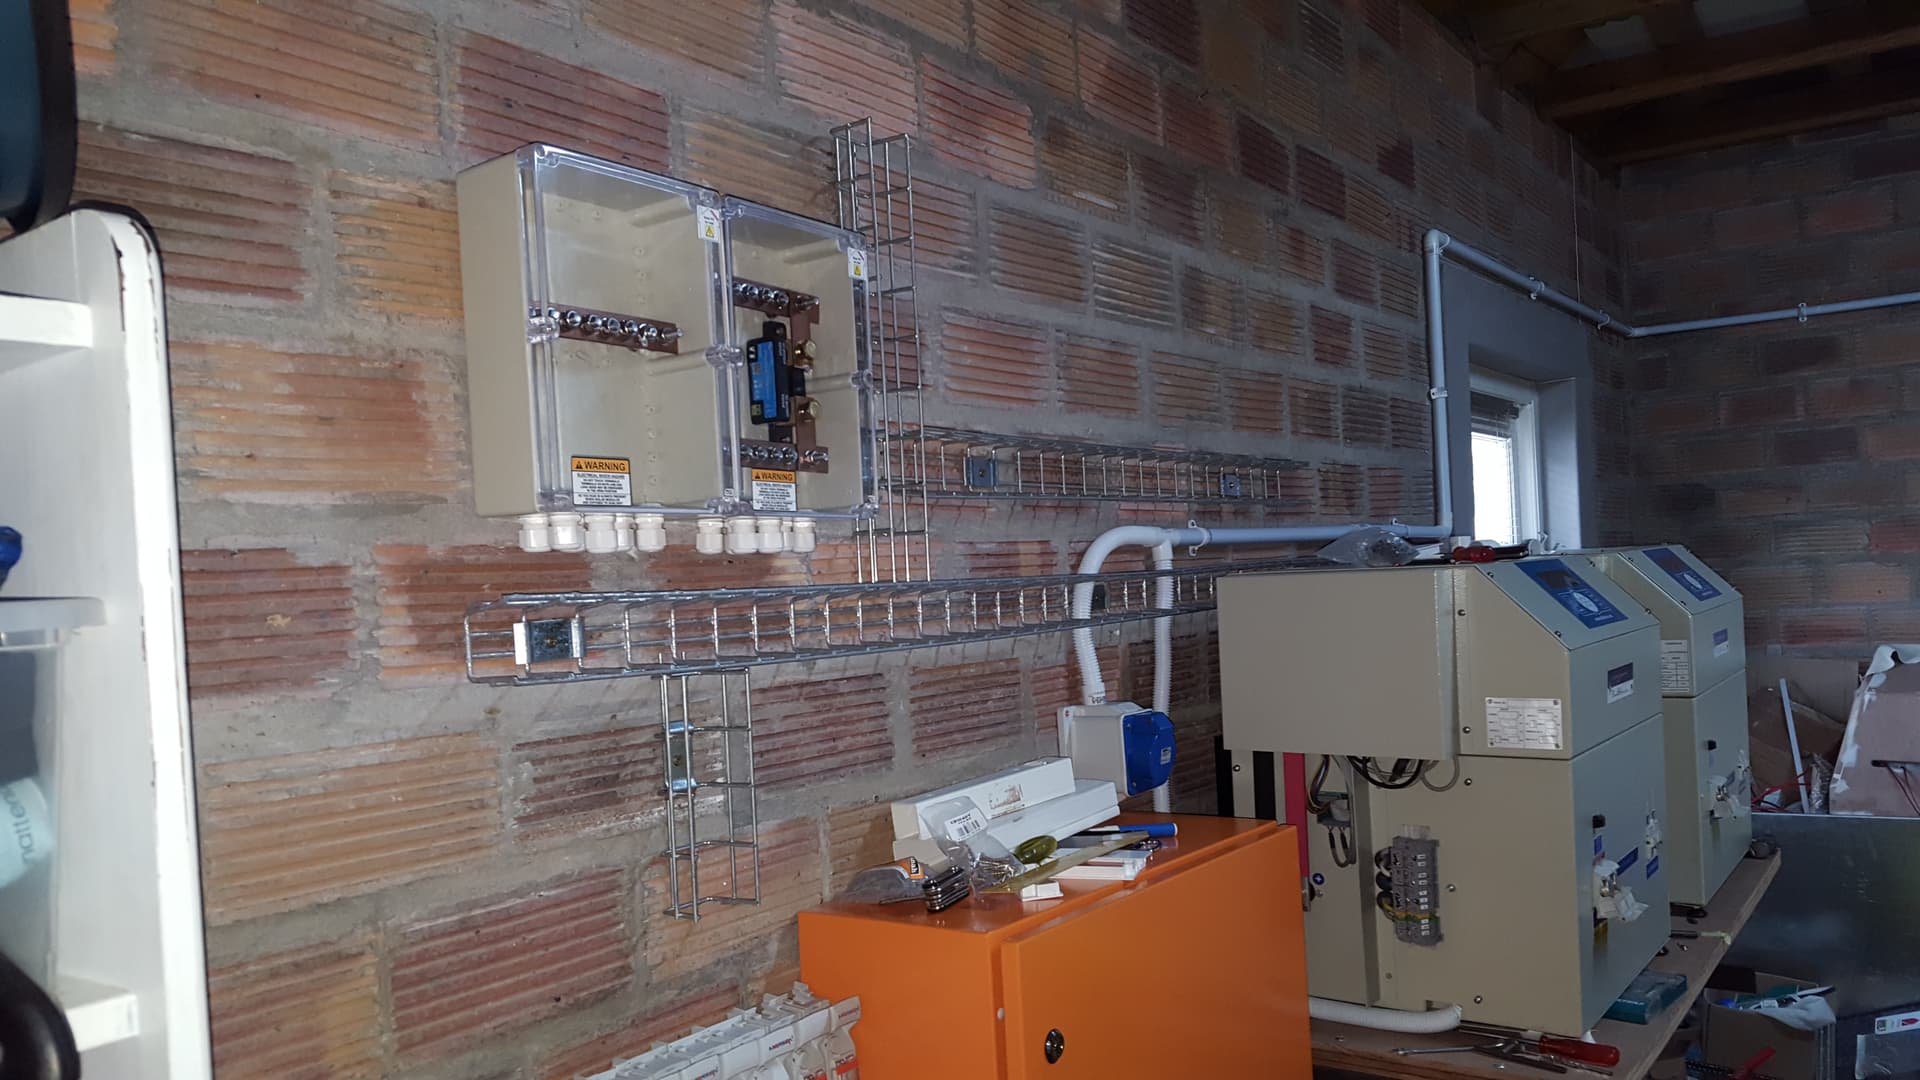
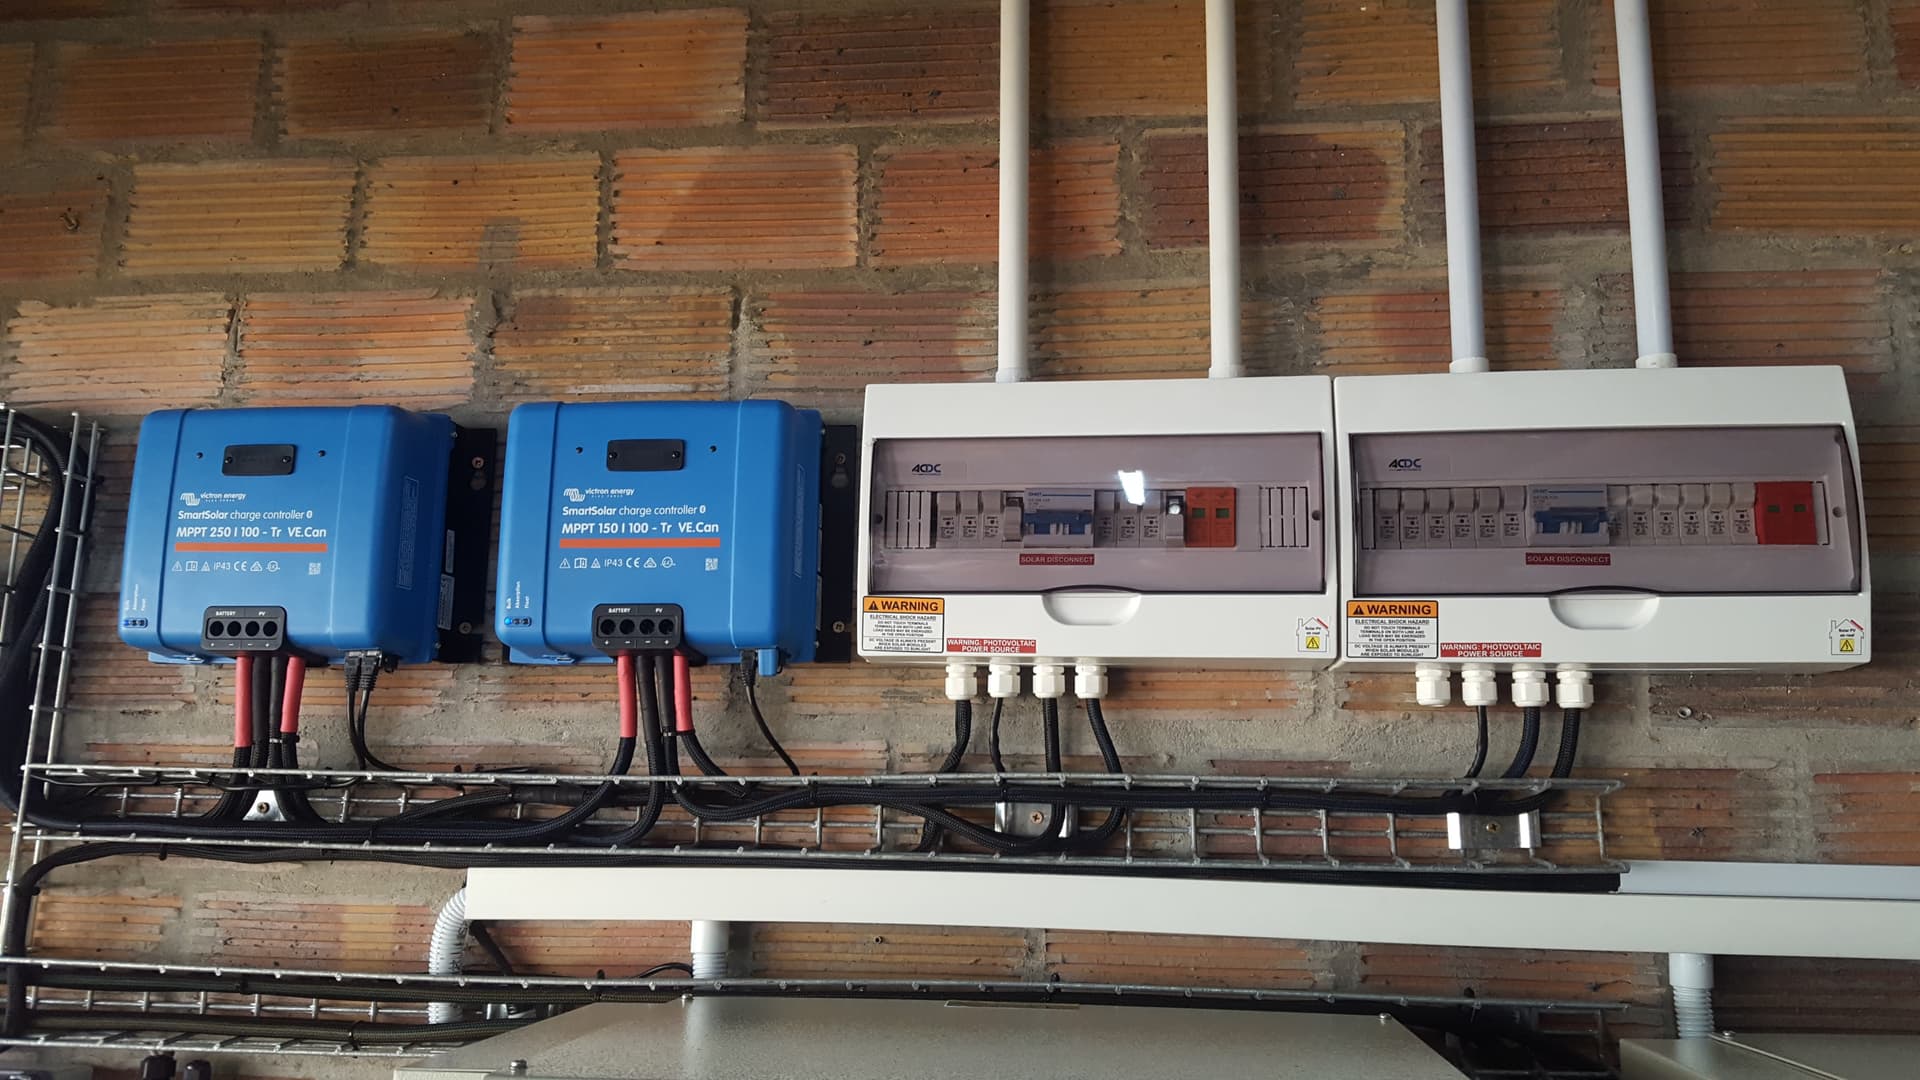
On the MPPTs I went for Victron stuff with all the stuff that go’s with them. Wanted something that I can get stats and do more stuff and a bit of a step-up from Microcare stuff. 250/100 and 150/100 mppts. 250/100 is for my North array and the 150/100 is for my East and West array.
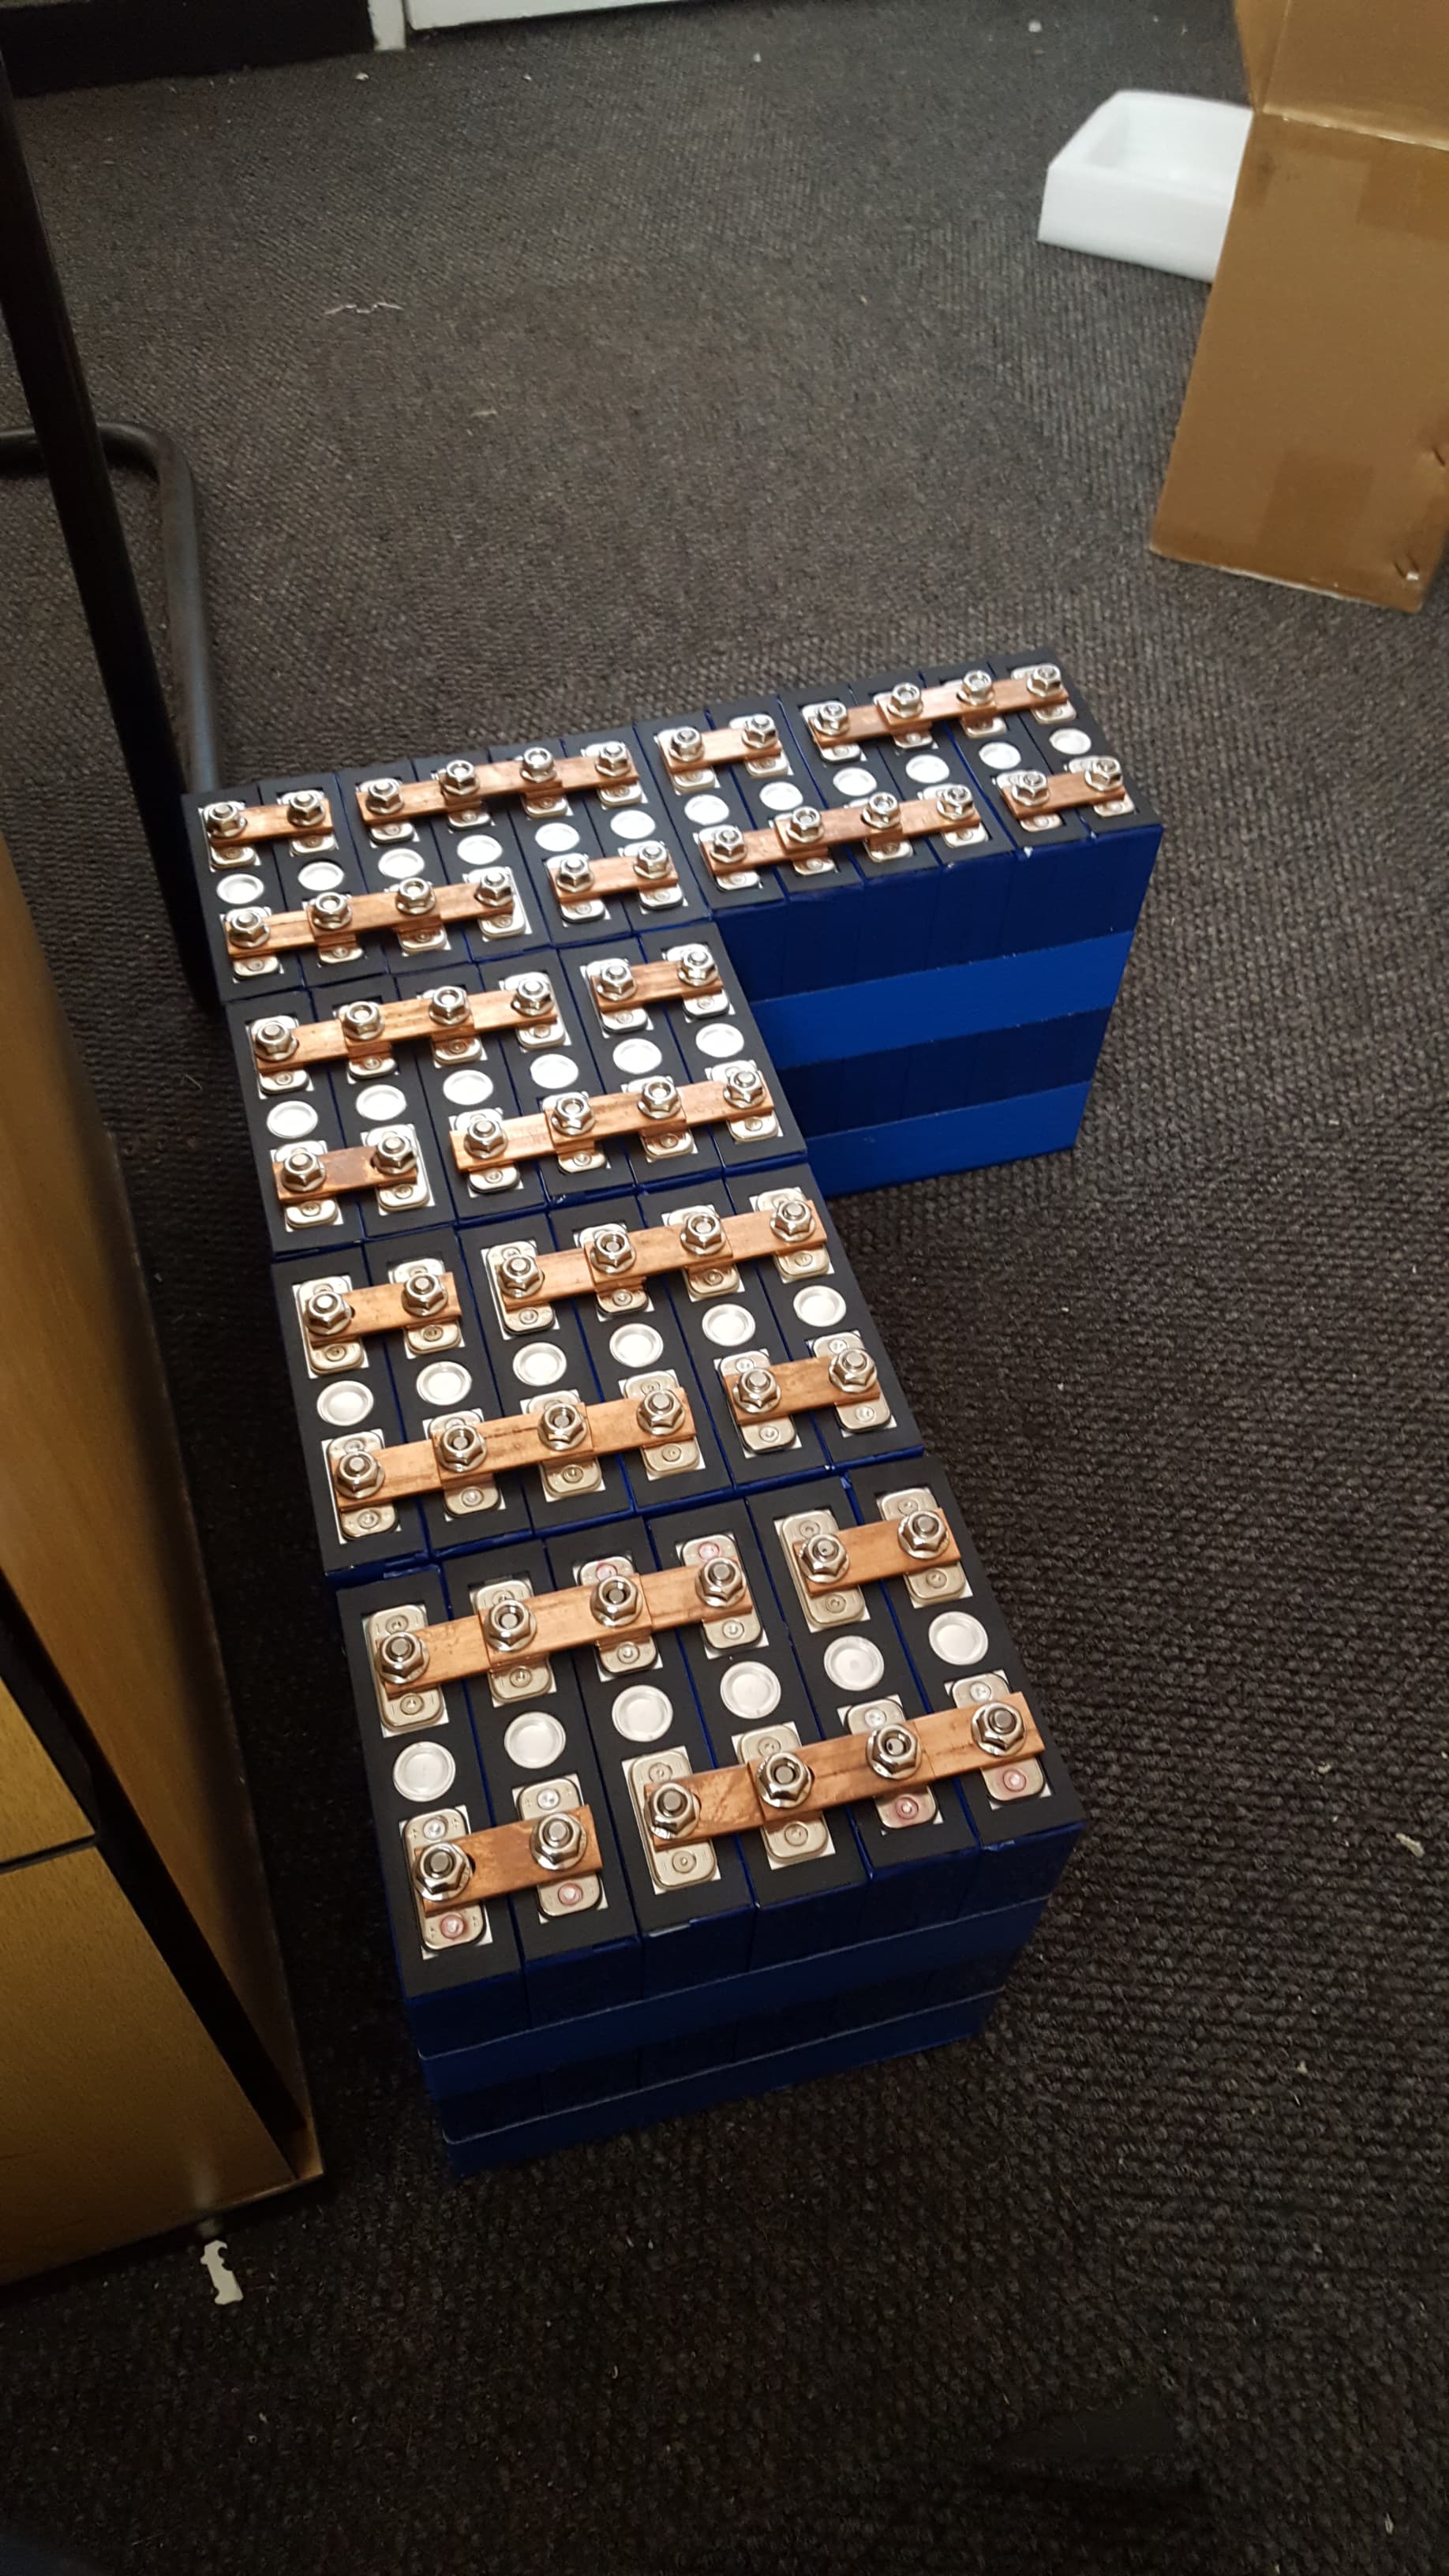
I kept the 600 x 600 enclosures that used for my 140AH lifepo’s decided to get some more lifepo batteries. Bought a 1000 x 600 enclosure and will move the 140Ah to them and the 100ah sells will go in the 600 x 600. The 140ah will be 16s2p setup now and the 100ah sells with be 16s2p. Combine it will be about 36kwh (680ah) storage.
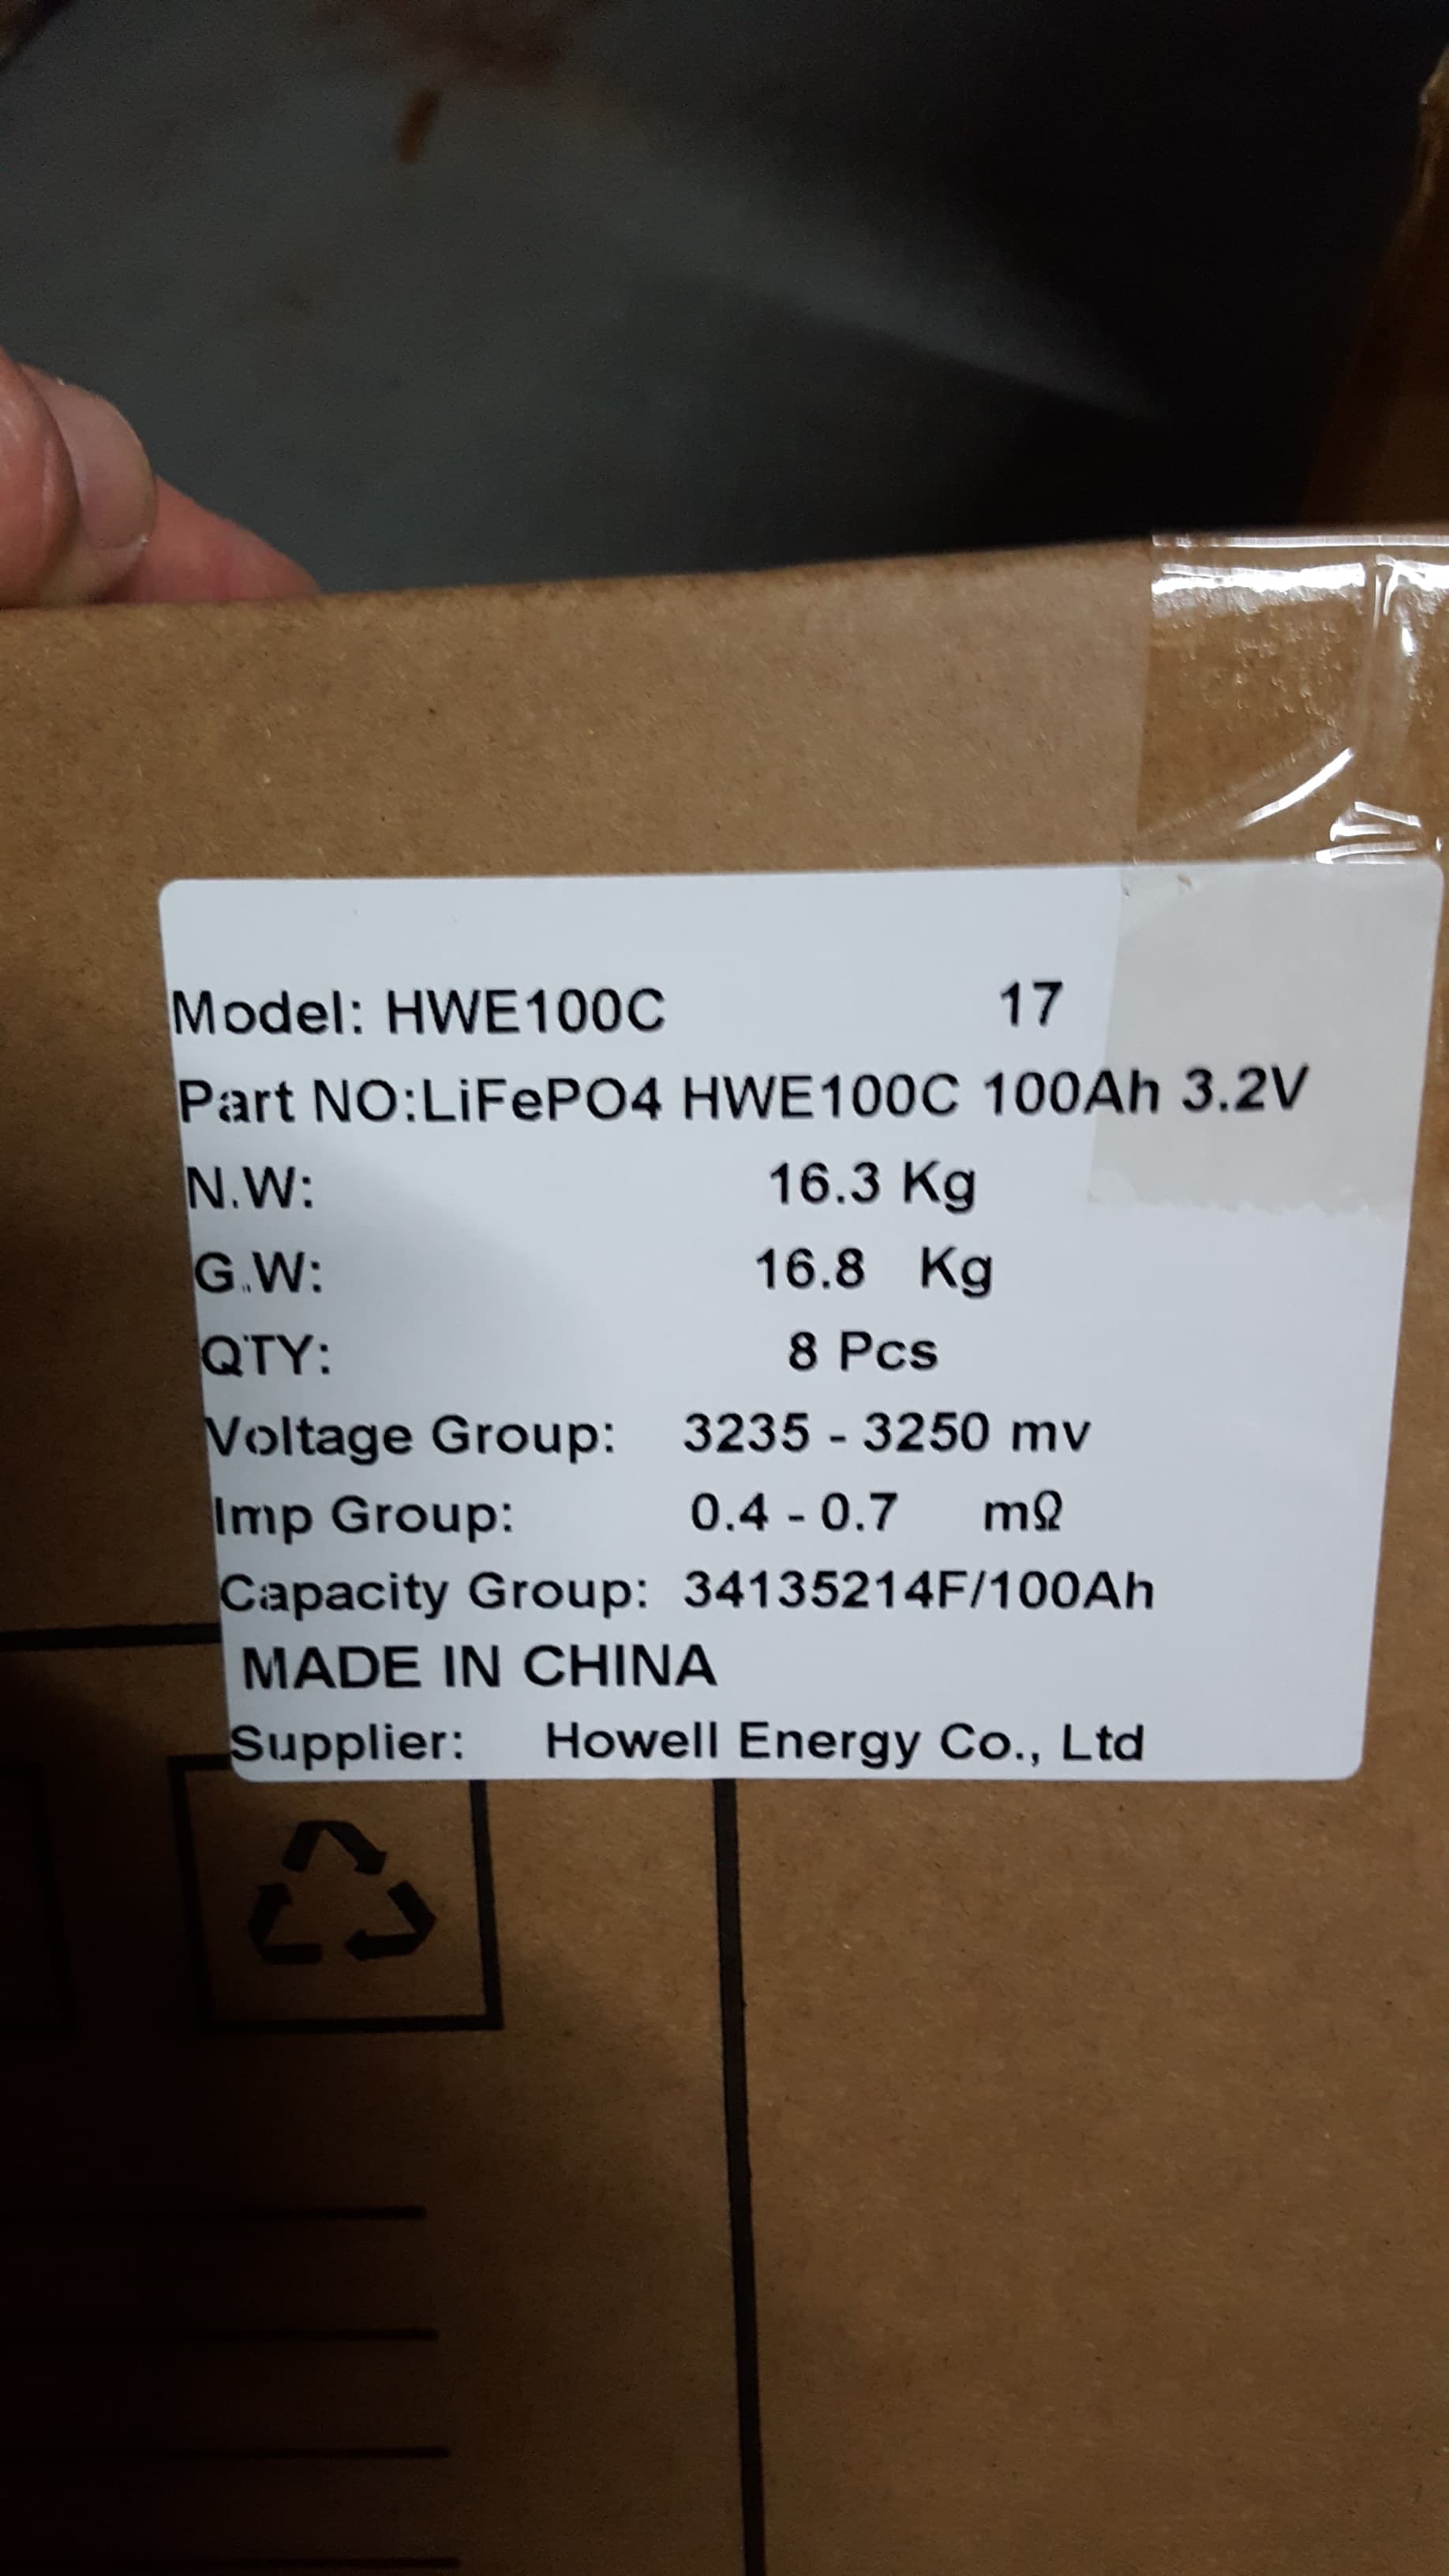
64 100ah sells delivered
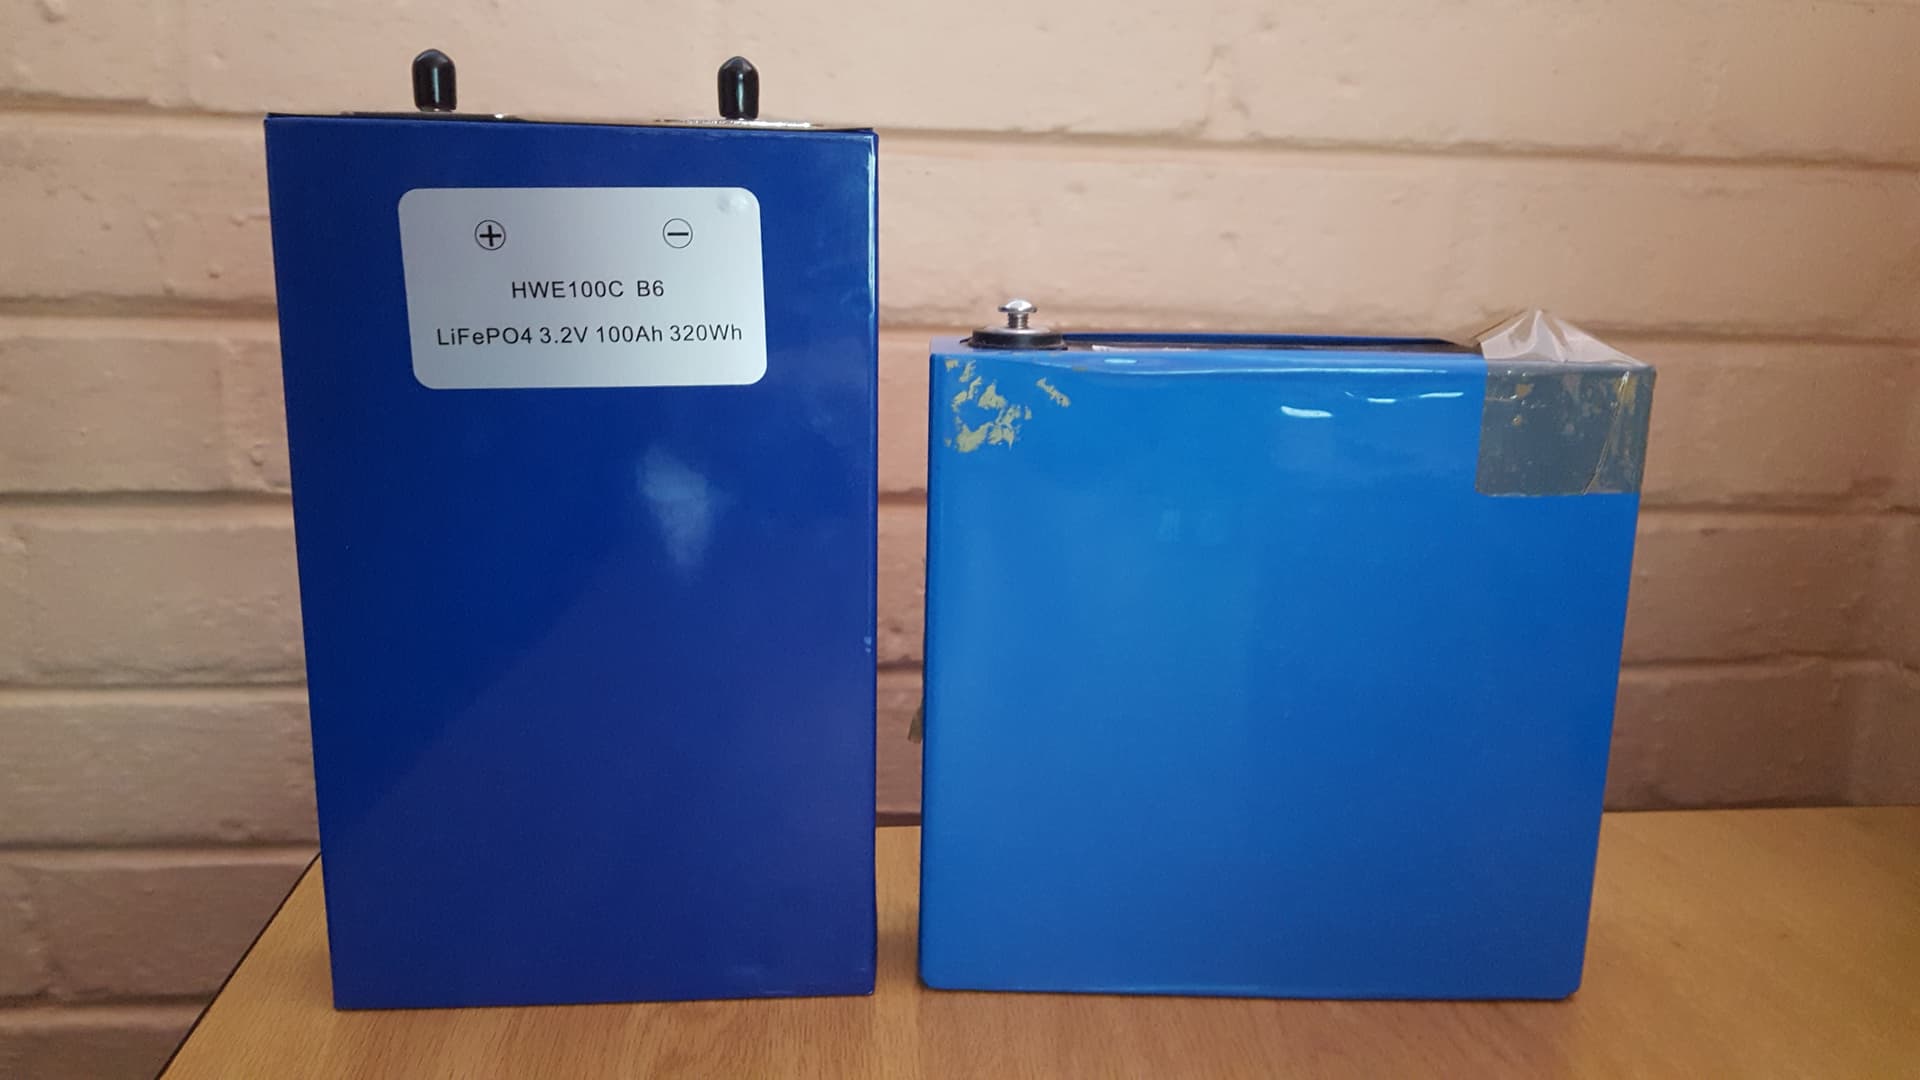
Size deference between the my old sells and the 100ah sells

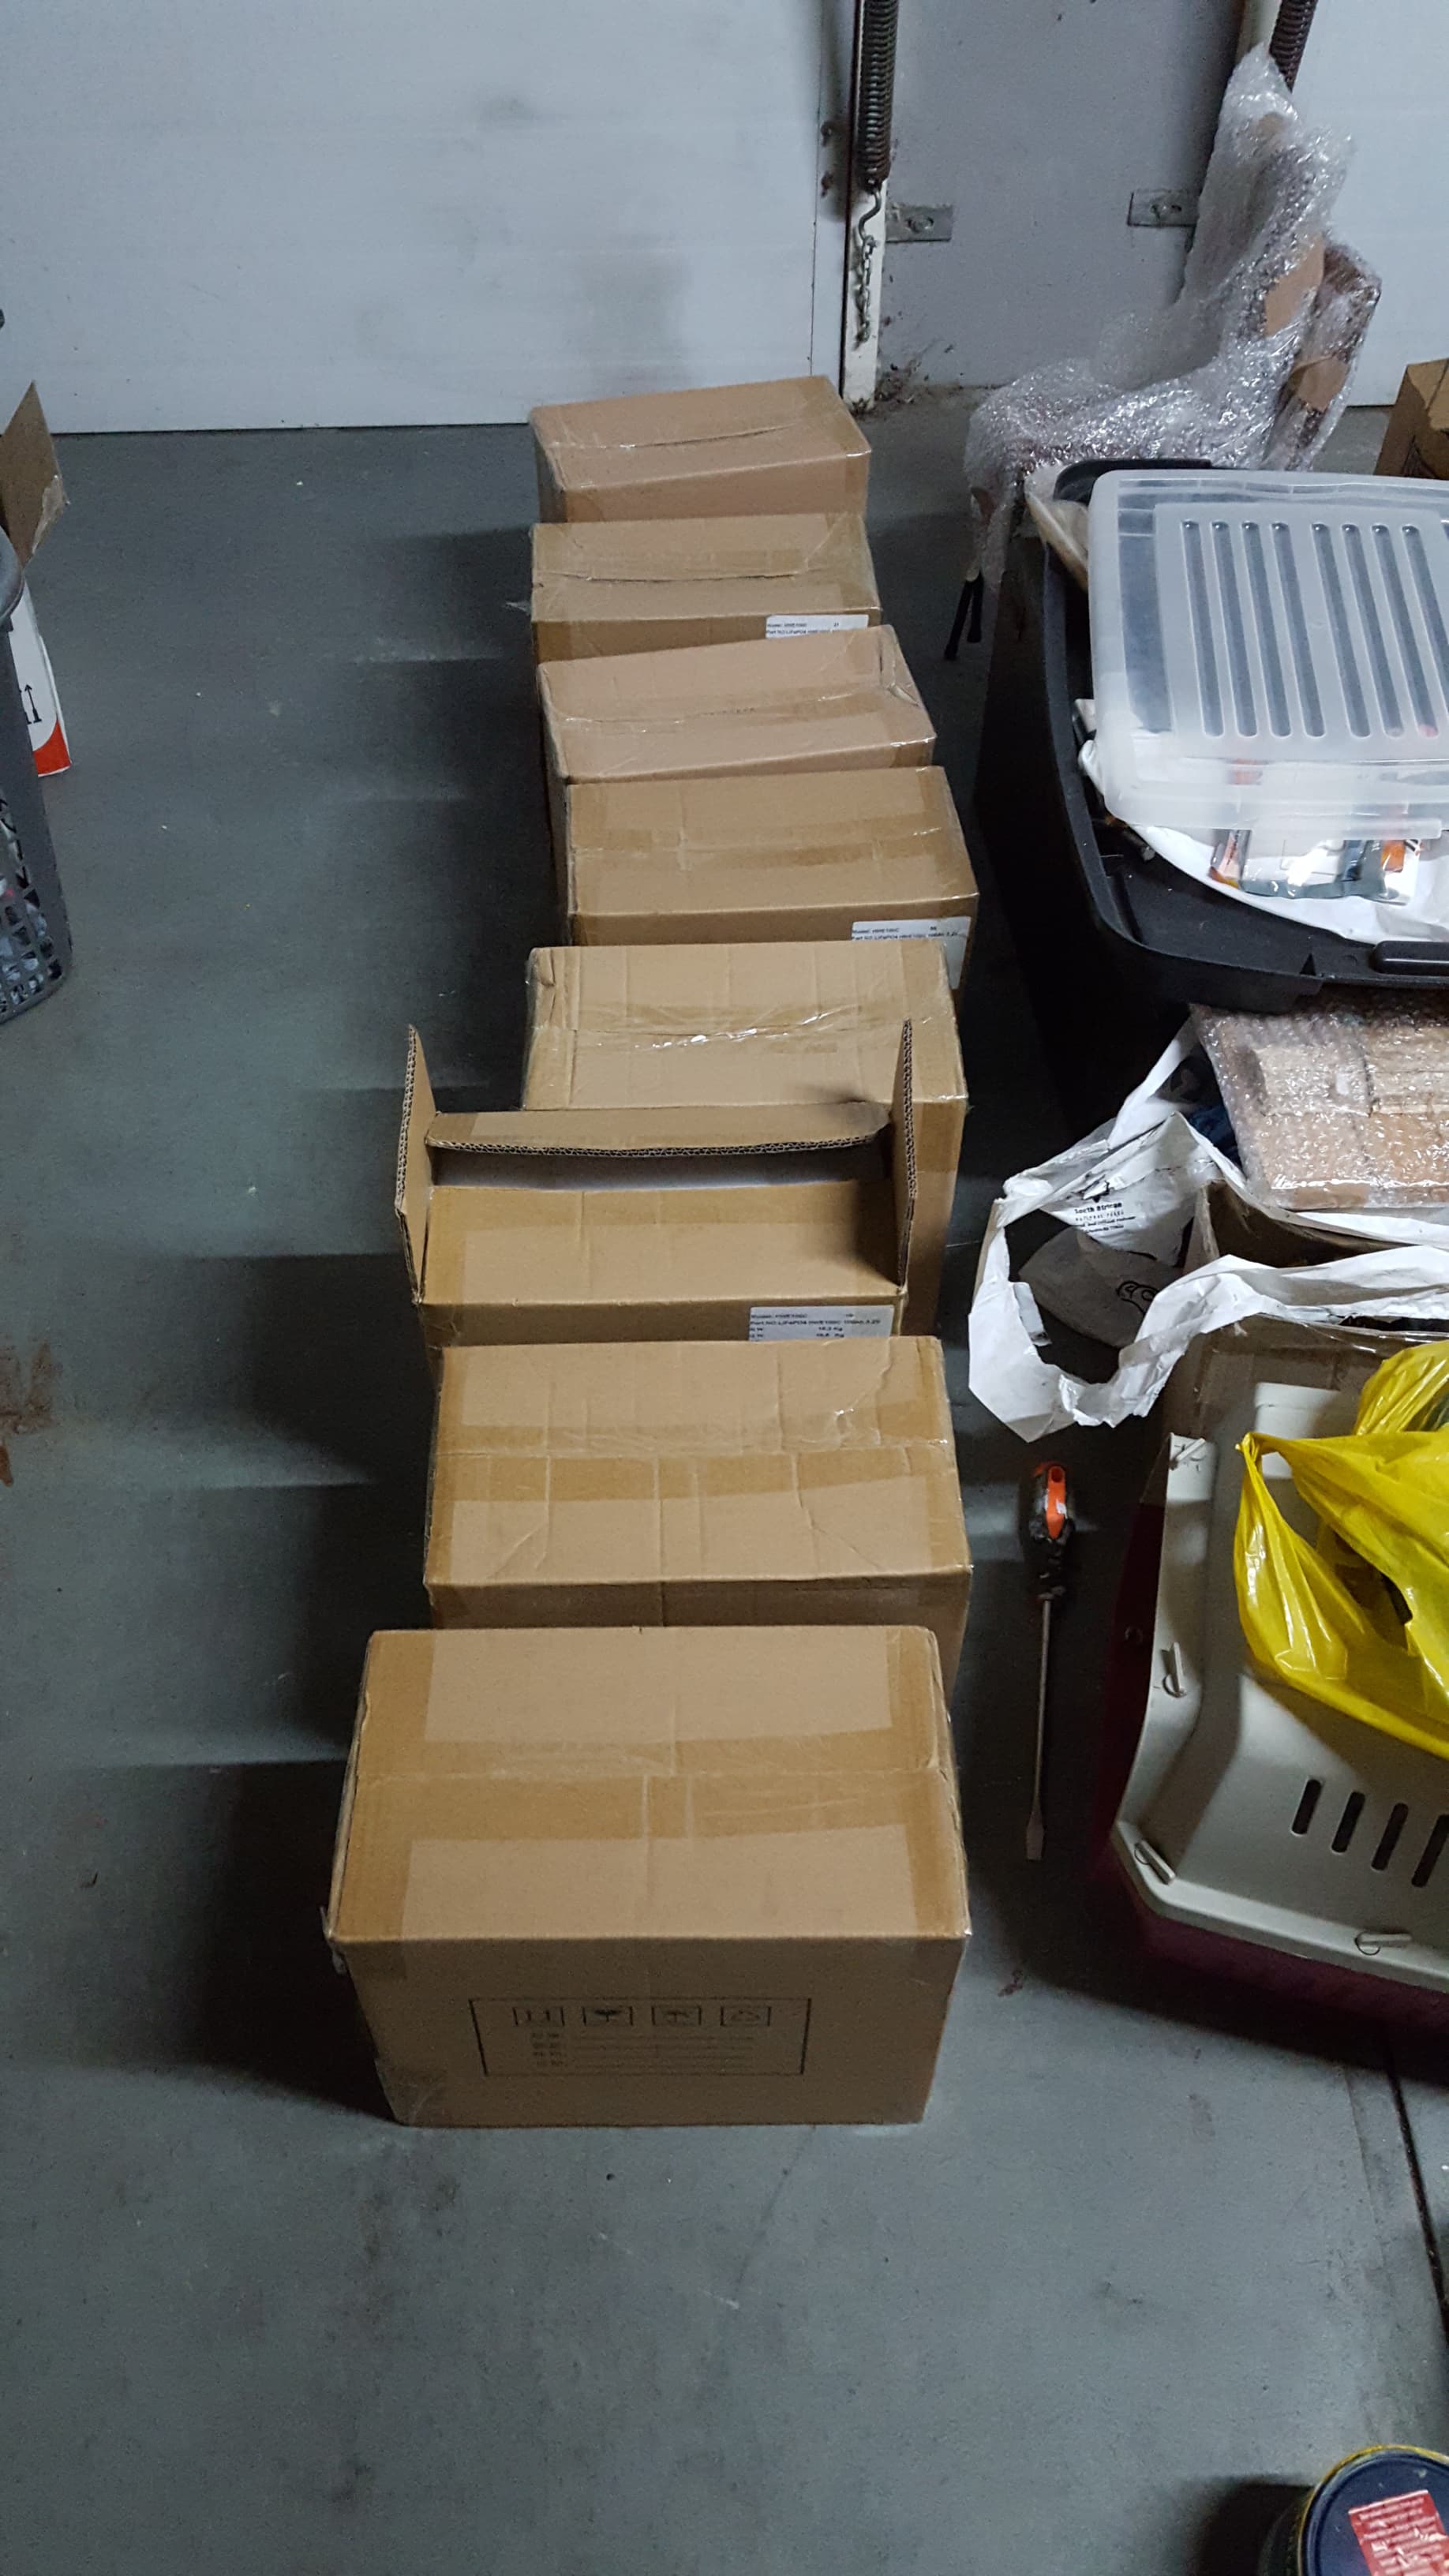
Some photos busy building the lifepo4 battery packs.

18 x 330w panels for my East and West array. 9 for East and 9 for West array. This if for the morning sun and afternoon tot late afternoon sun. They will be running on the 150/100 mppt
I will be collecting the other panels this week. I got hold of 430w panels for the North array that will be running on the 250/100 mppt.
With all the crimping in the past and all the crimping I needed to do, I went and bought a Hydraulic crimper, one of the best buys ever.
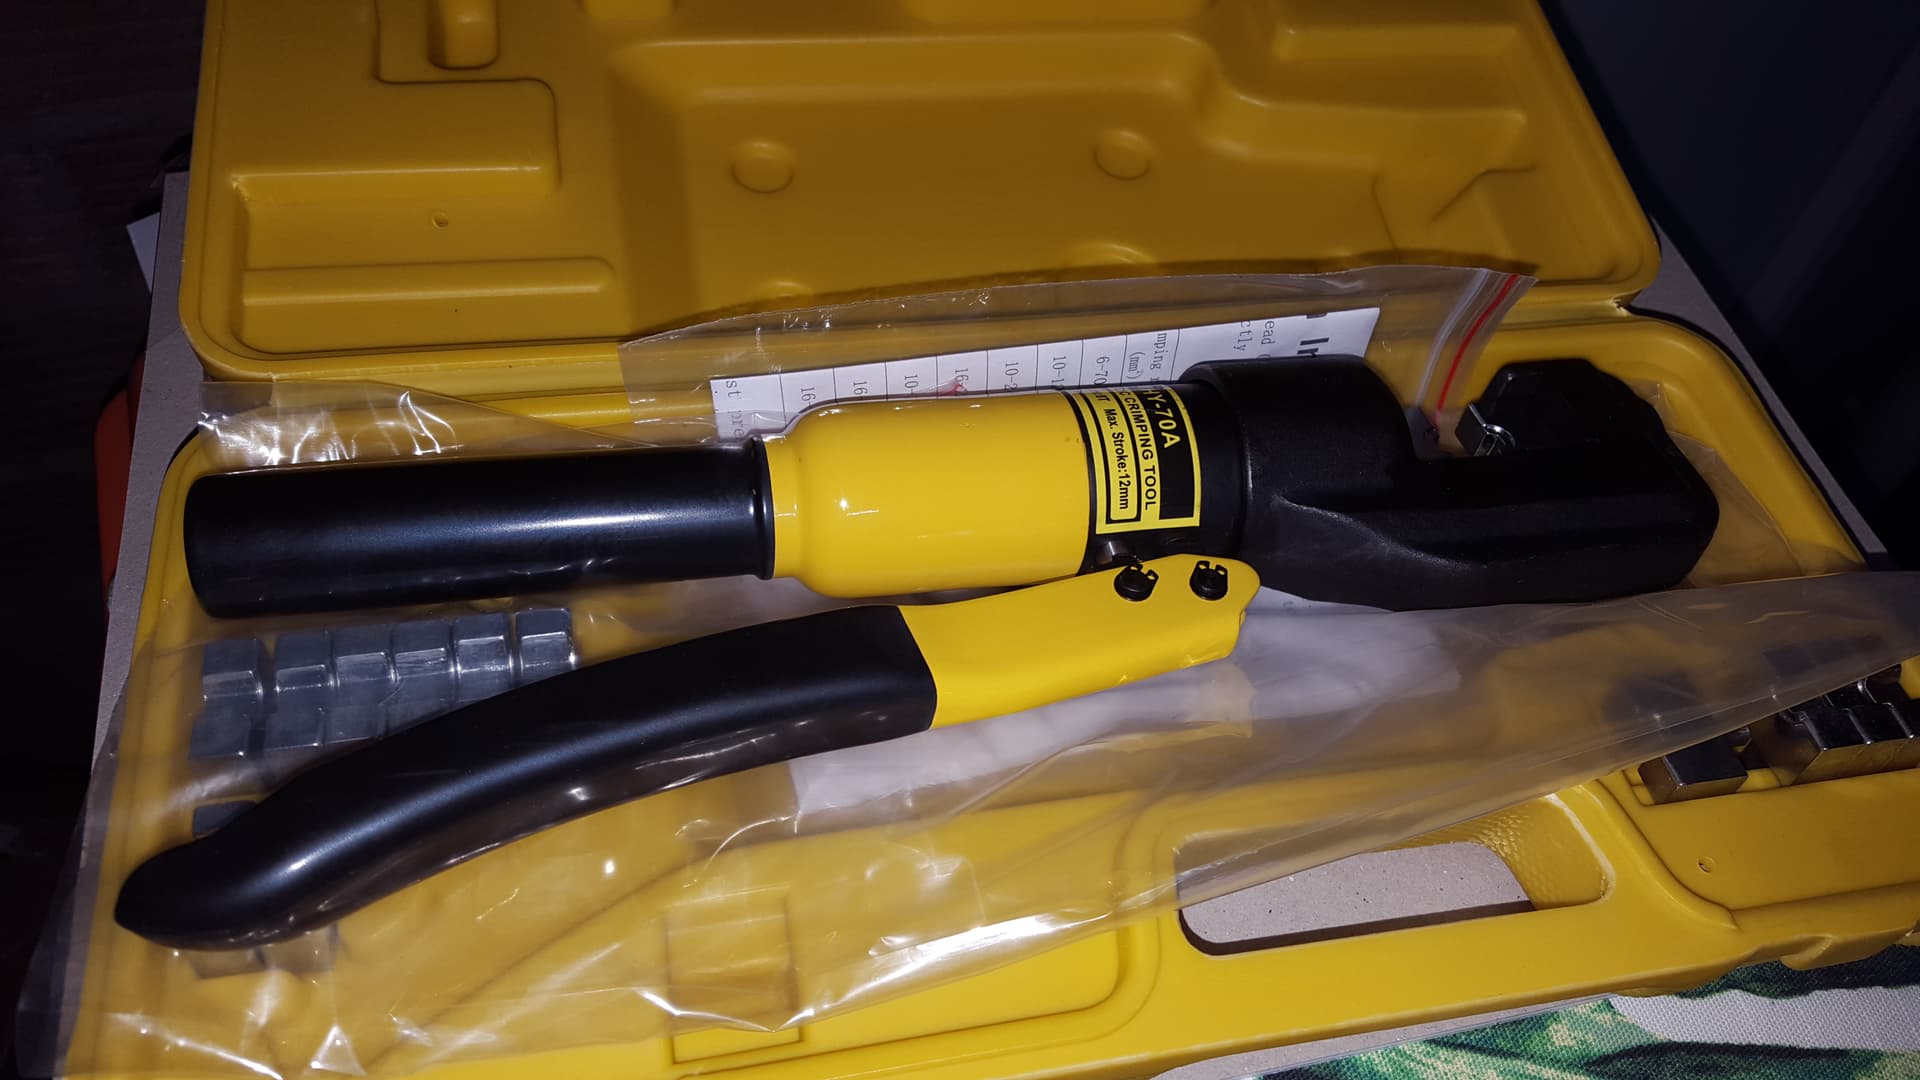
It crimps really nice crimps

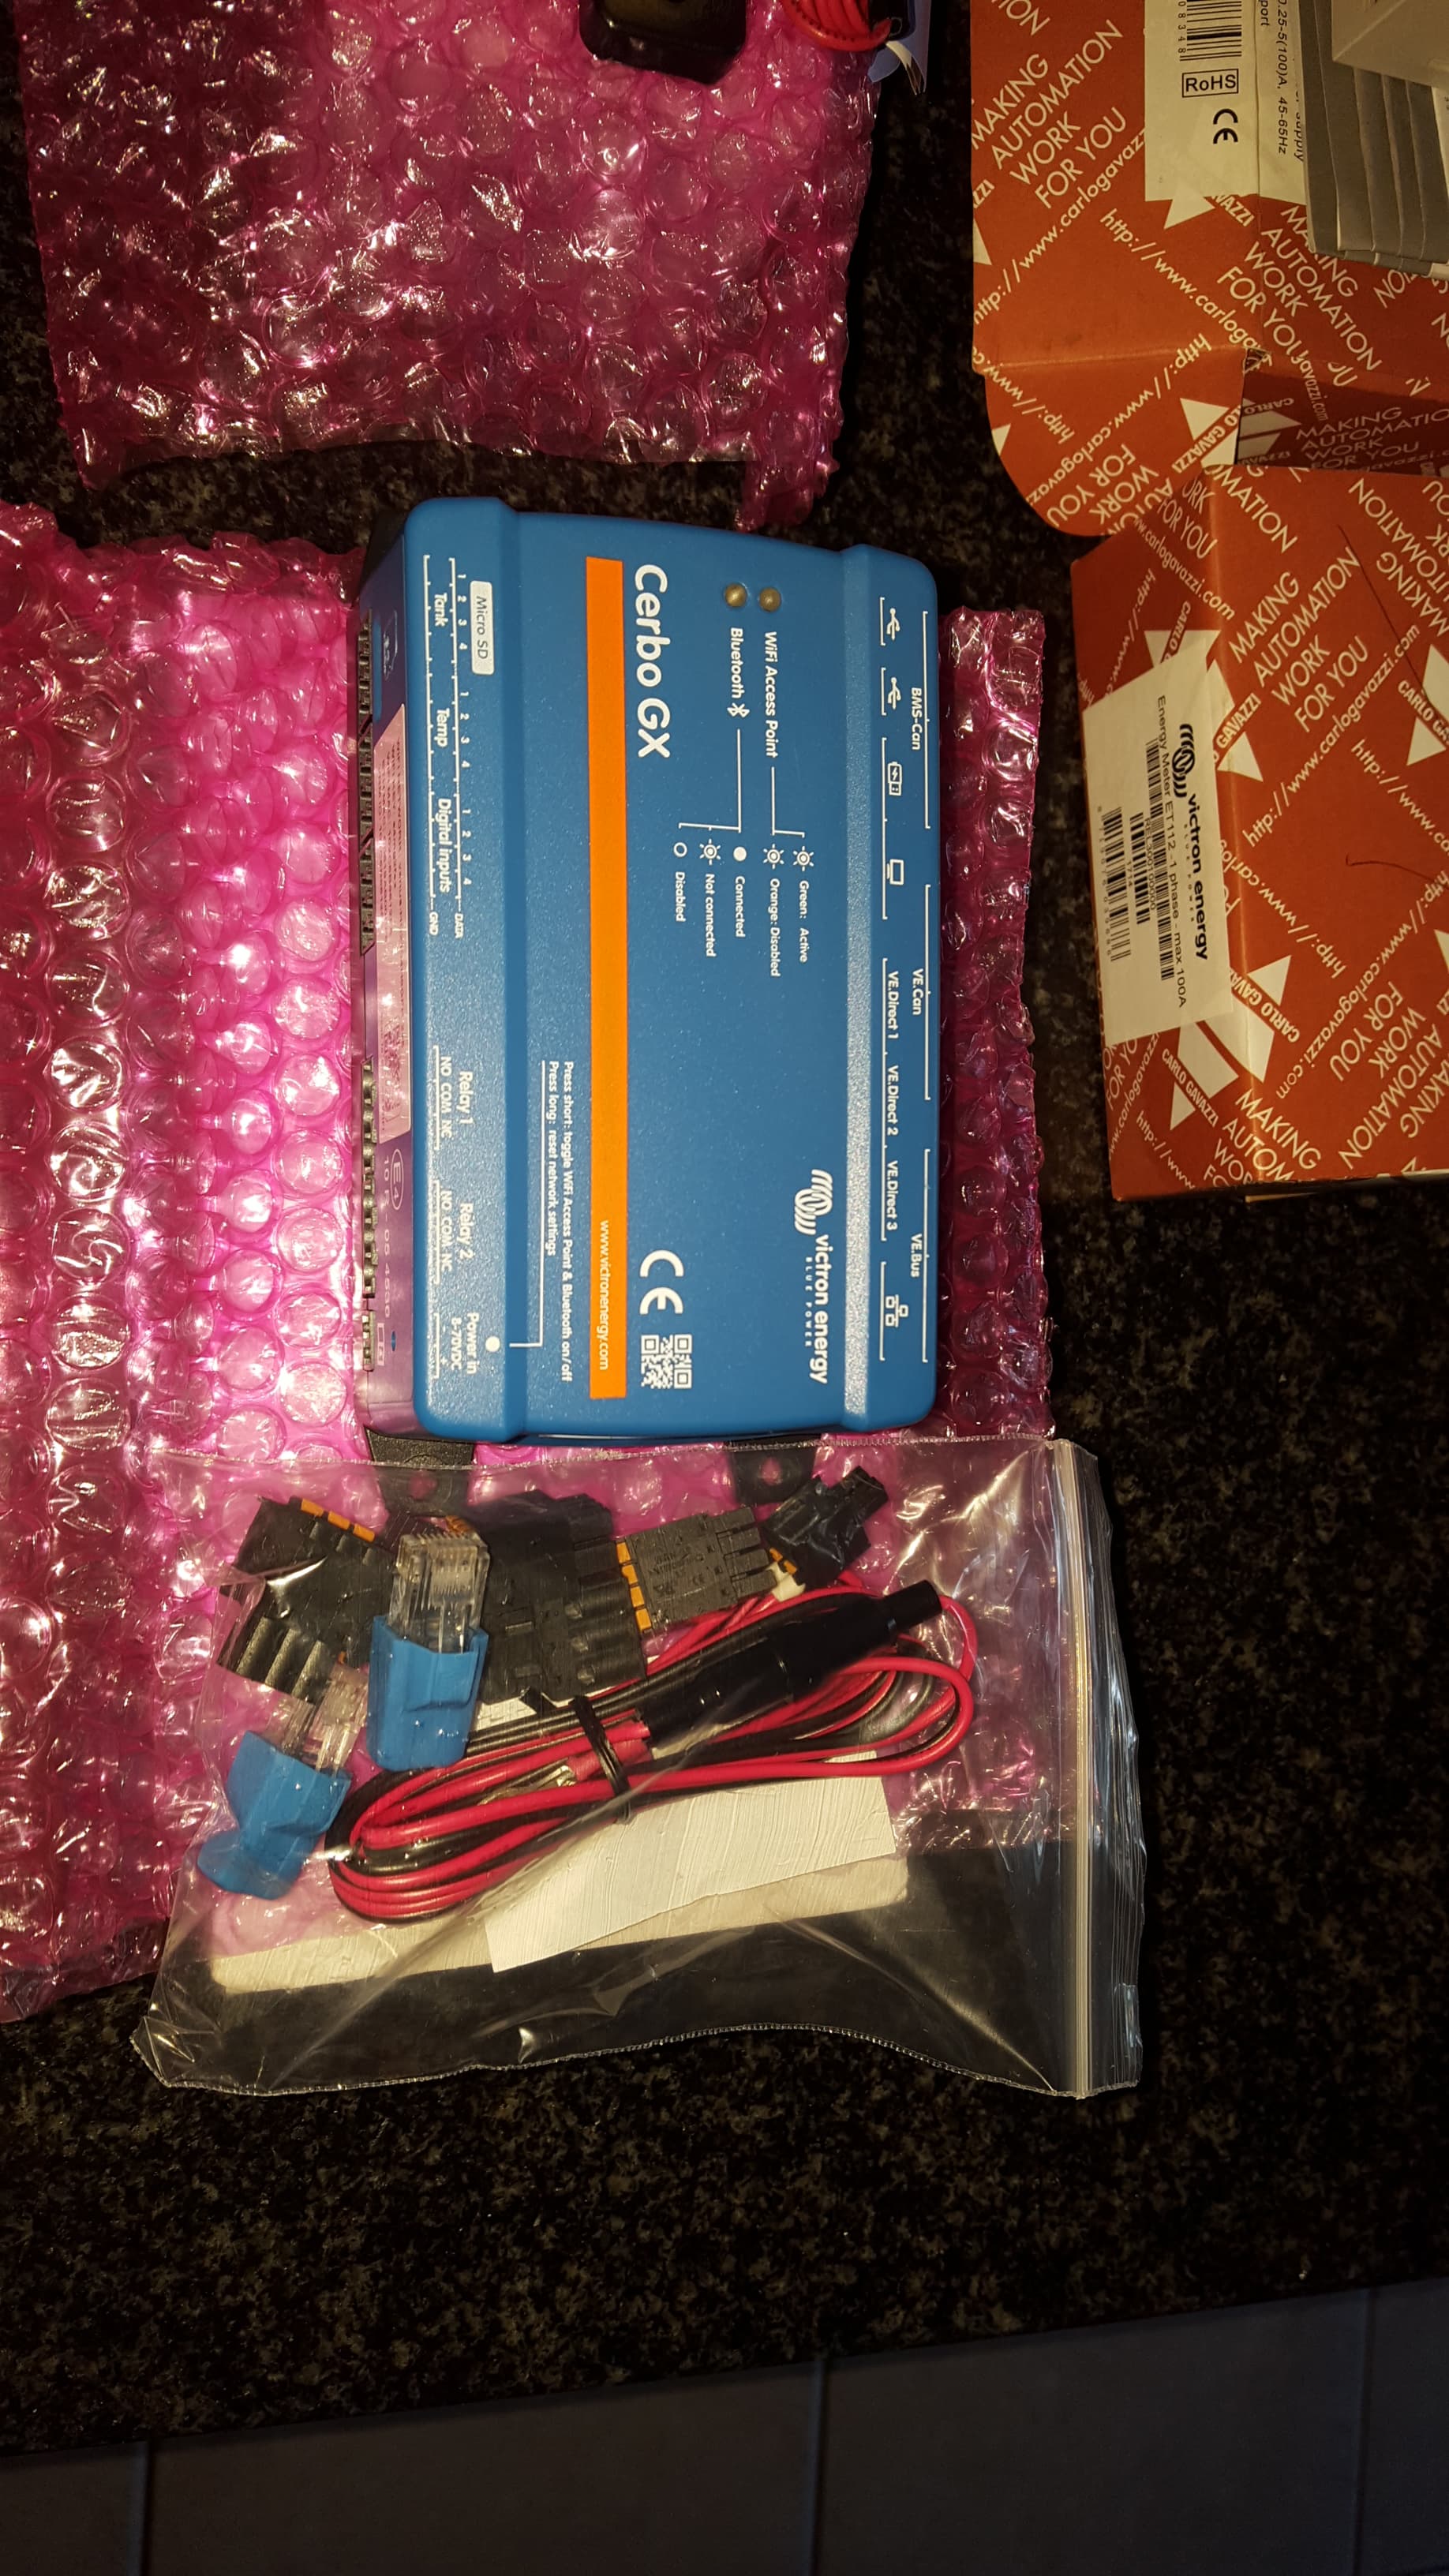
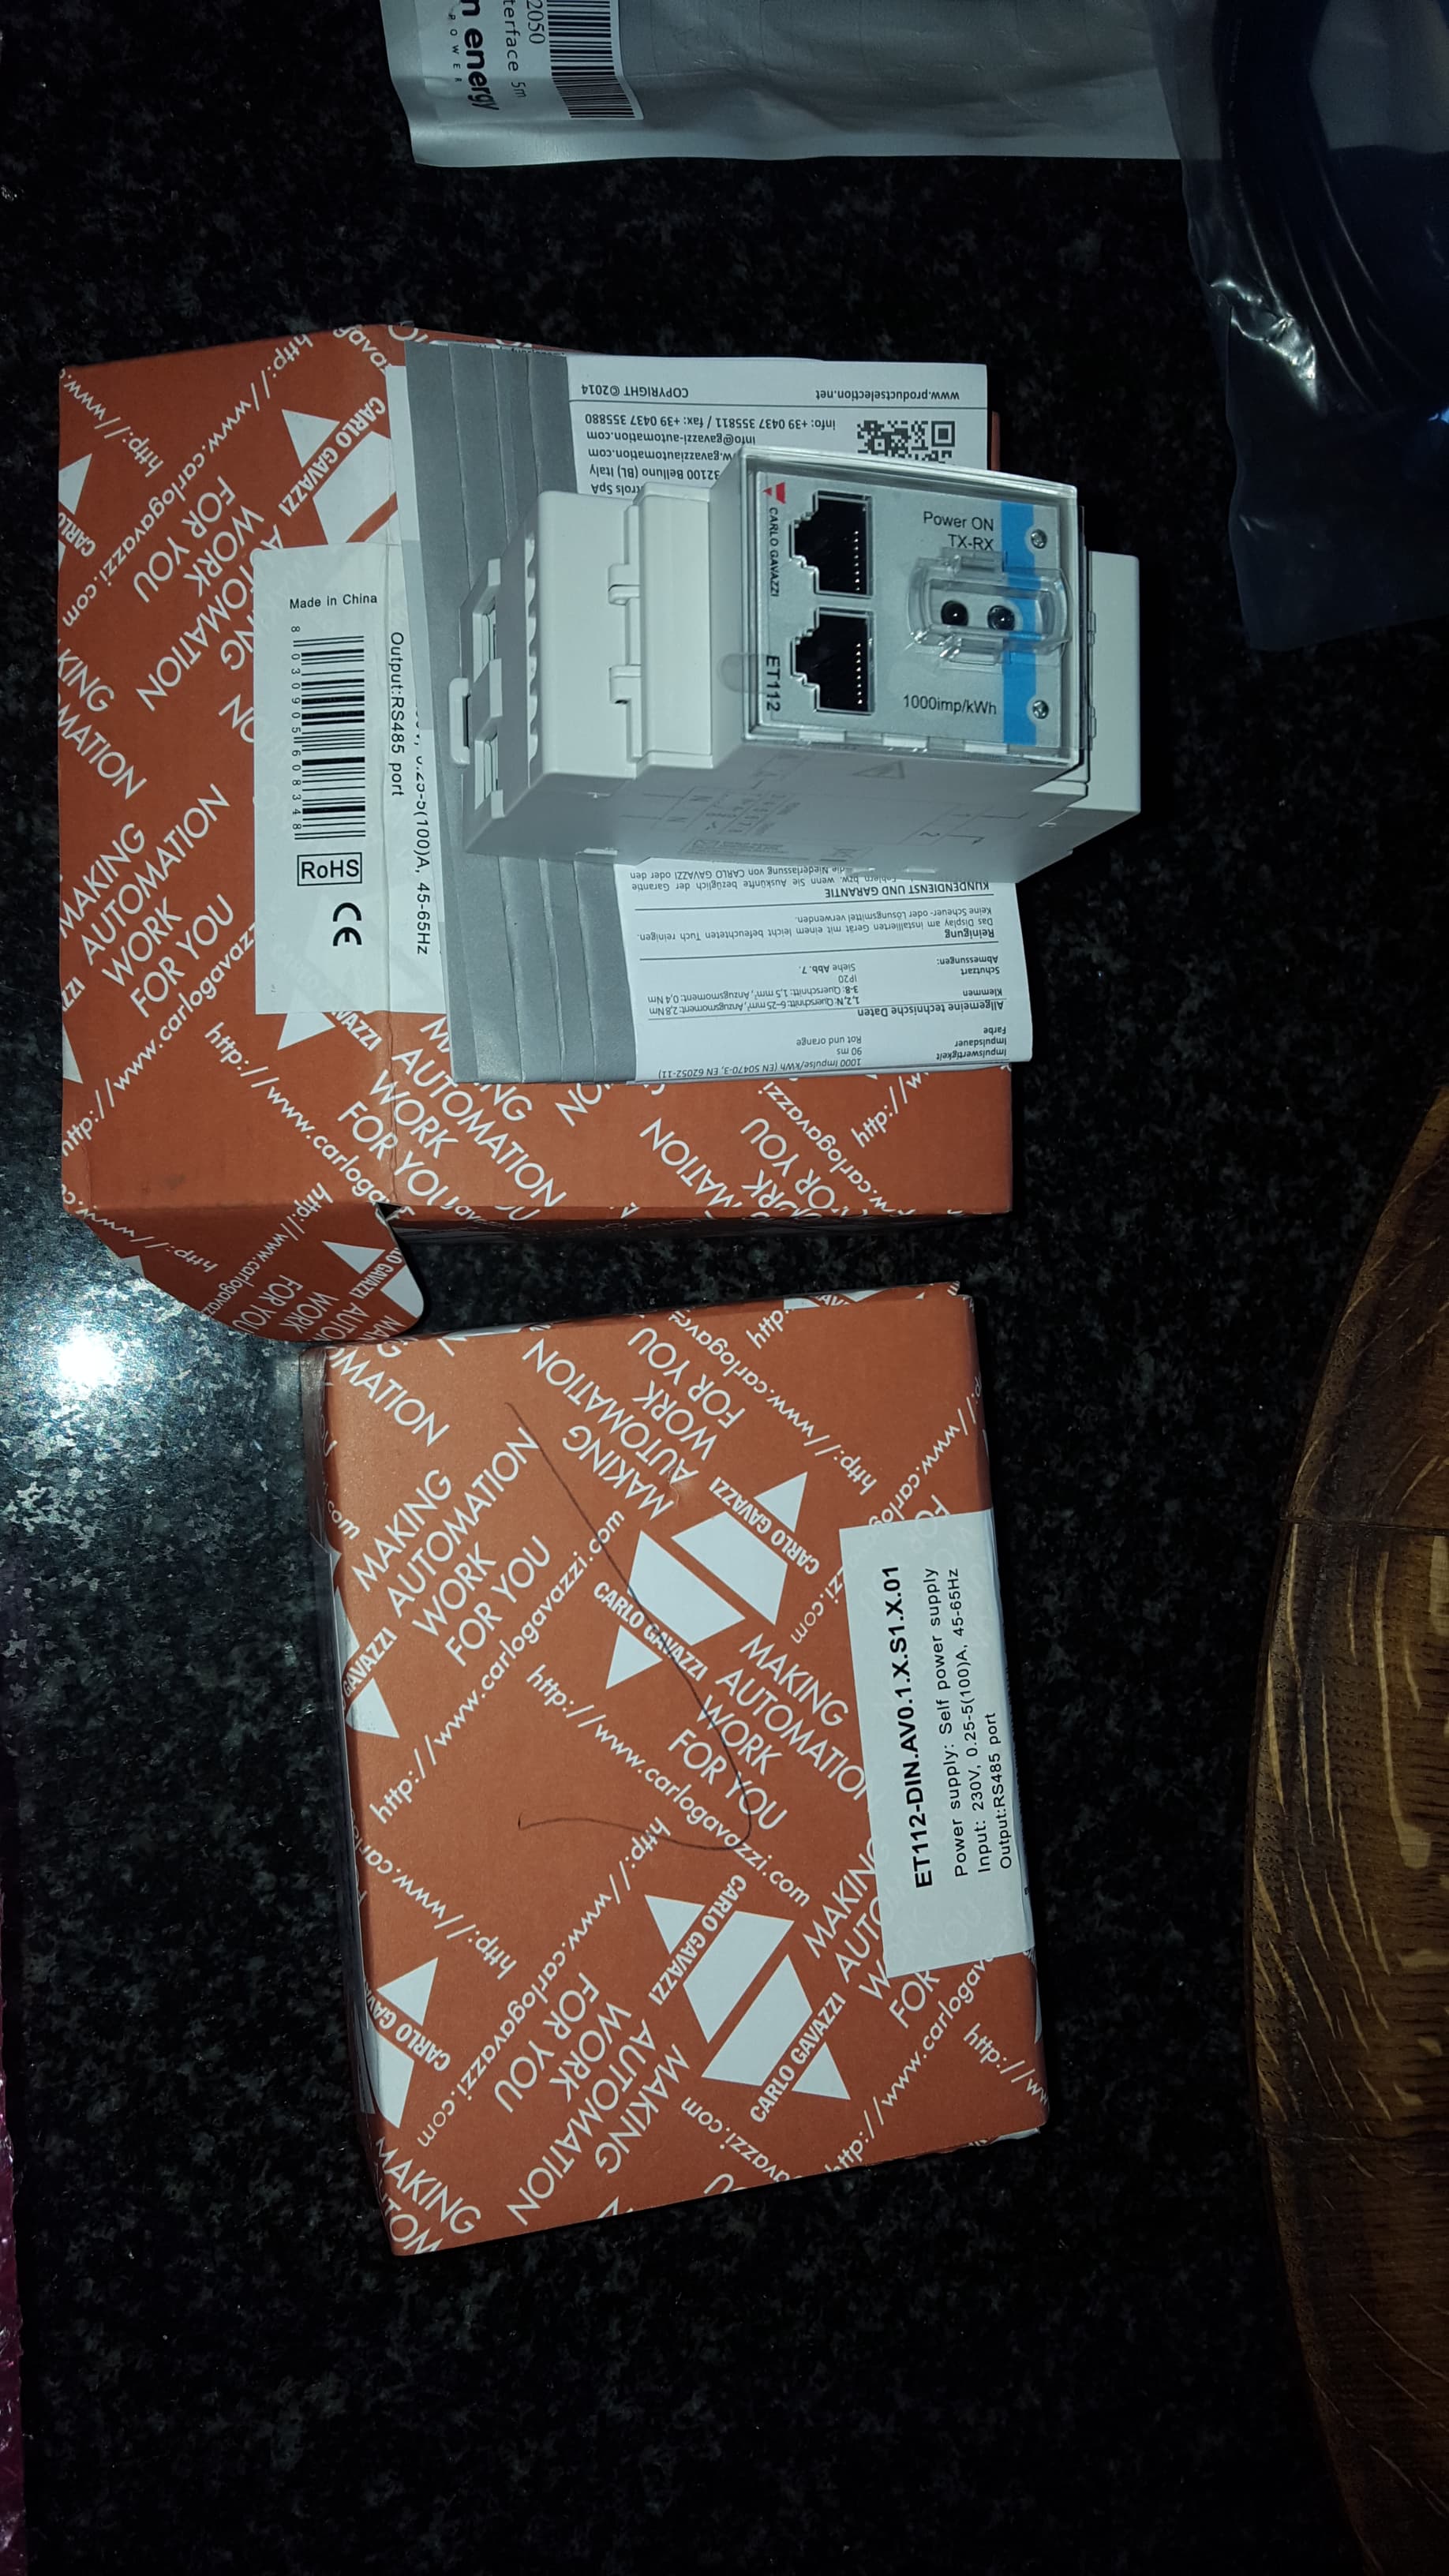
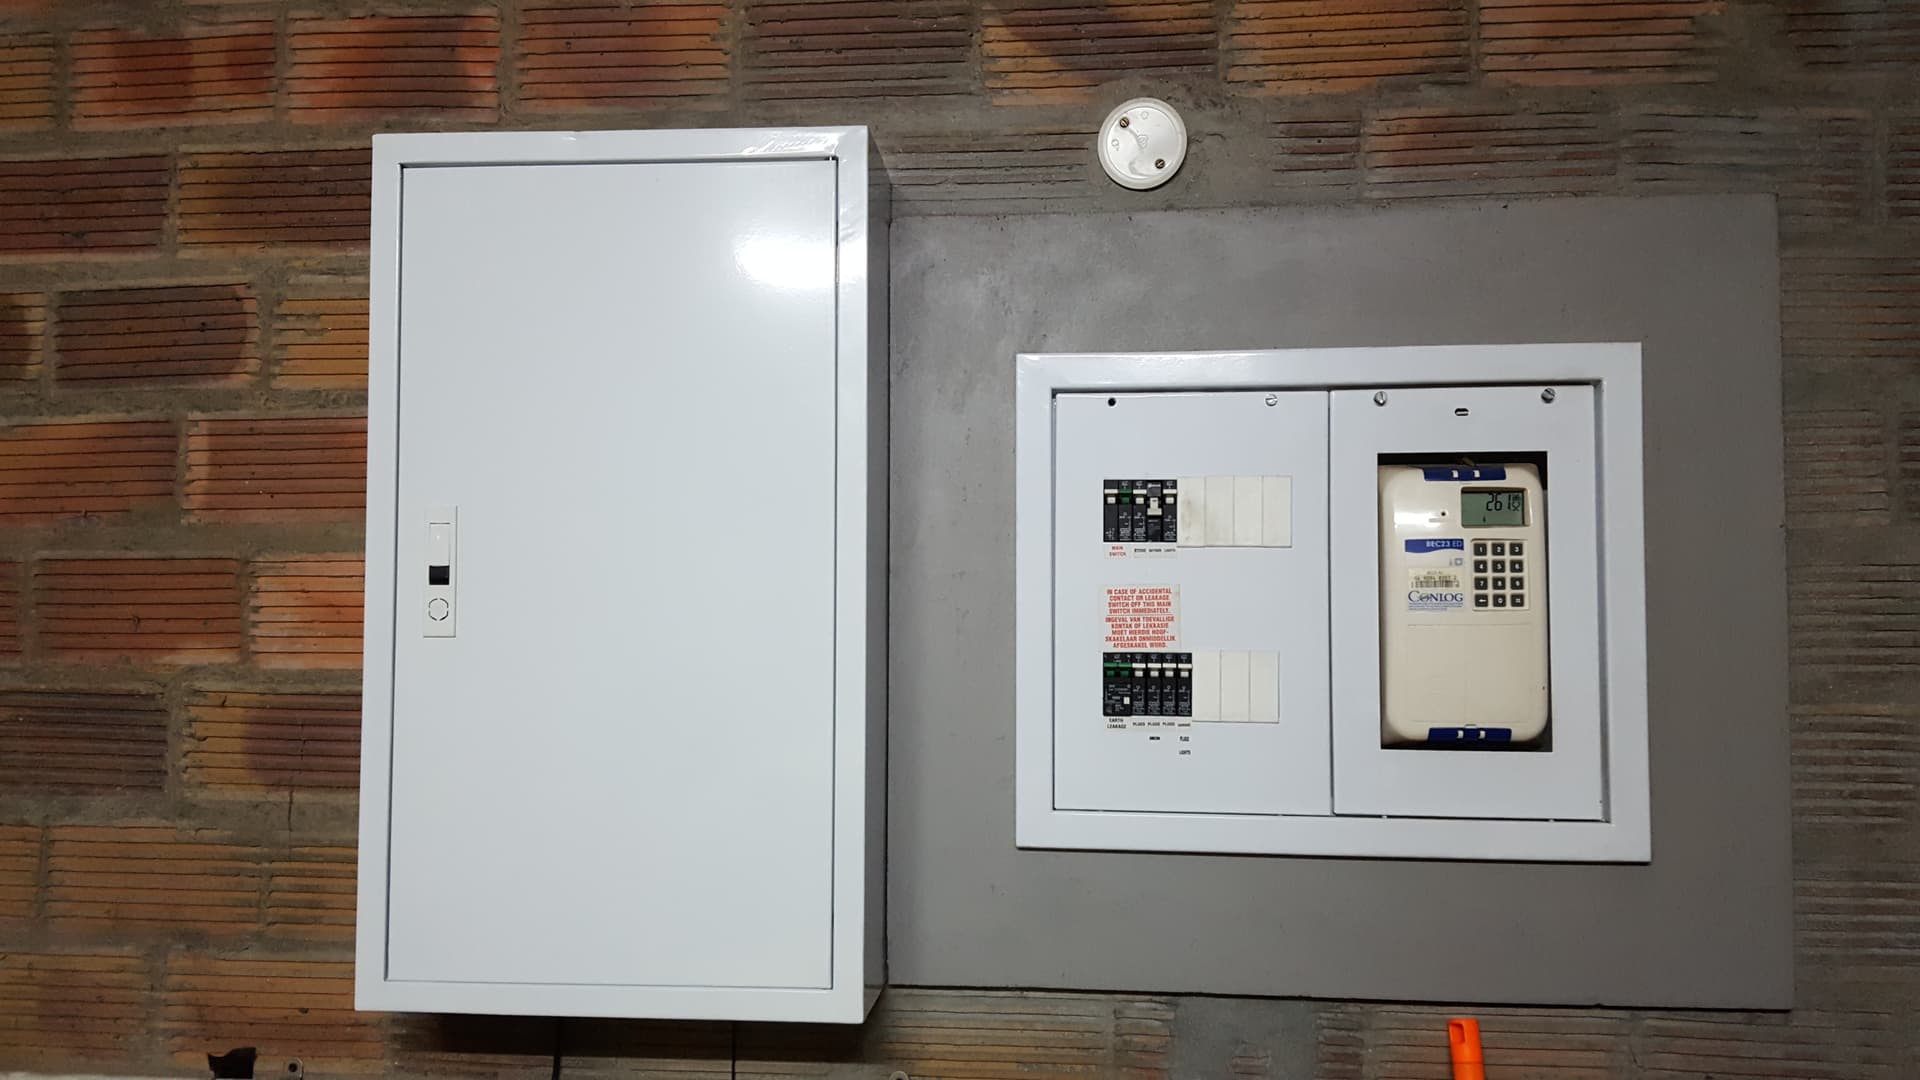
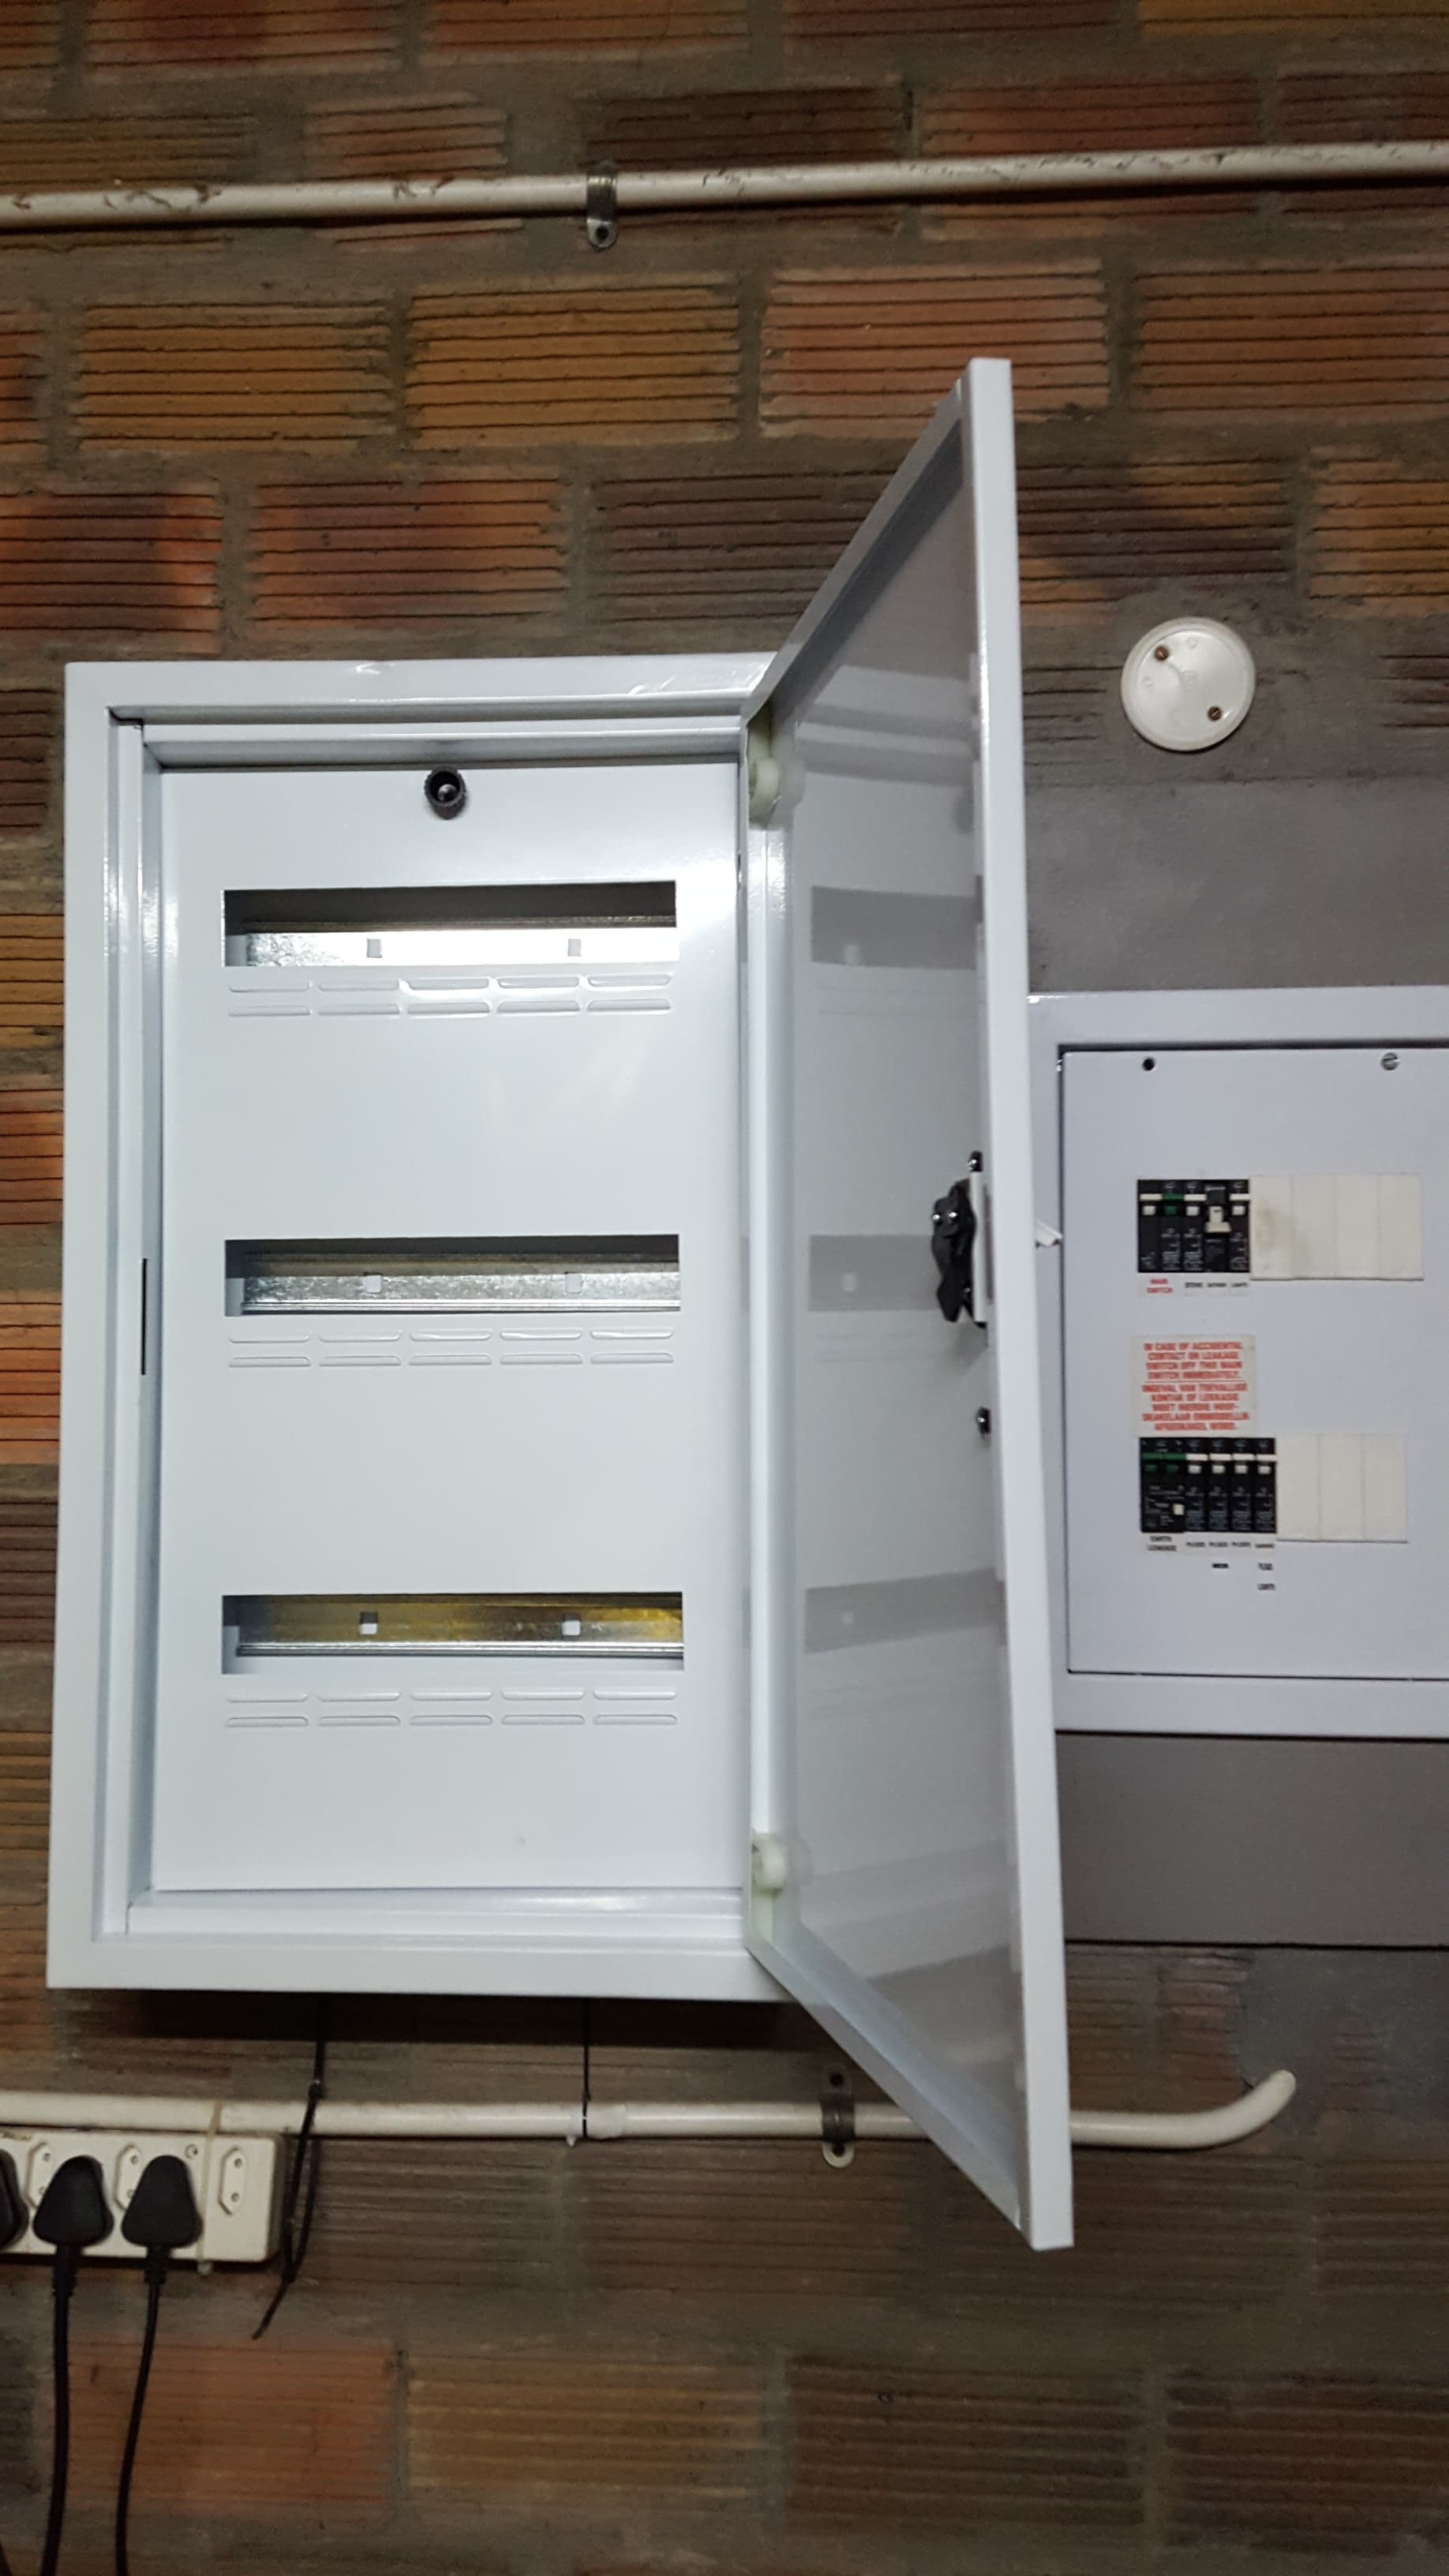
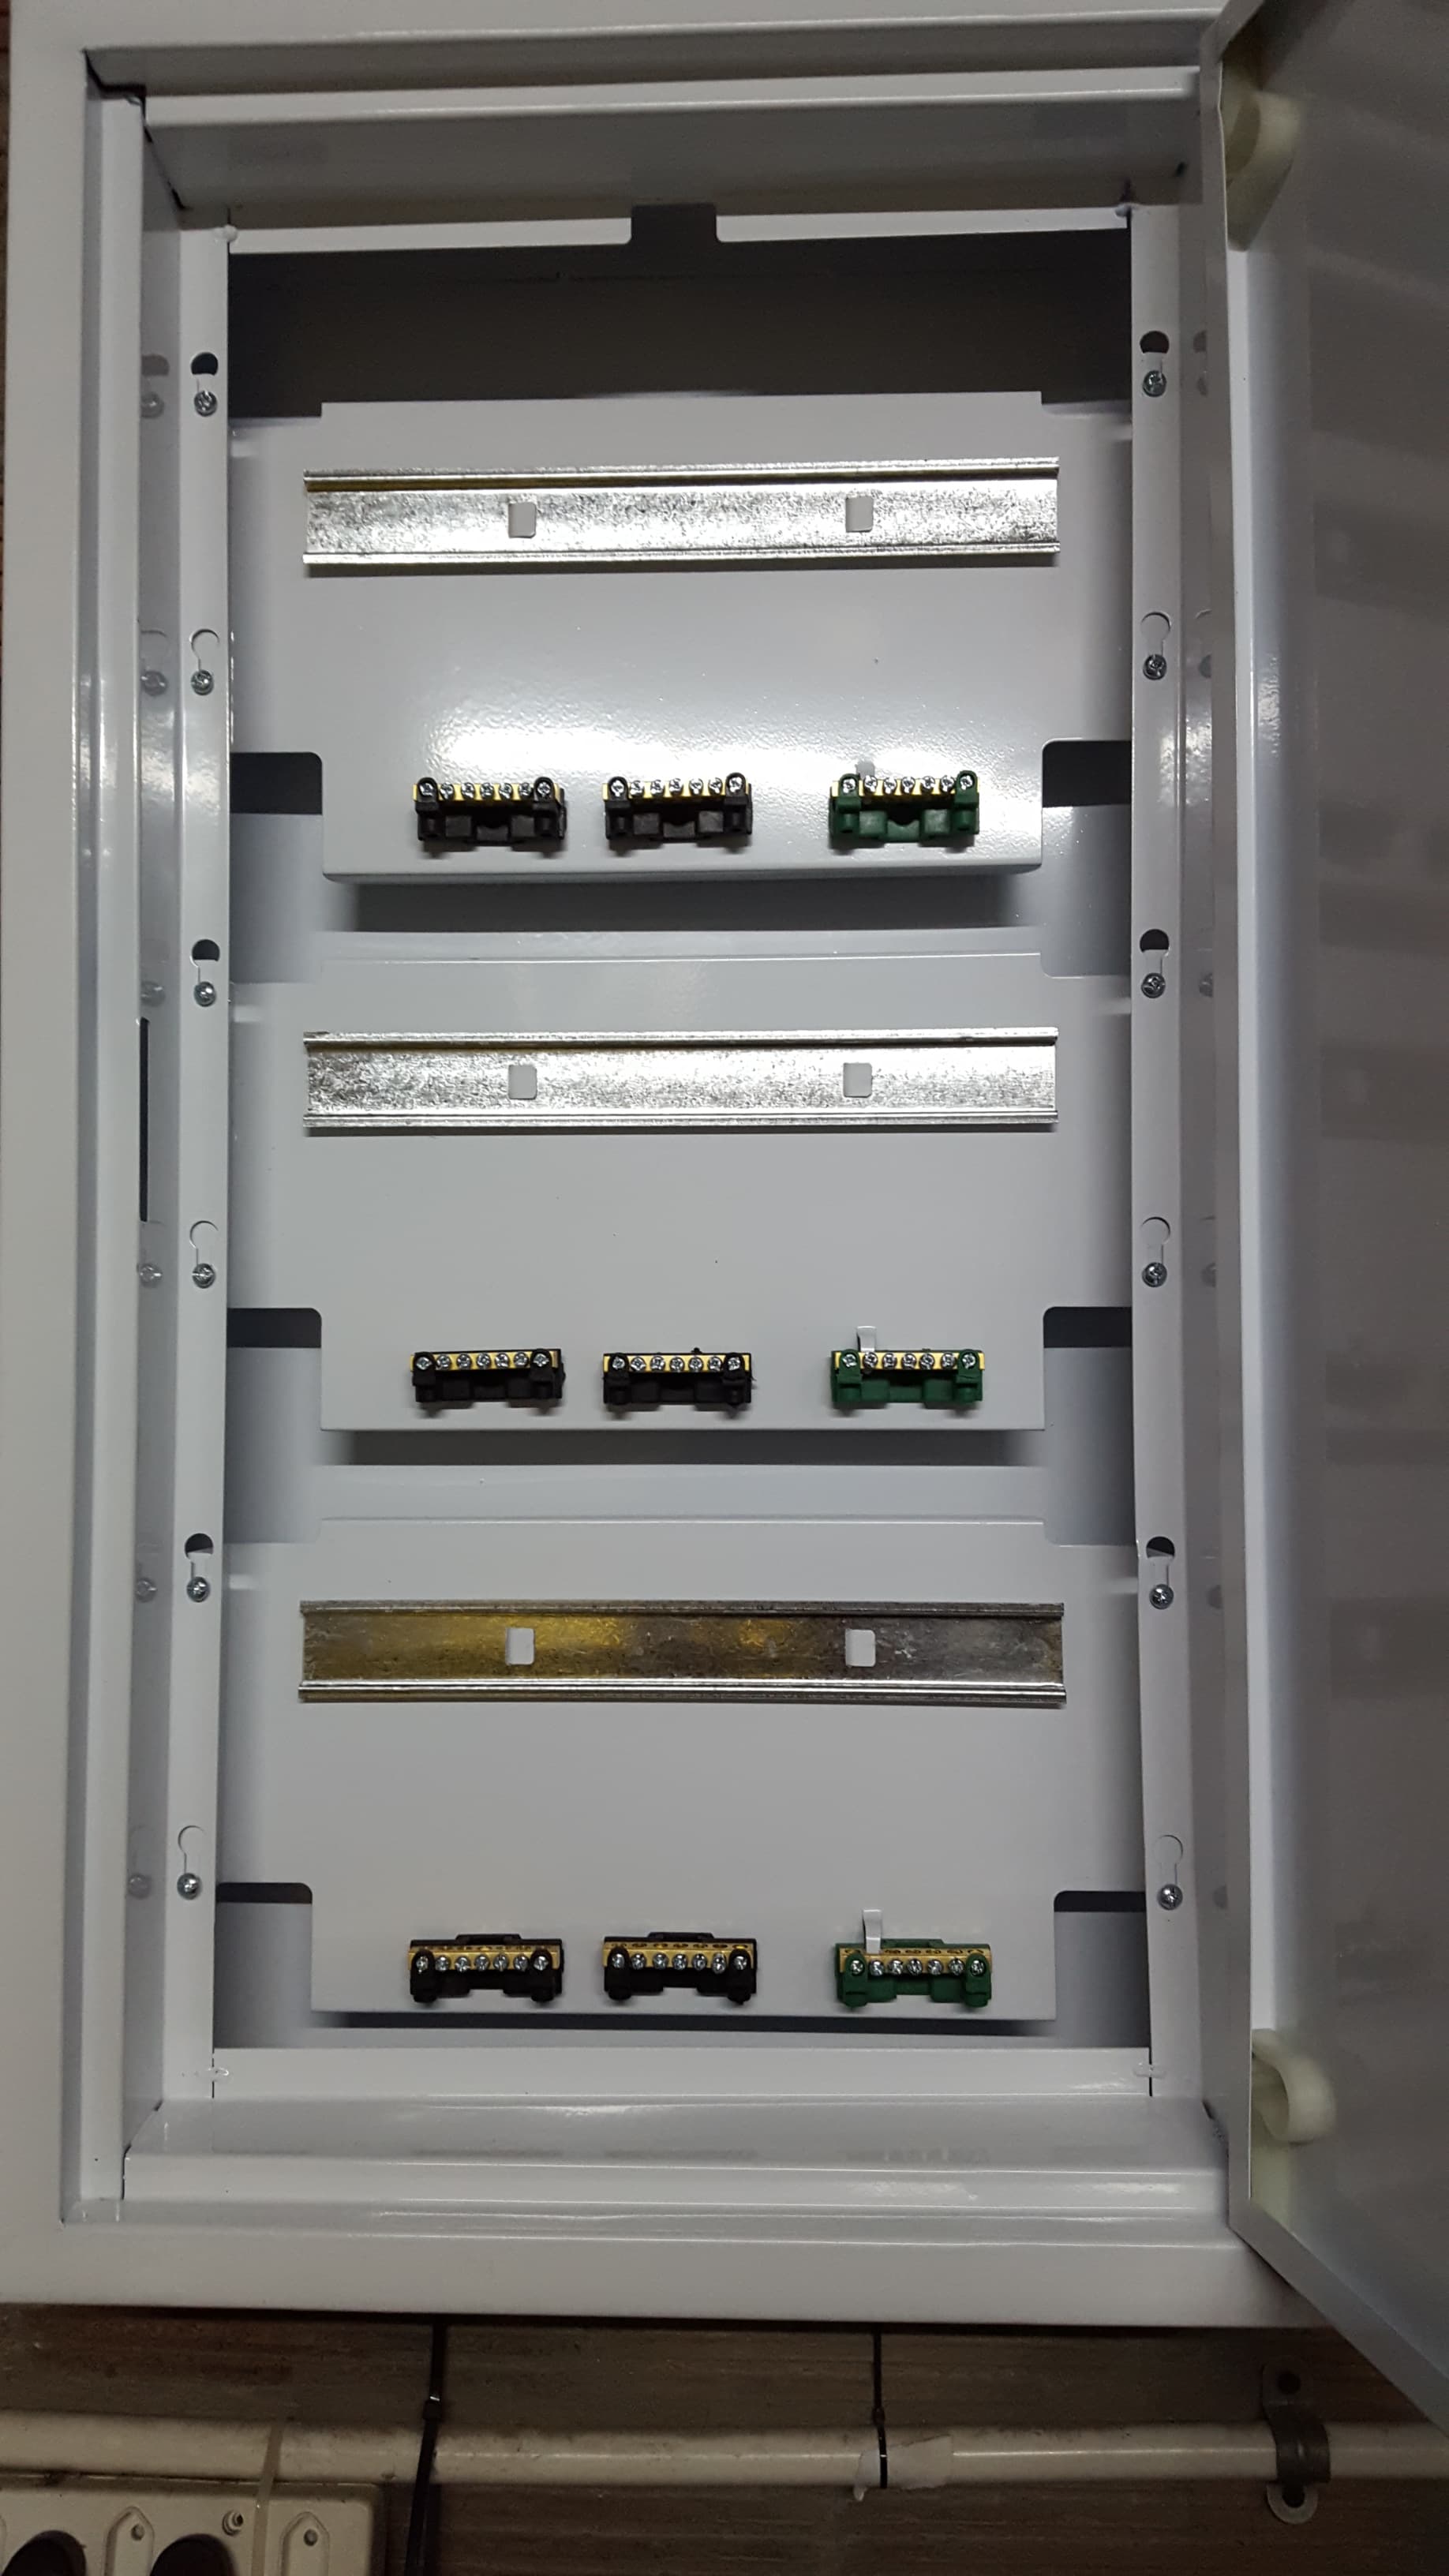
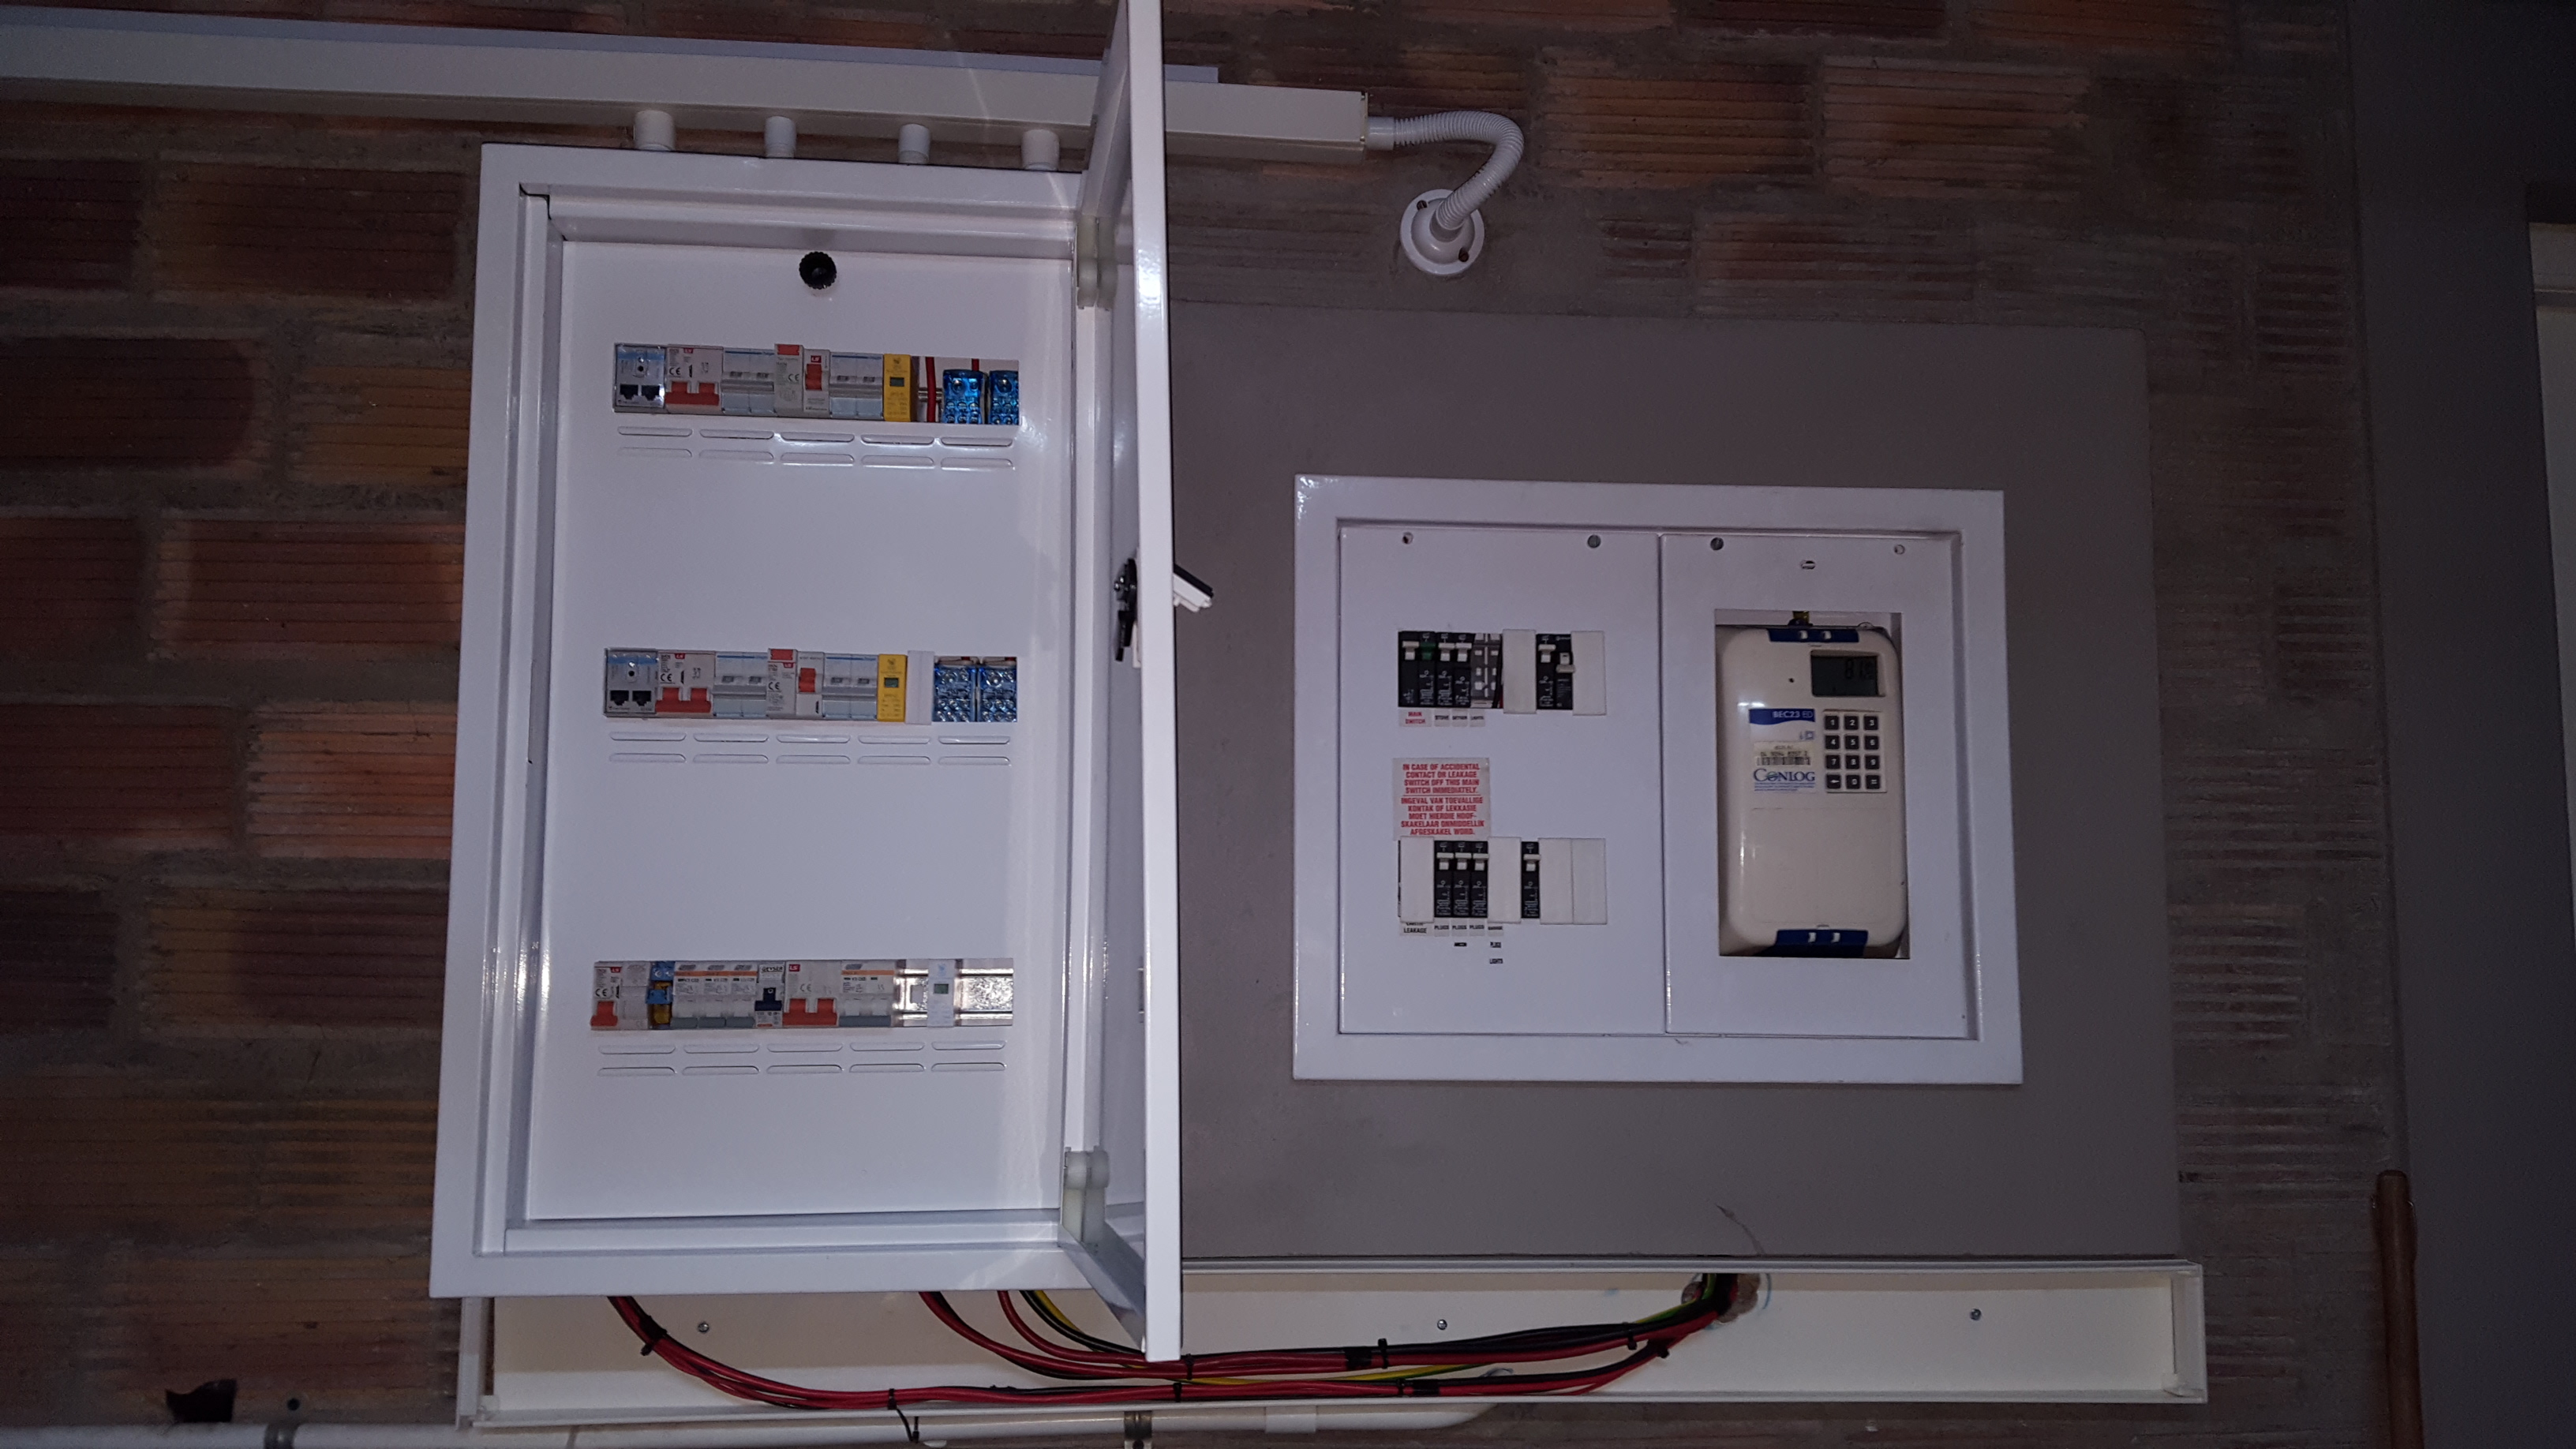
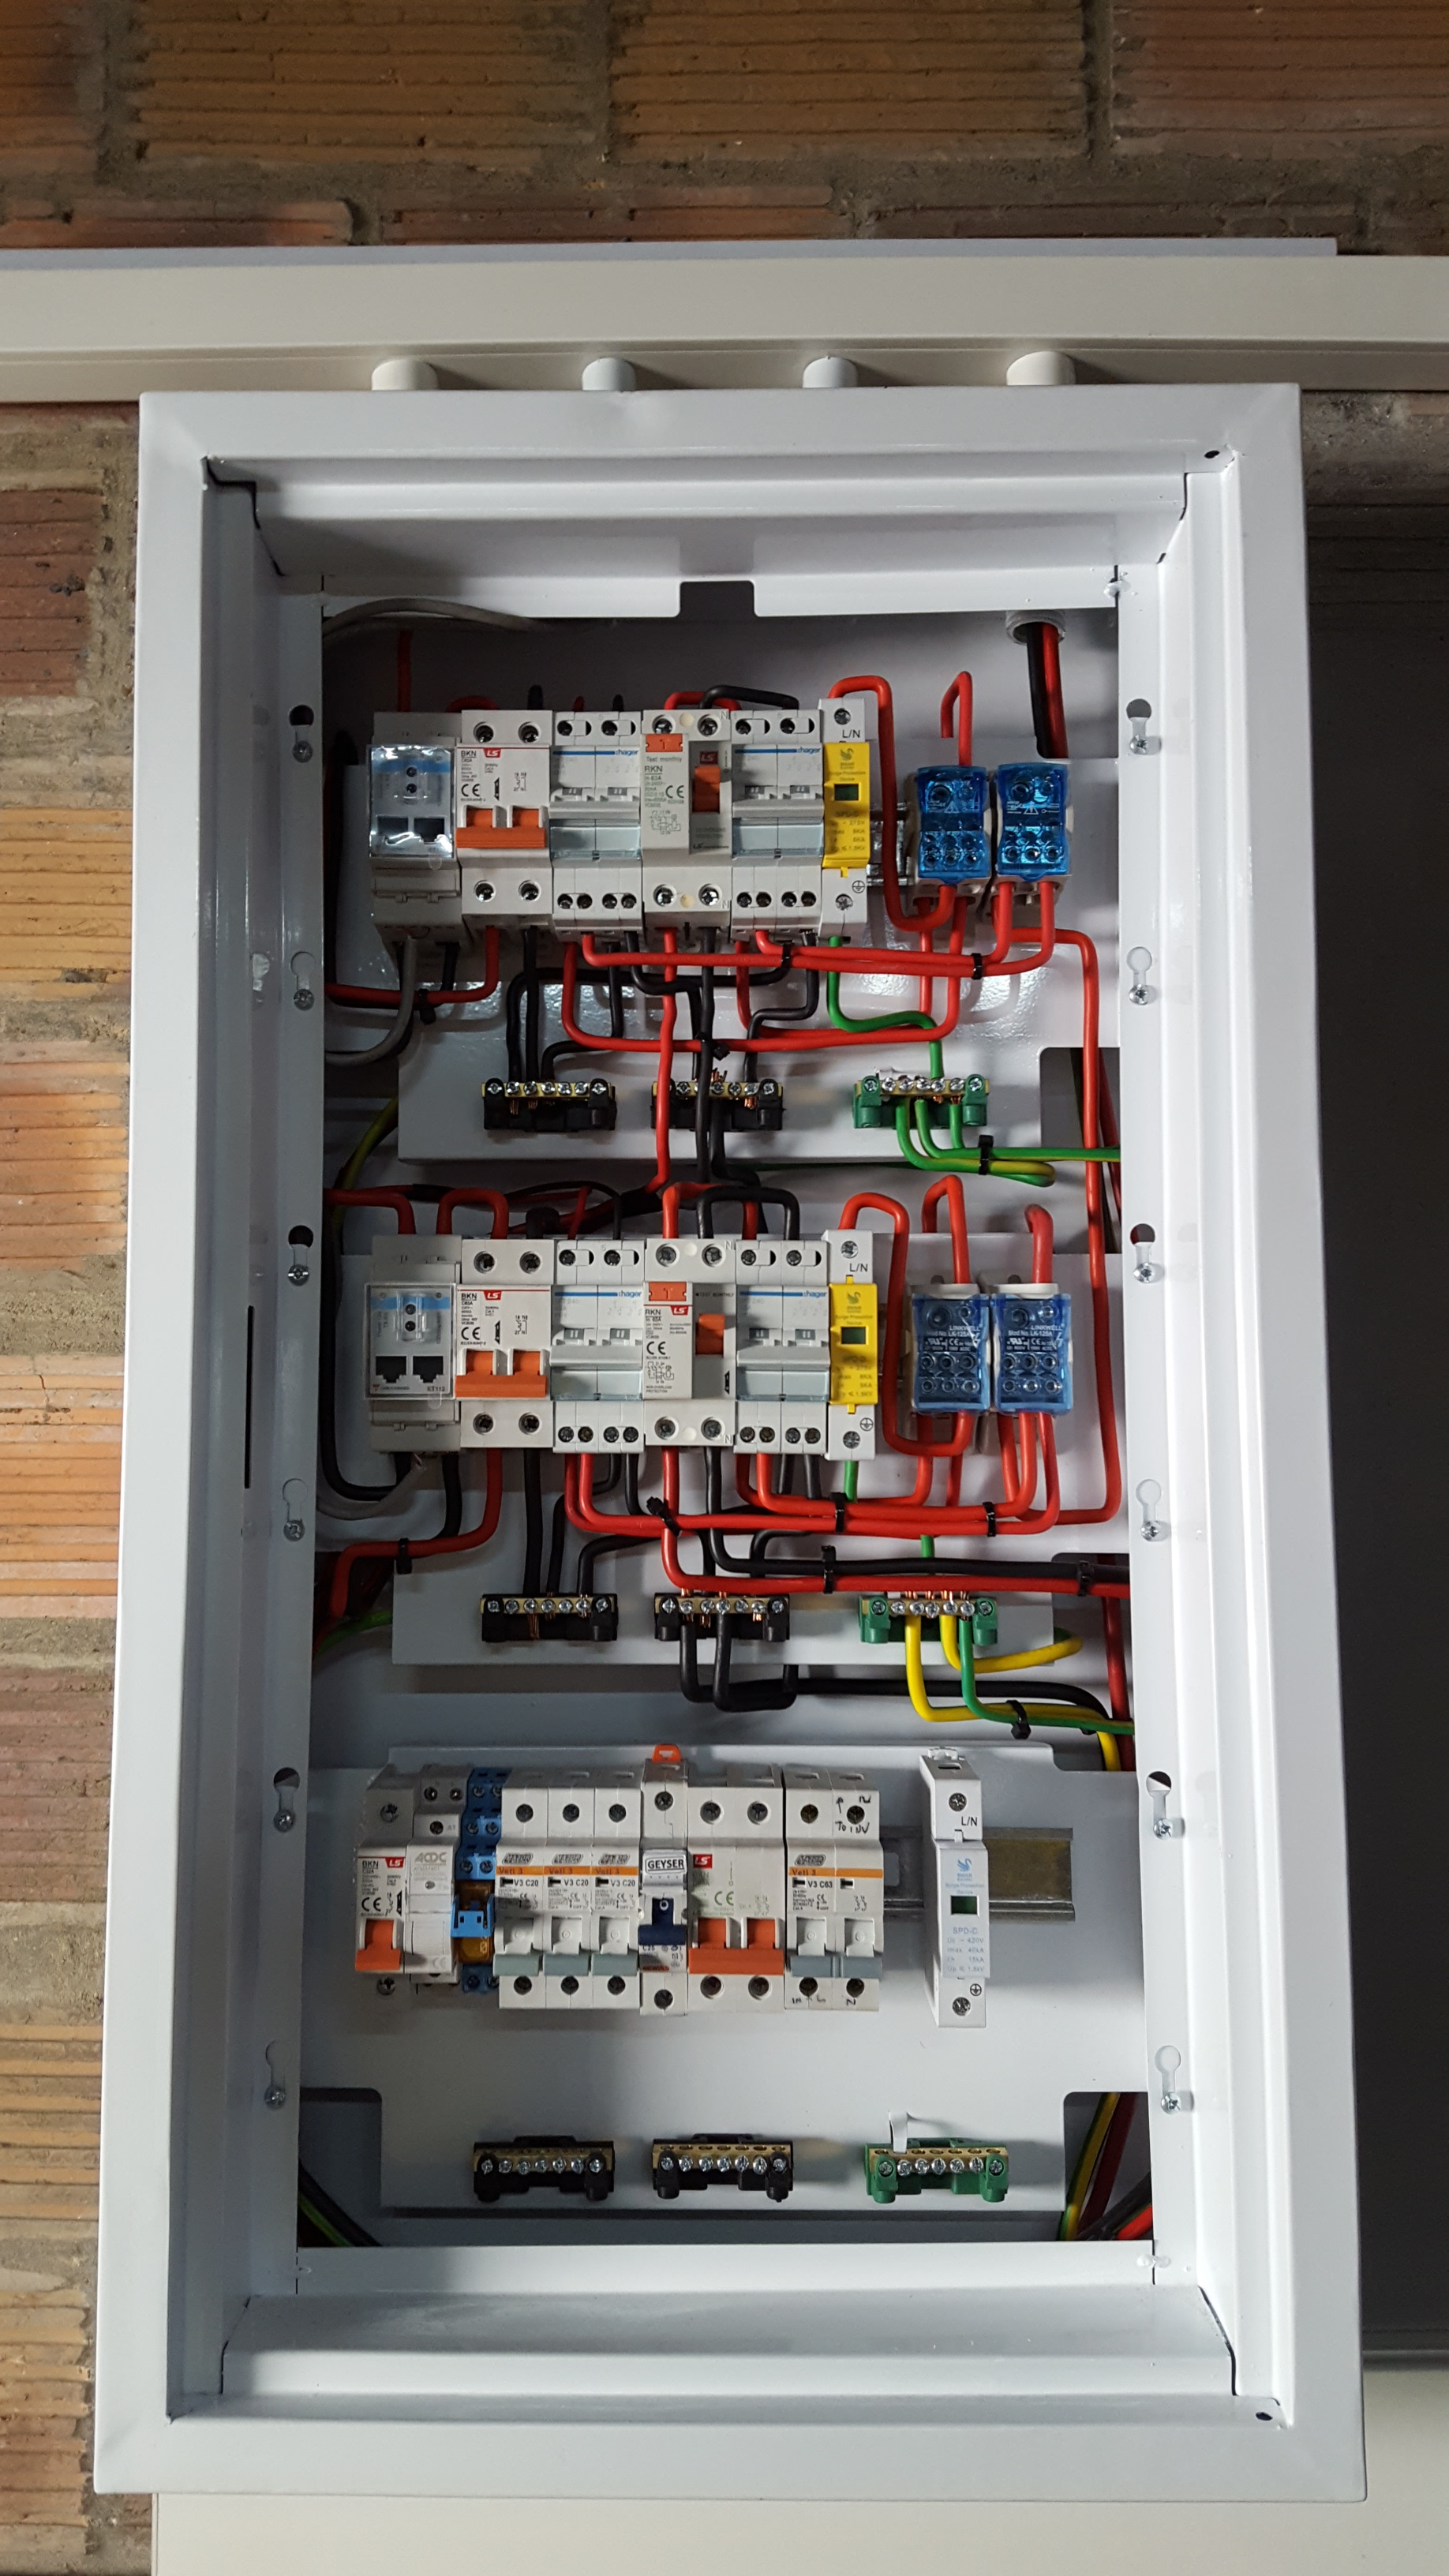
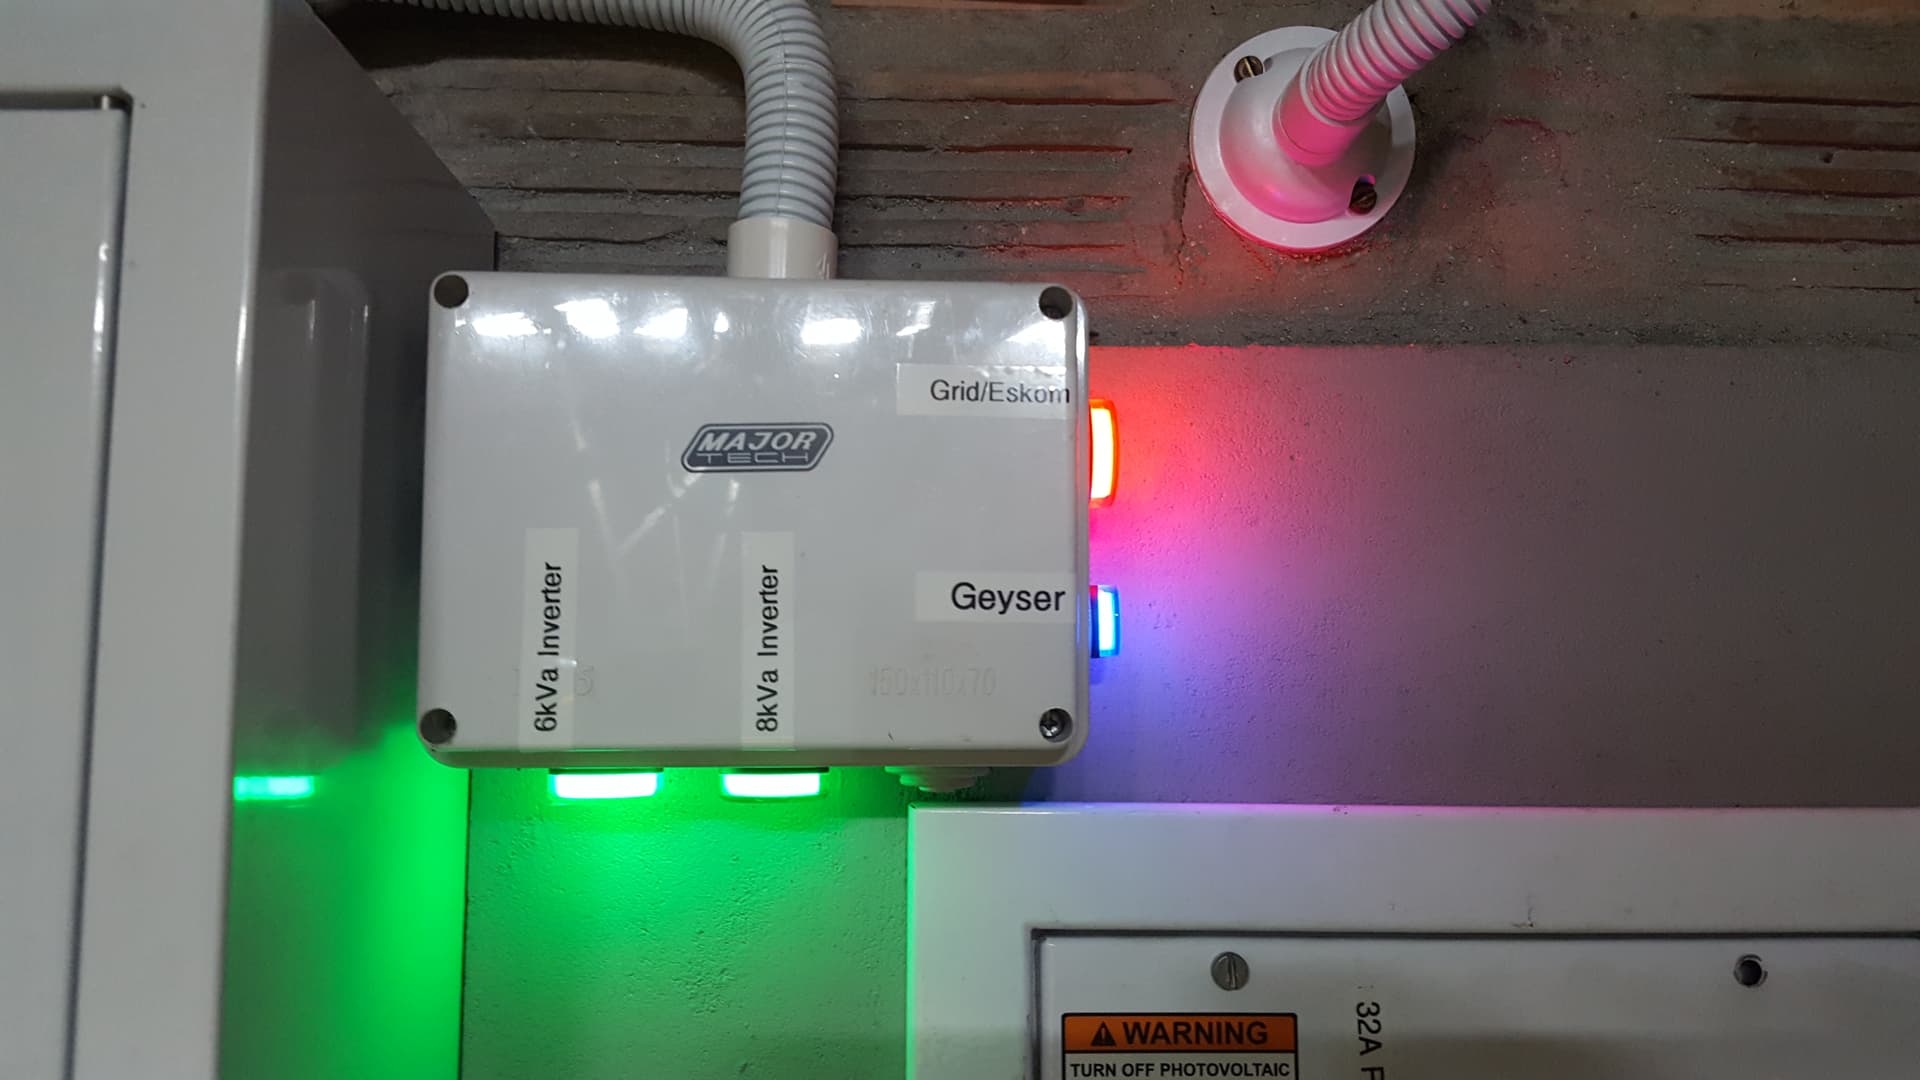
I went for a bigger DB because I am going to split my DB in to two between the two inverters. the H8.0 will run the Garage and geyser and AC in the house. The H10.0 will run the rest of the house. That’s why I got two Et112, one for every inverter that feeds the house so that I can get the reading via the VRM portal. Will run extra home automation stuff to.
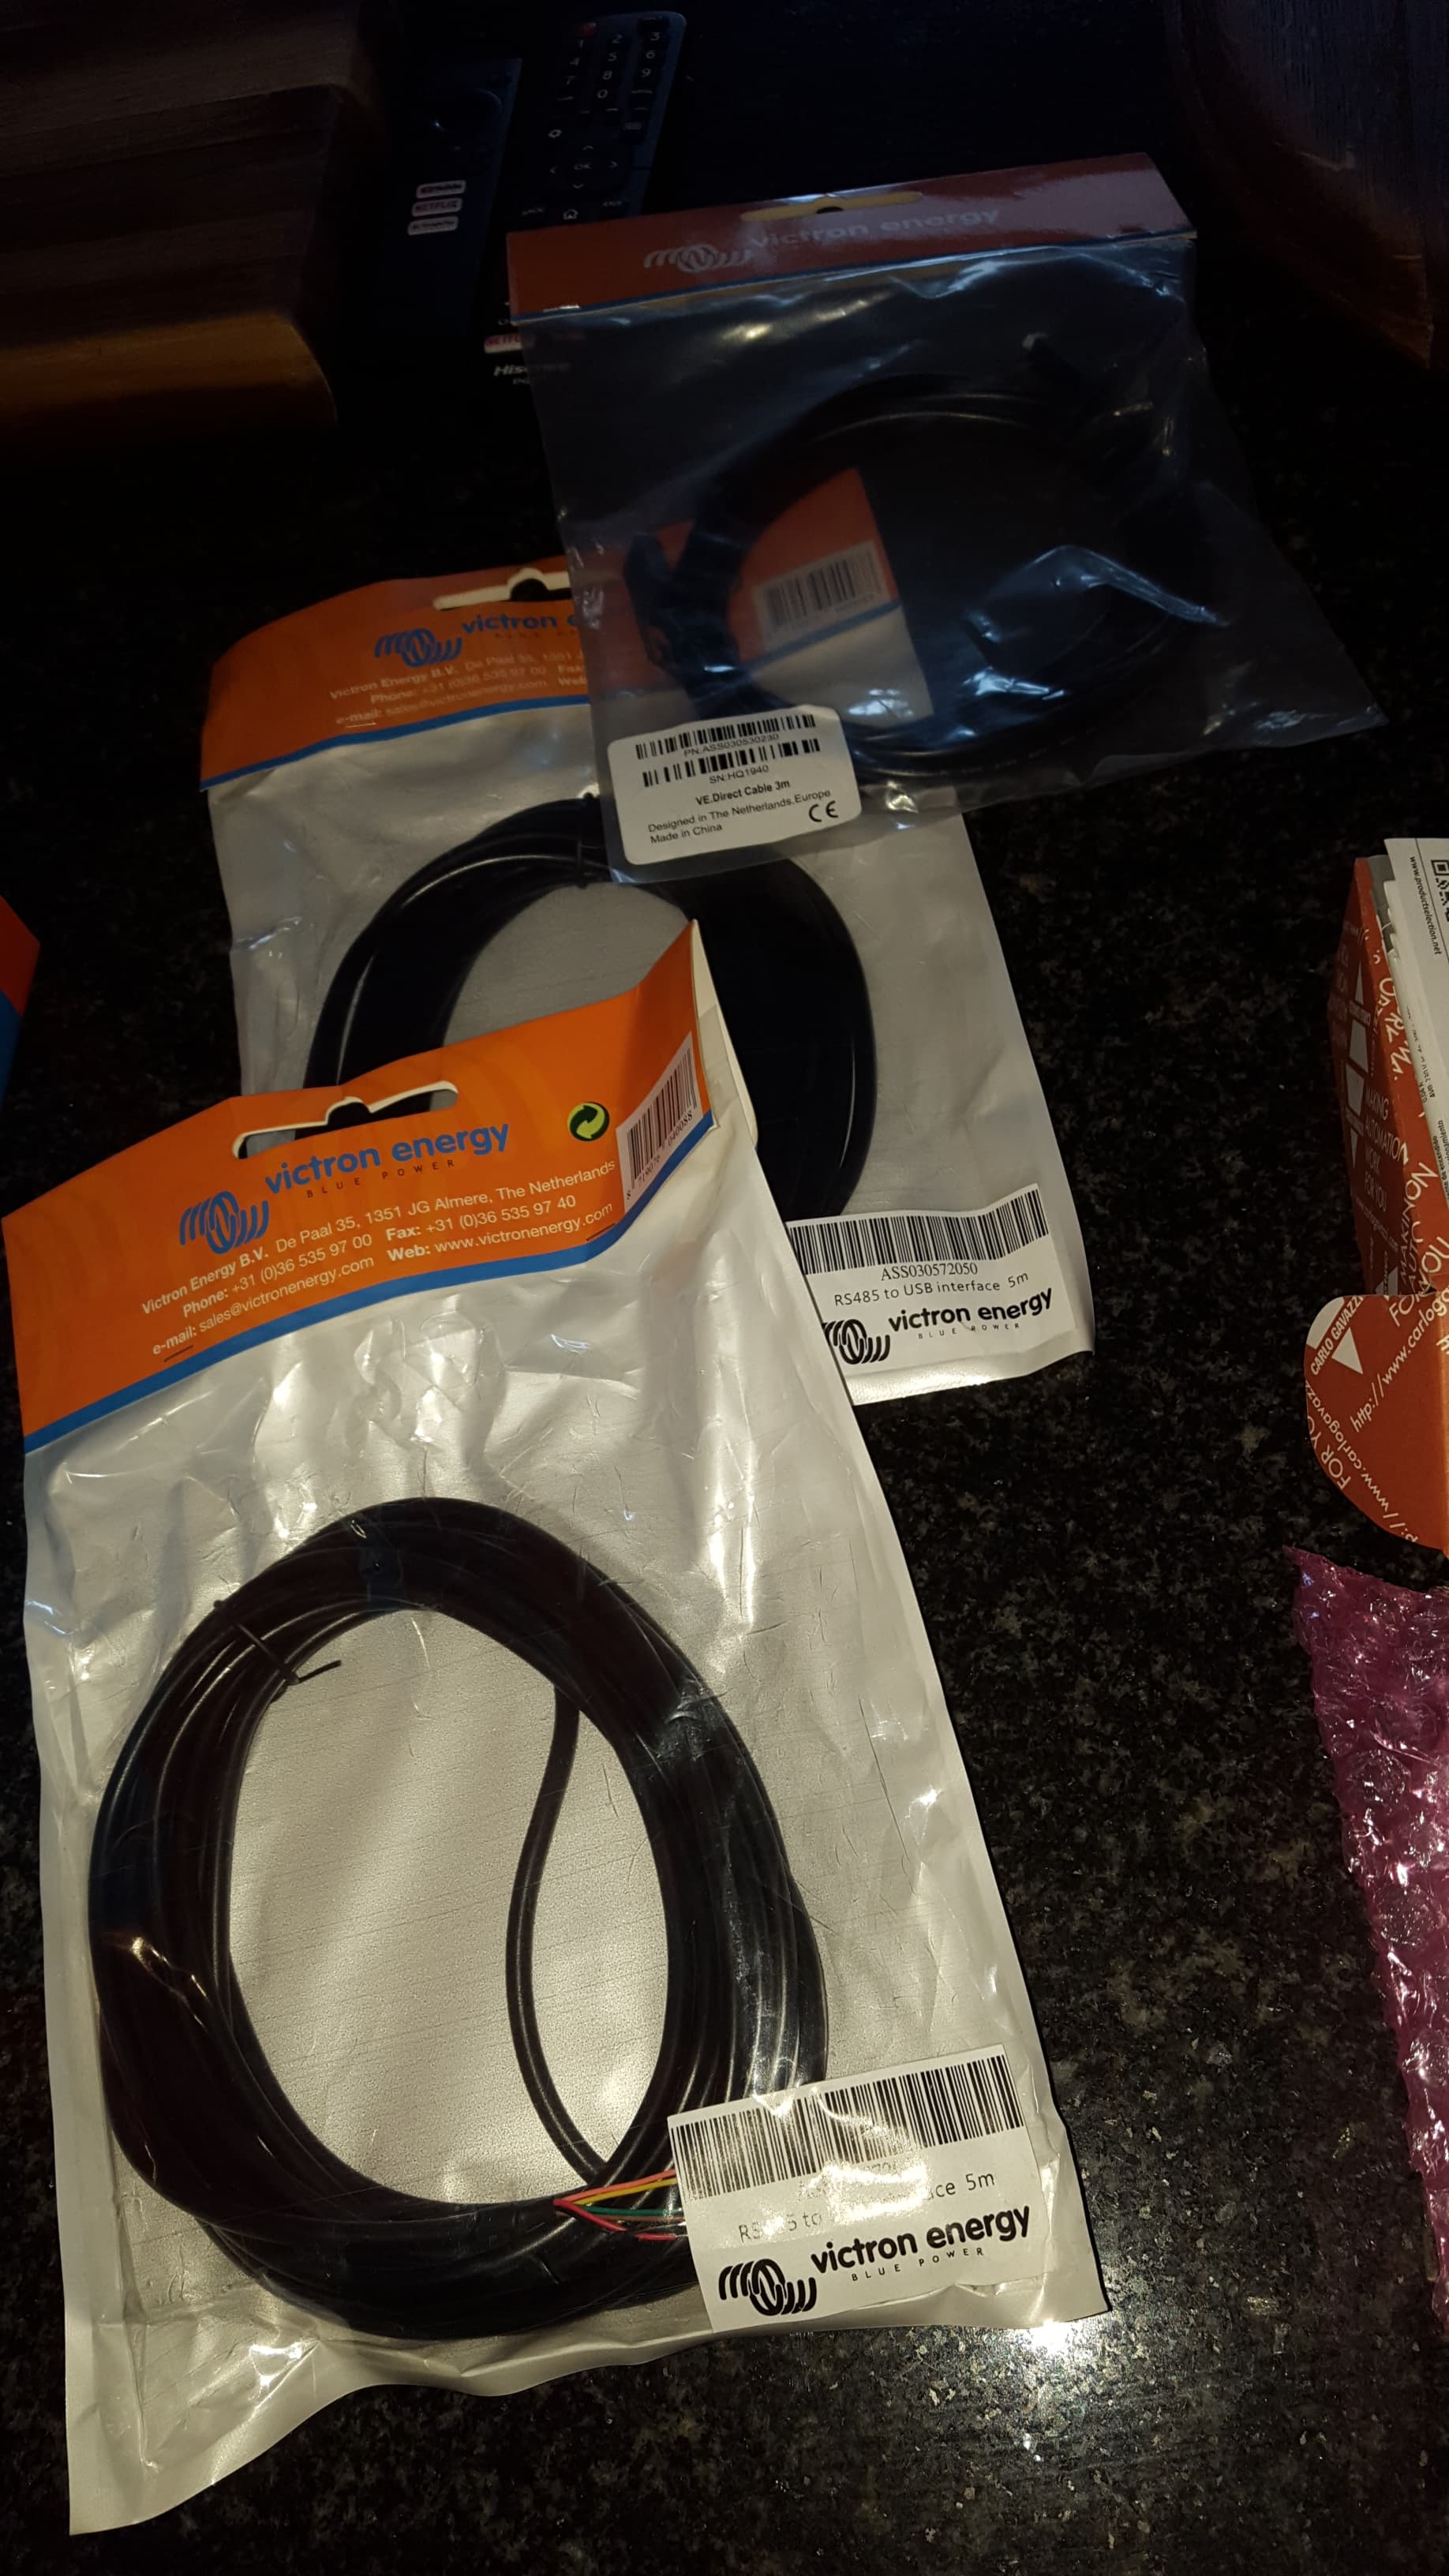
I using Breaded Sleeving with all my DC cables. Some photos of all the work that I did in this few days.


7 Likes
very nice build.
What BMS are you going to use for the bettery cells? ANT BMS if I remember from before?
@Louisvdw I will still use the ant bms at the moment and I ordered some bms’s from TTT so waiting for them to arrive.
I will experiment with ant bms with software when everything is up and running.
I smiled because there is a whole lot more behind this innocent sentence. ![]()
Along the lines of:
Darling, we must paint this and that and … leave the solar system.
Followed by Lovey, we need to do the garden … leave the solar system.
Then LS came … GET IT UP NOW!!!
![]()
Yes dear 
Hahahaha TTT!!! You know it!!! You know all the things that’s happening this side  Best thing is, sy plae my nie meer nie, because the LS driving her crazy now.
So last week I did a bit more wiring work and over the weekend connected the Lifepo4 batteries.
Mind the garage that looks so “woes”.  We busy painting the house inside and renovating so everything is stuffed in the garage.
Some late night working.
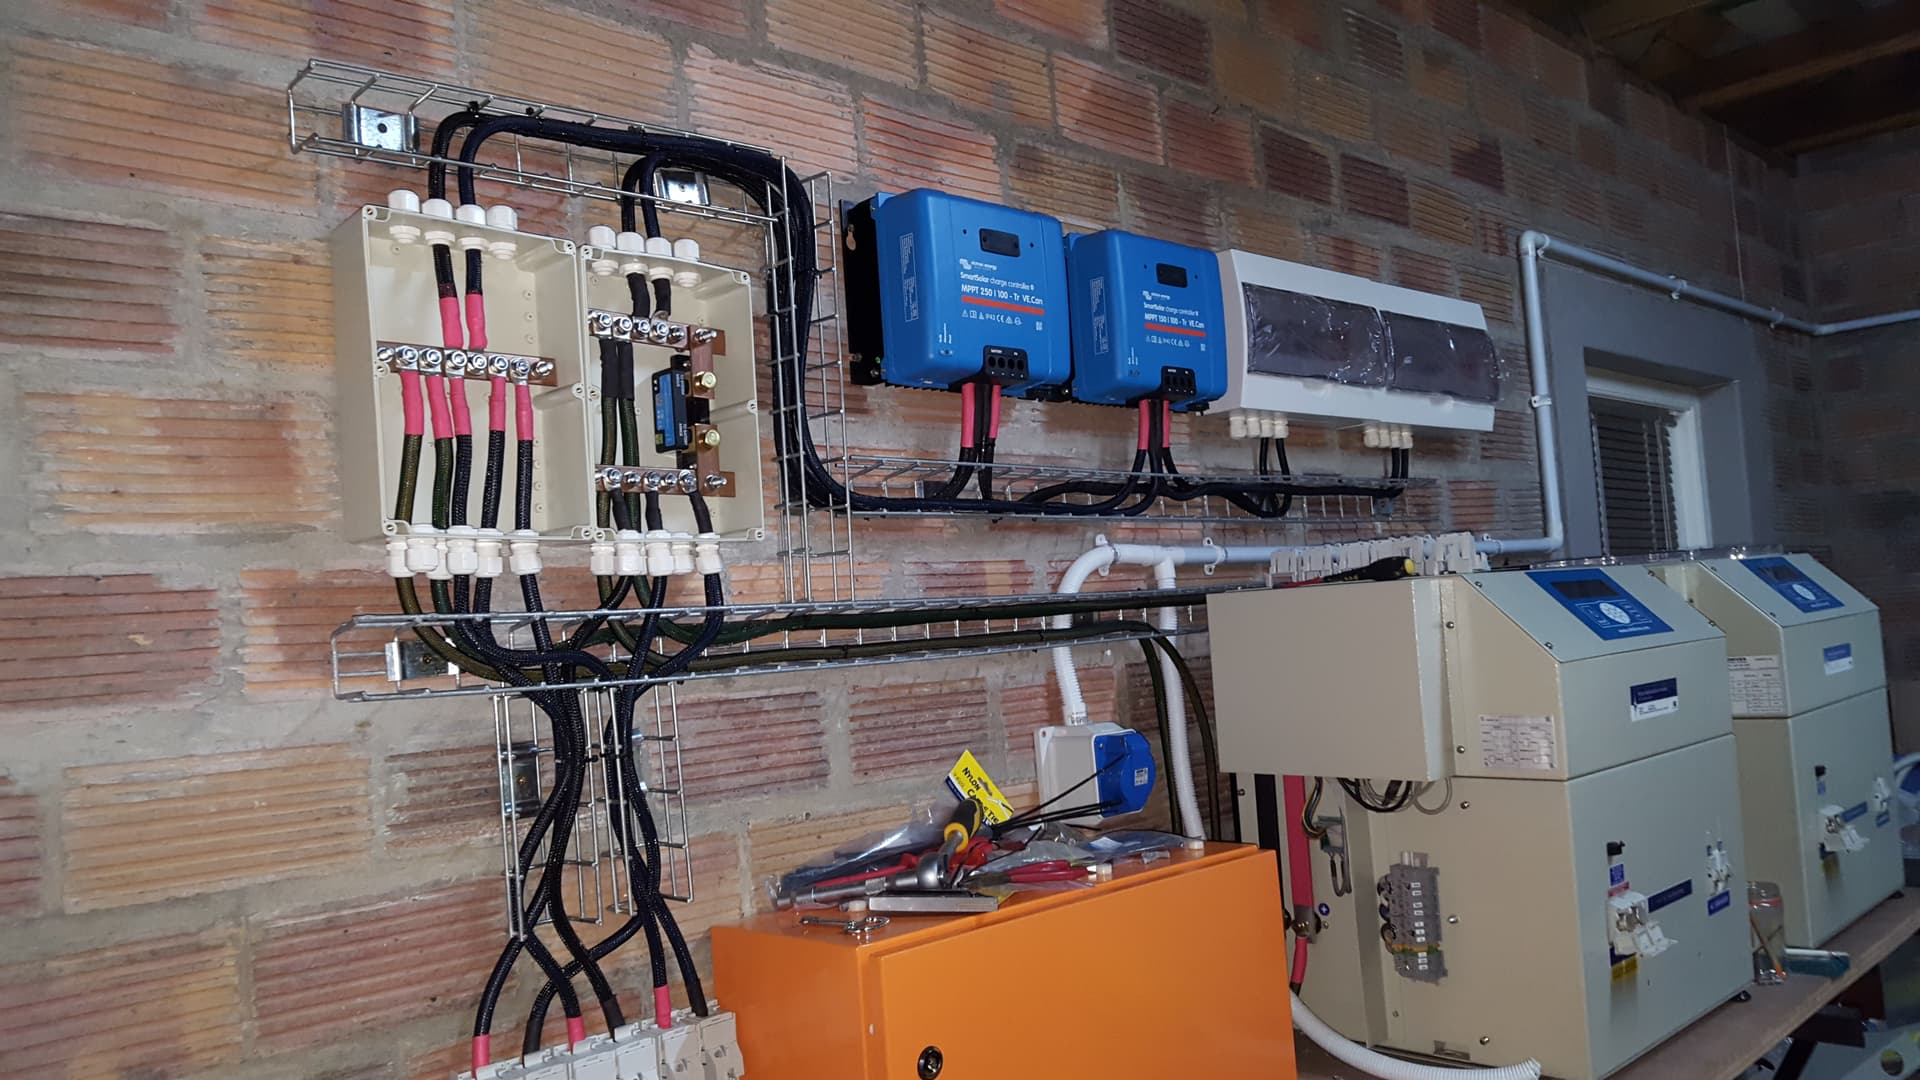


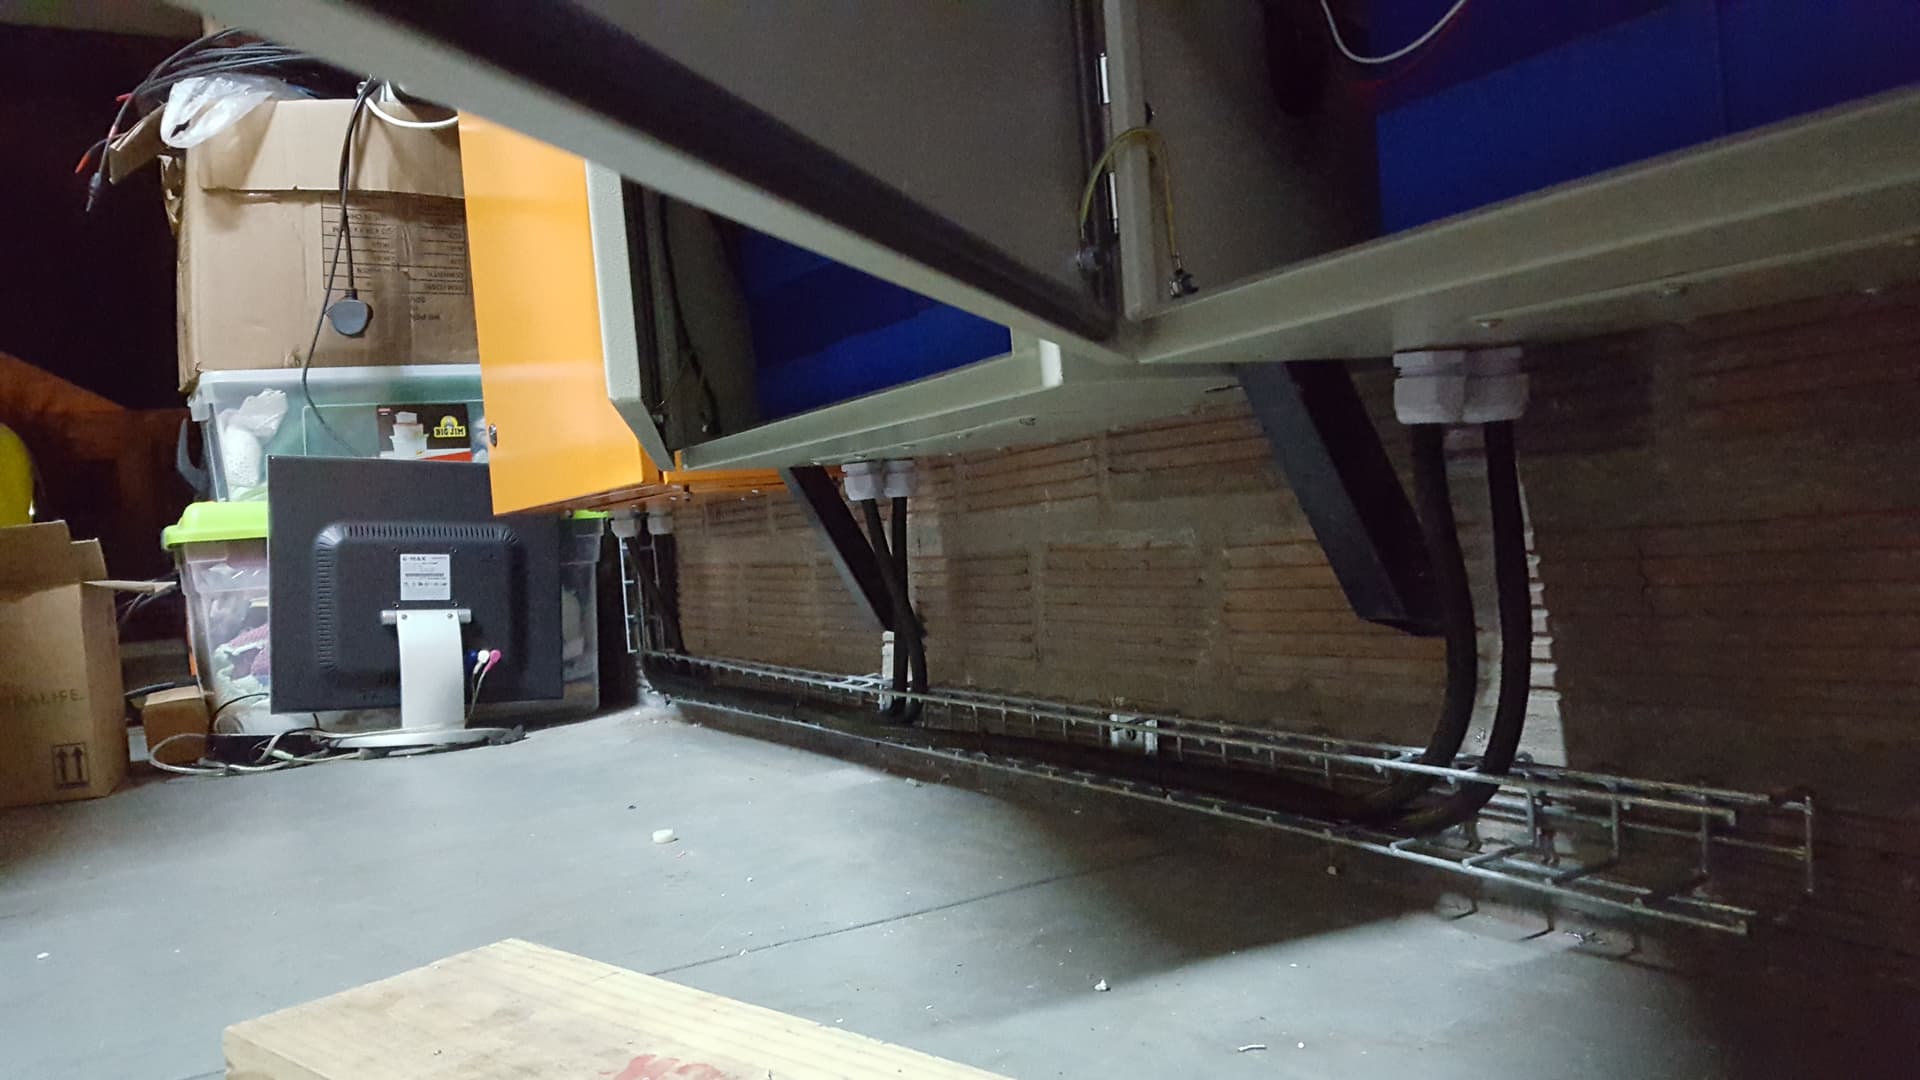
It can get tricky when you work with 50mm2, but we got it sorted . I used cable tray because it works way more easy and looks nice.
Got my extra 9 x 430w panels. Way bigger then the 330w.
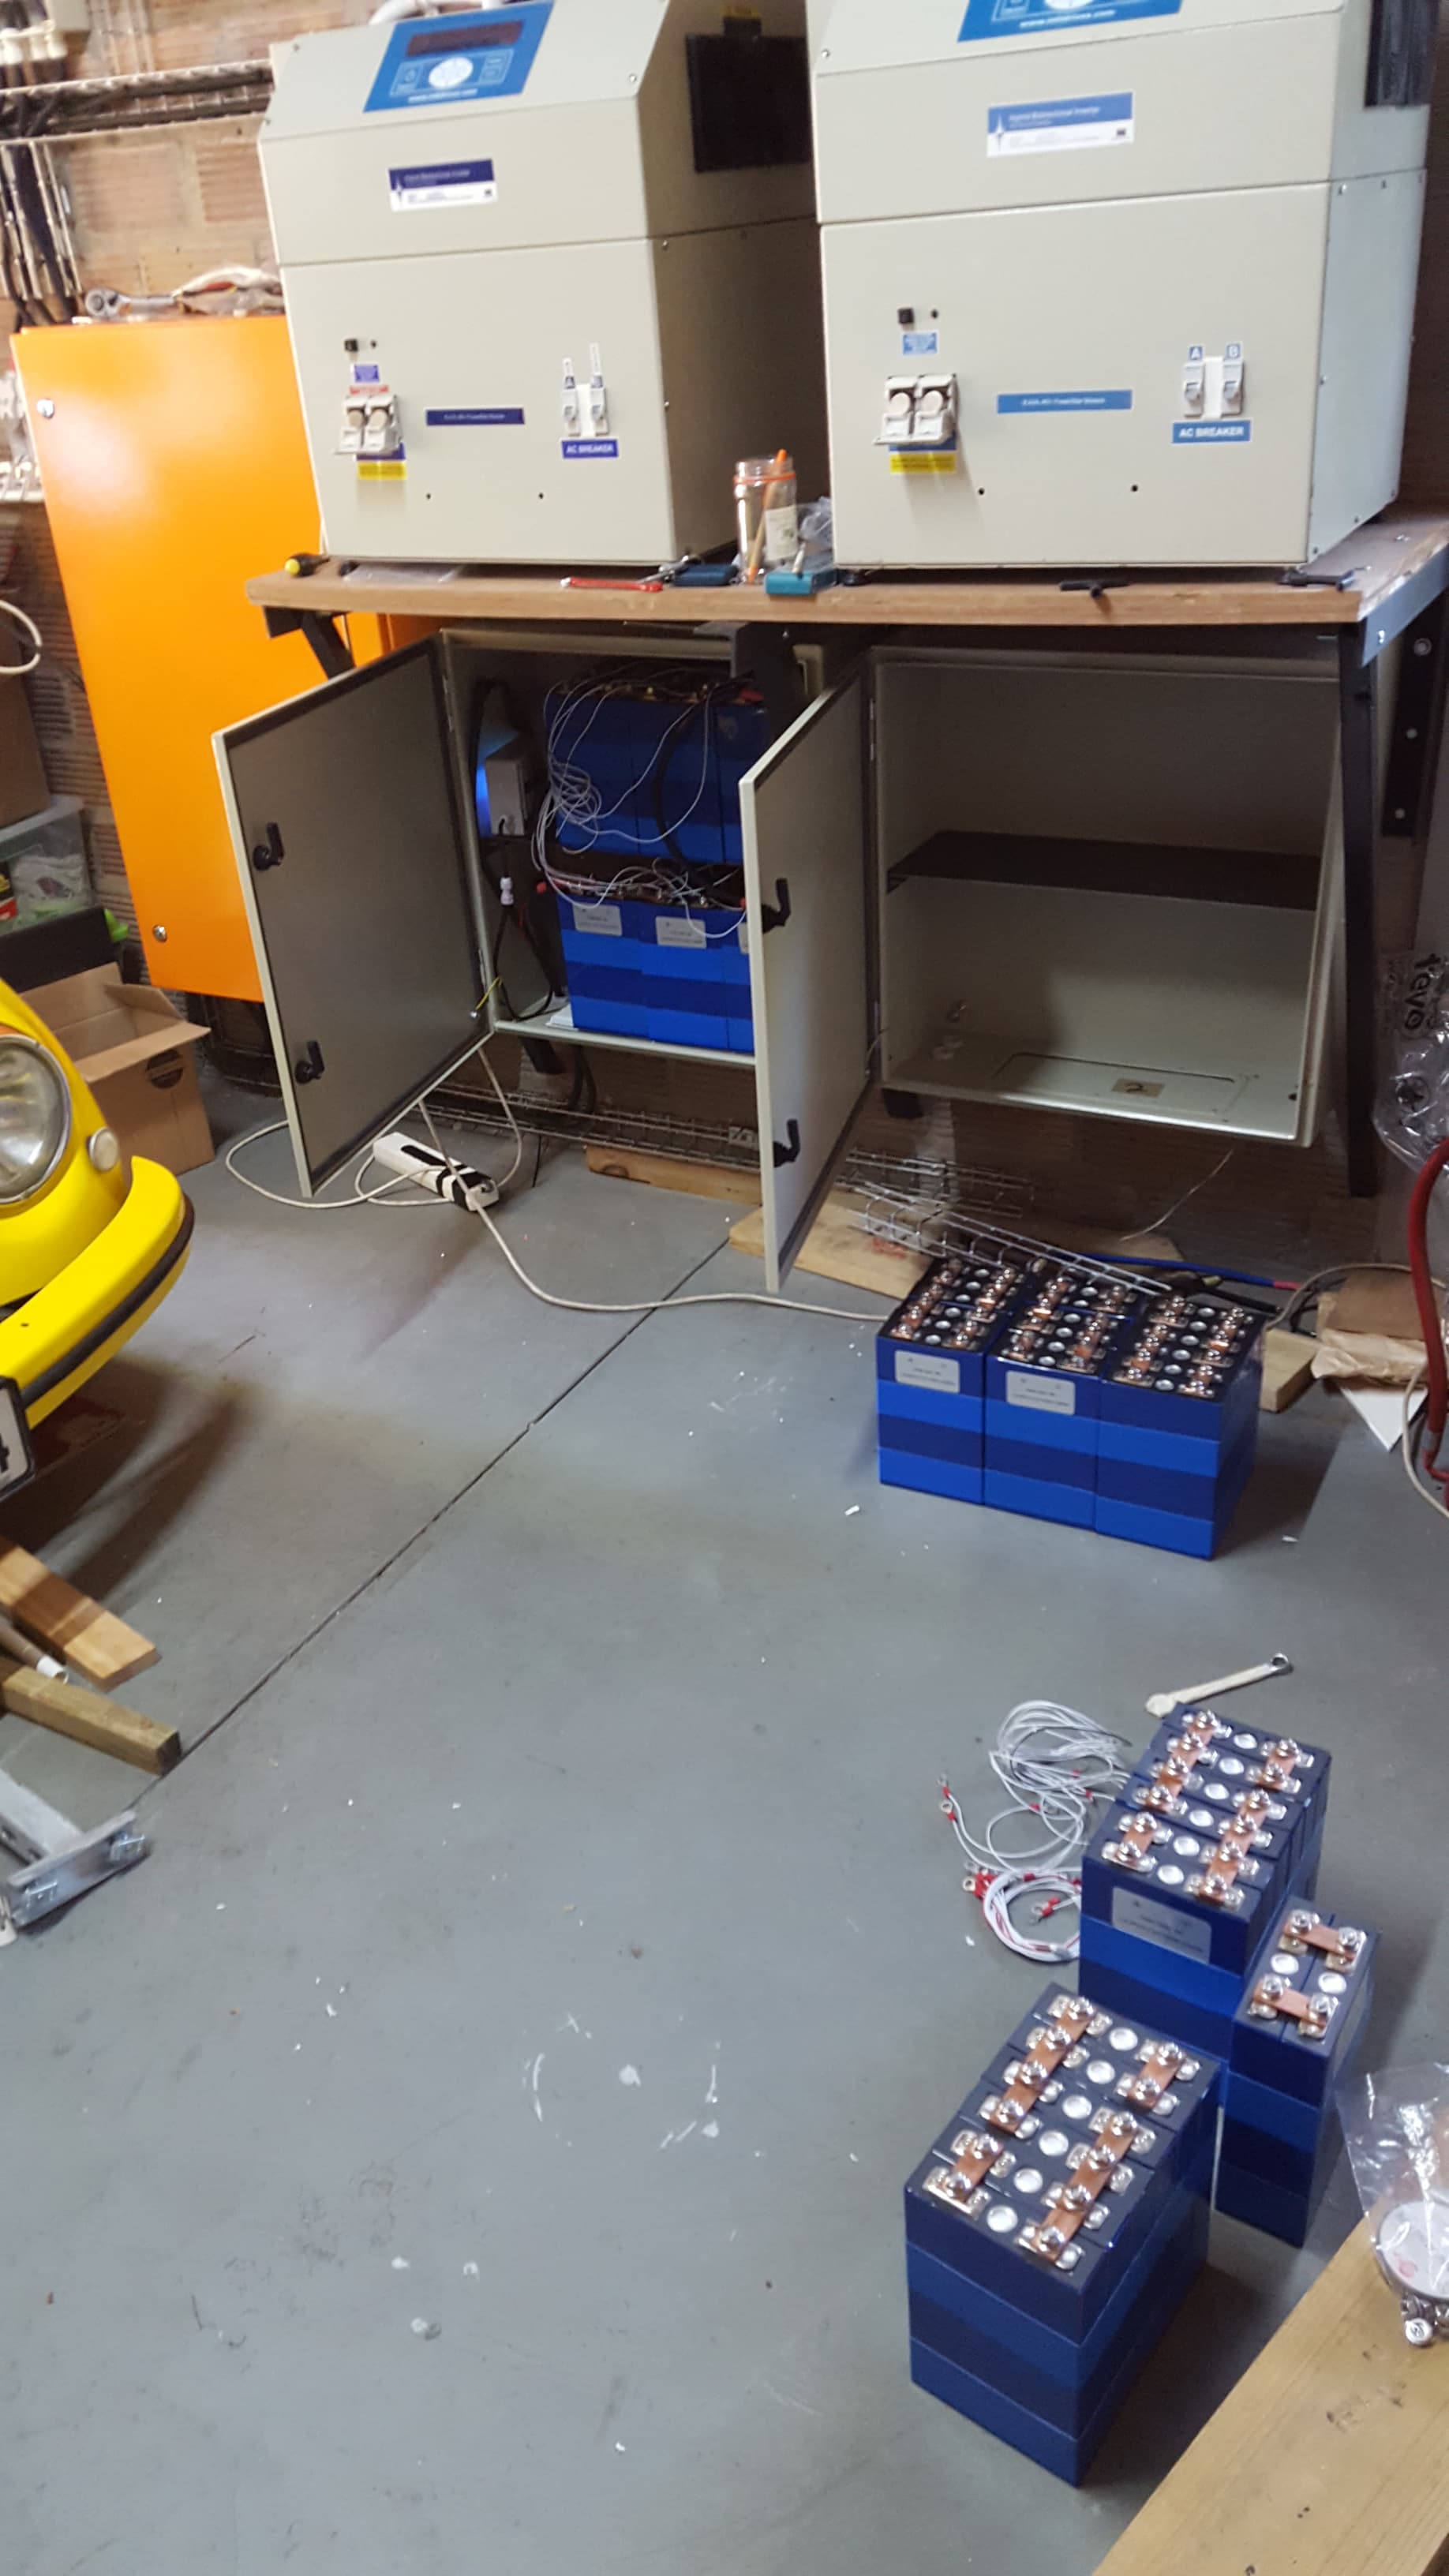
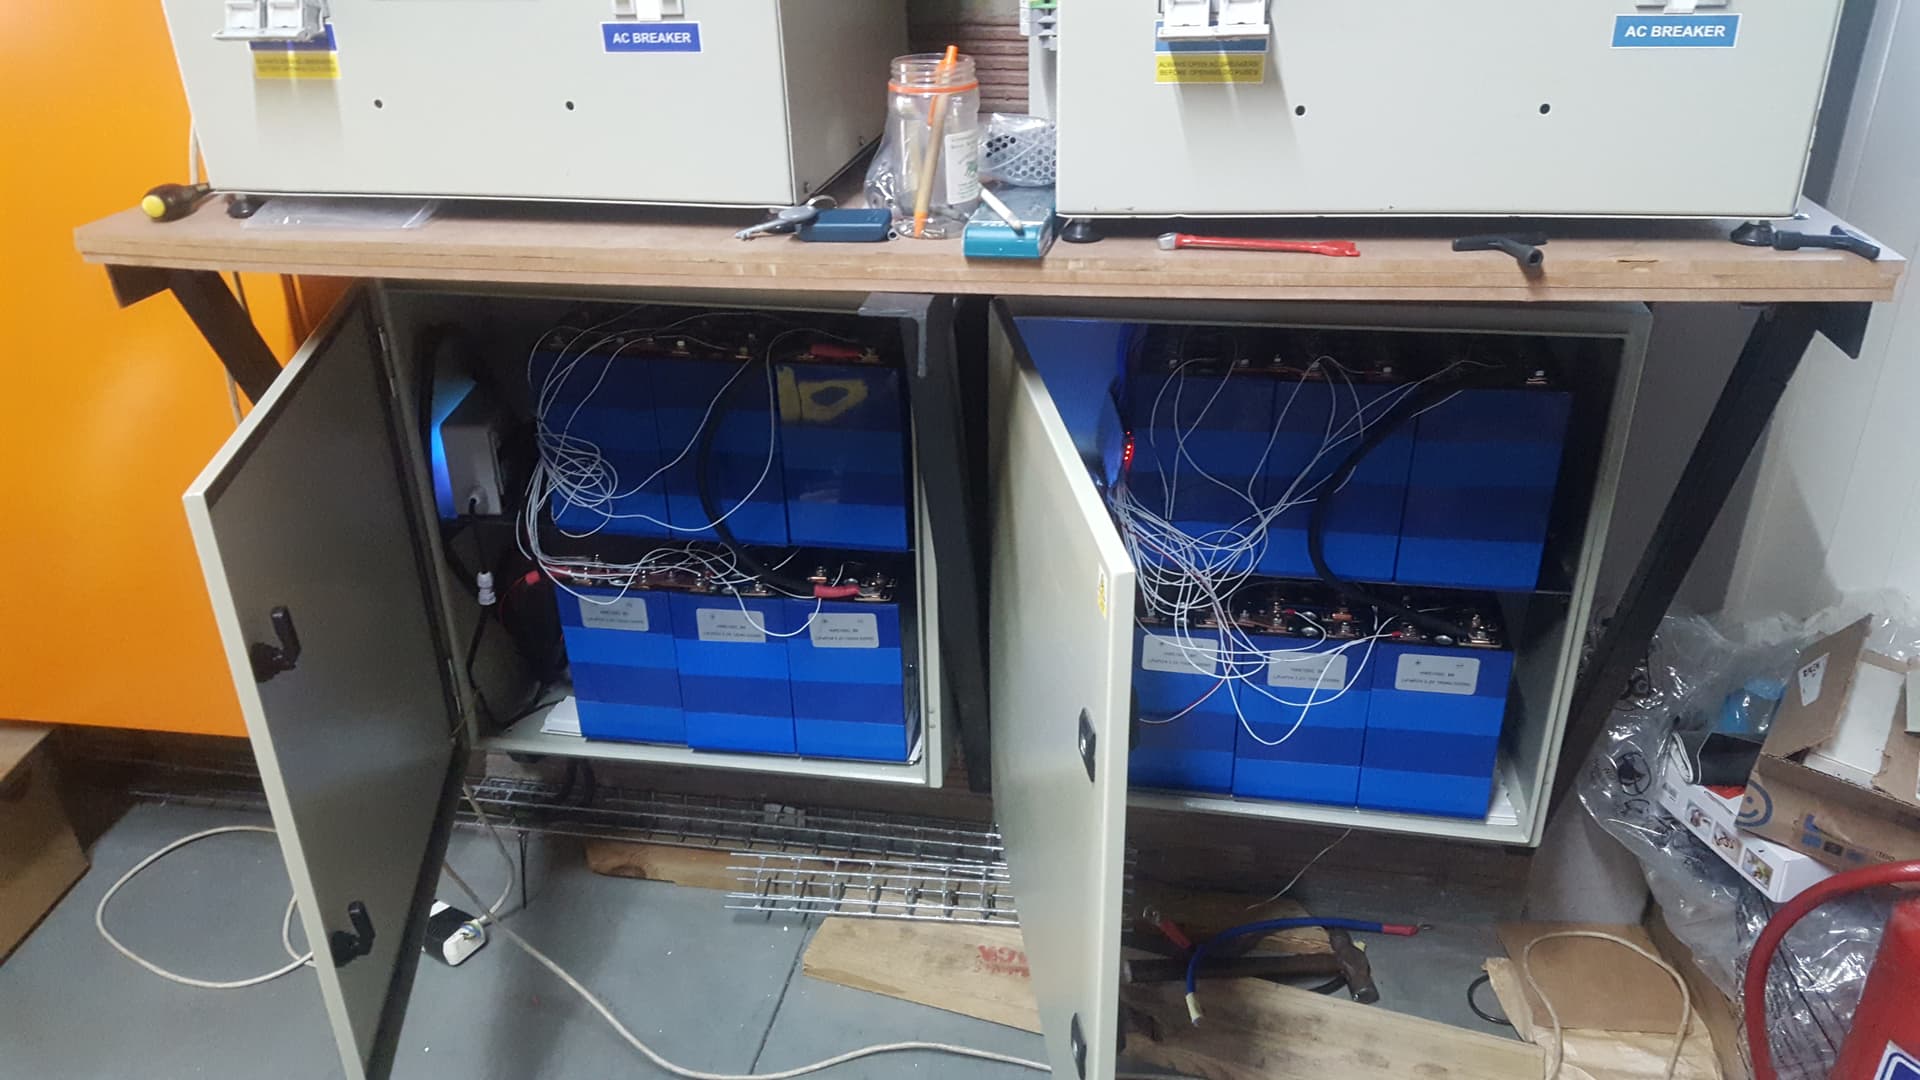
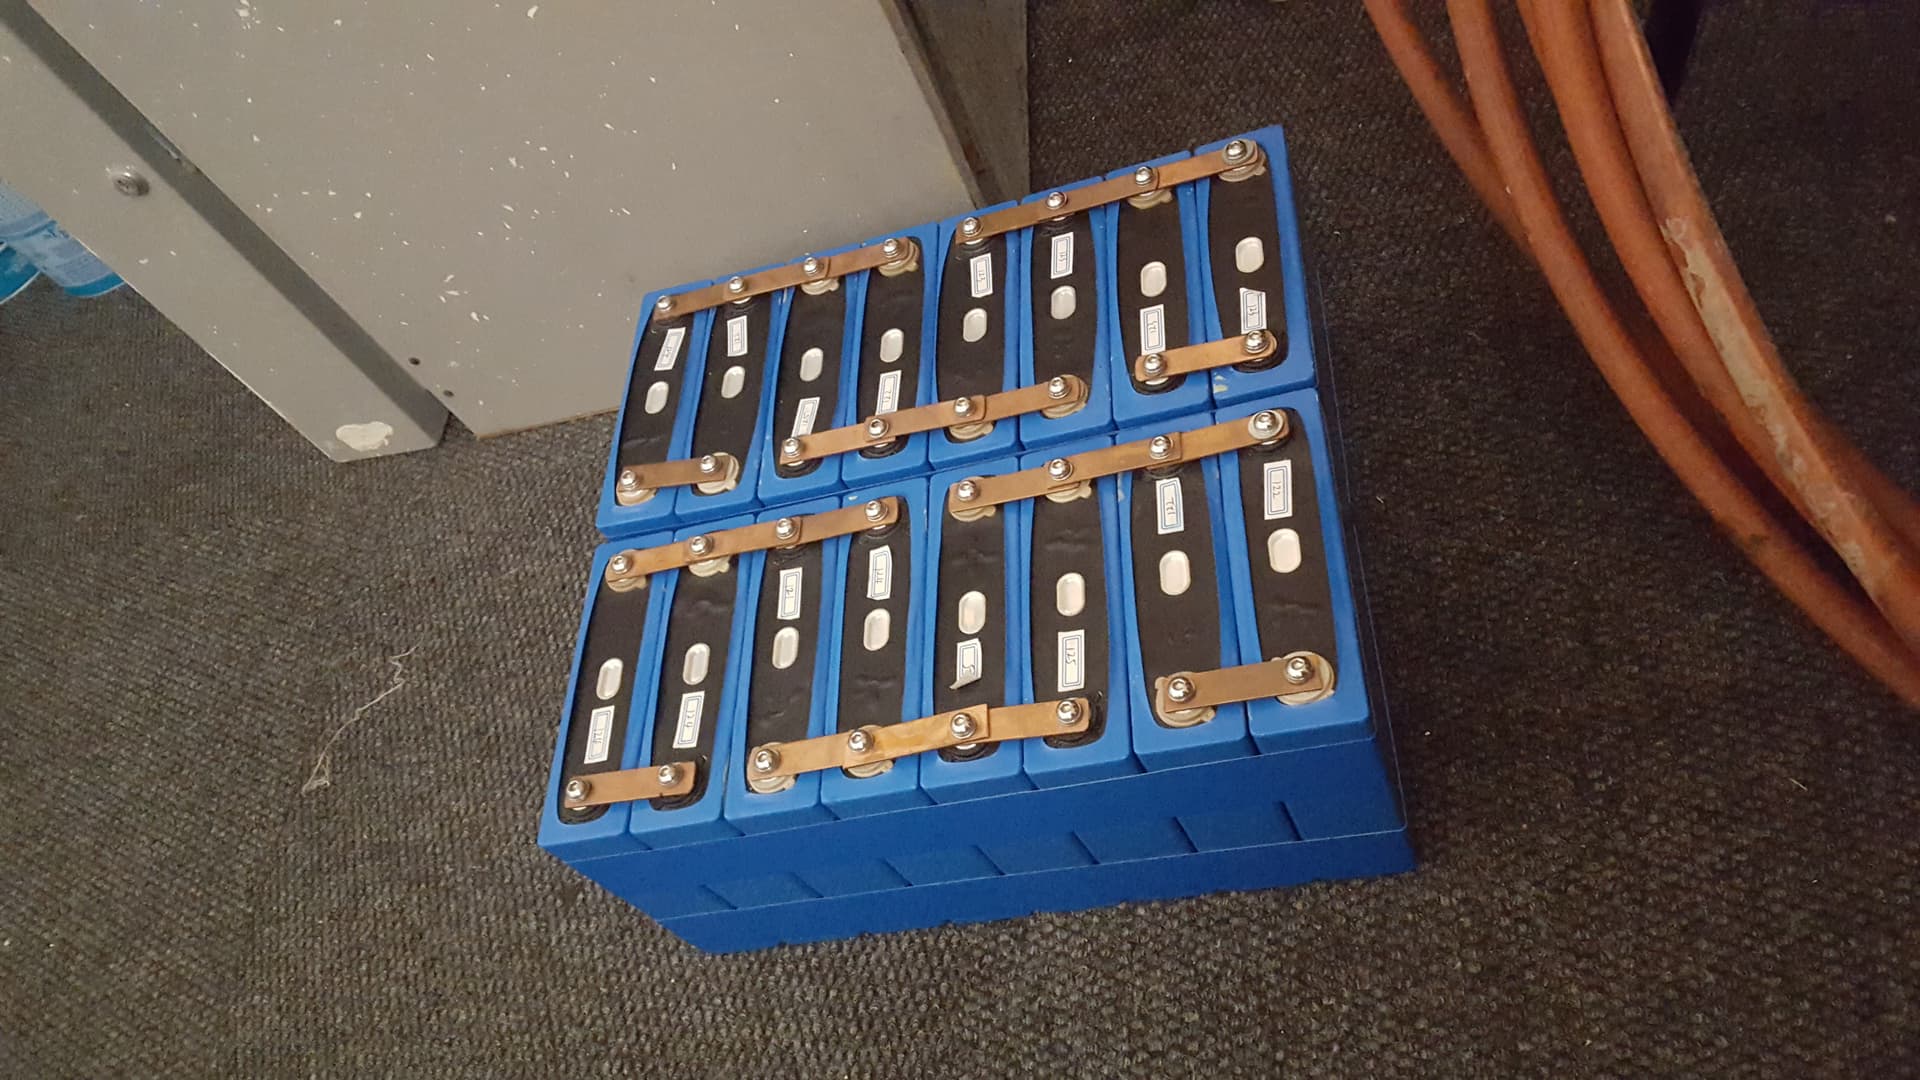
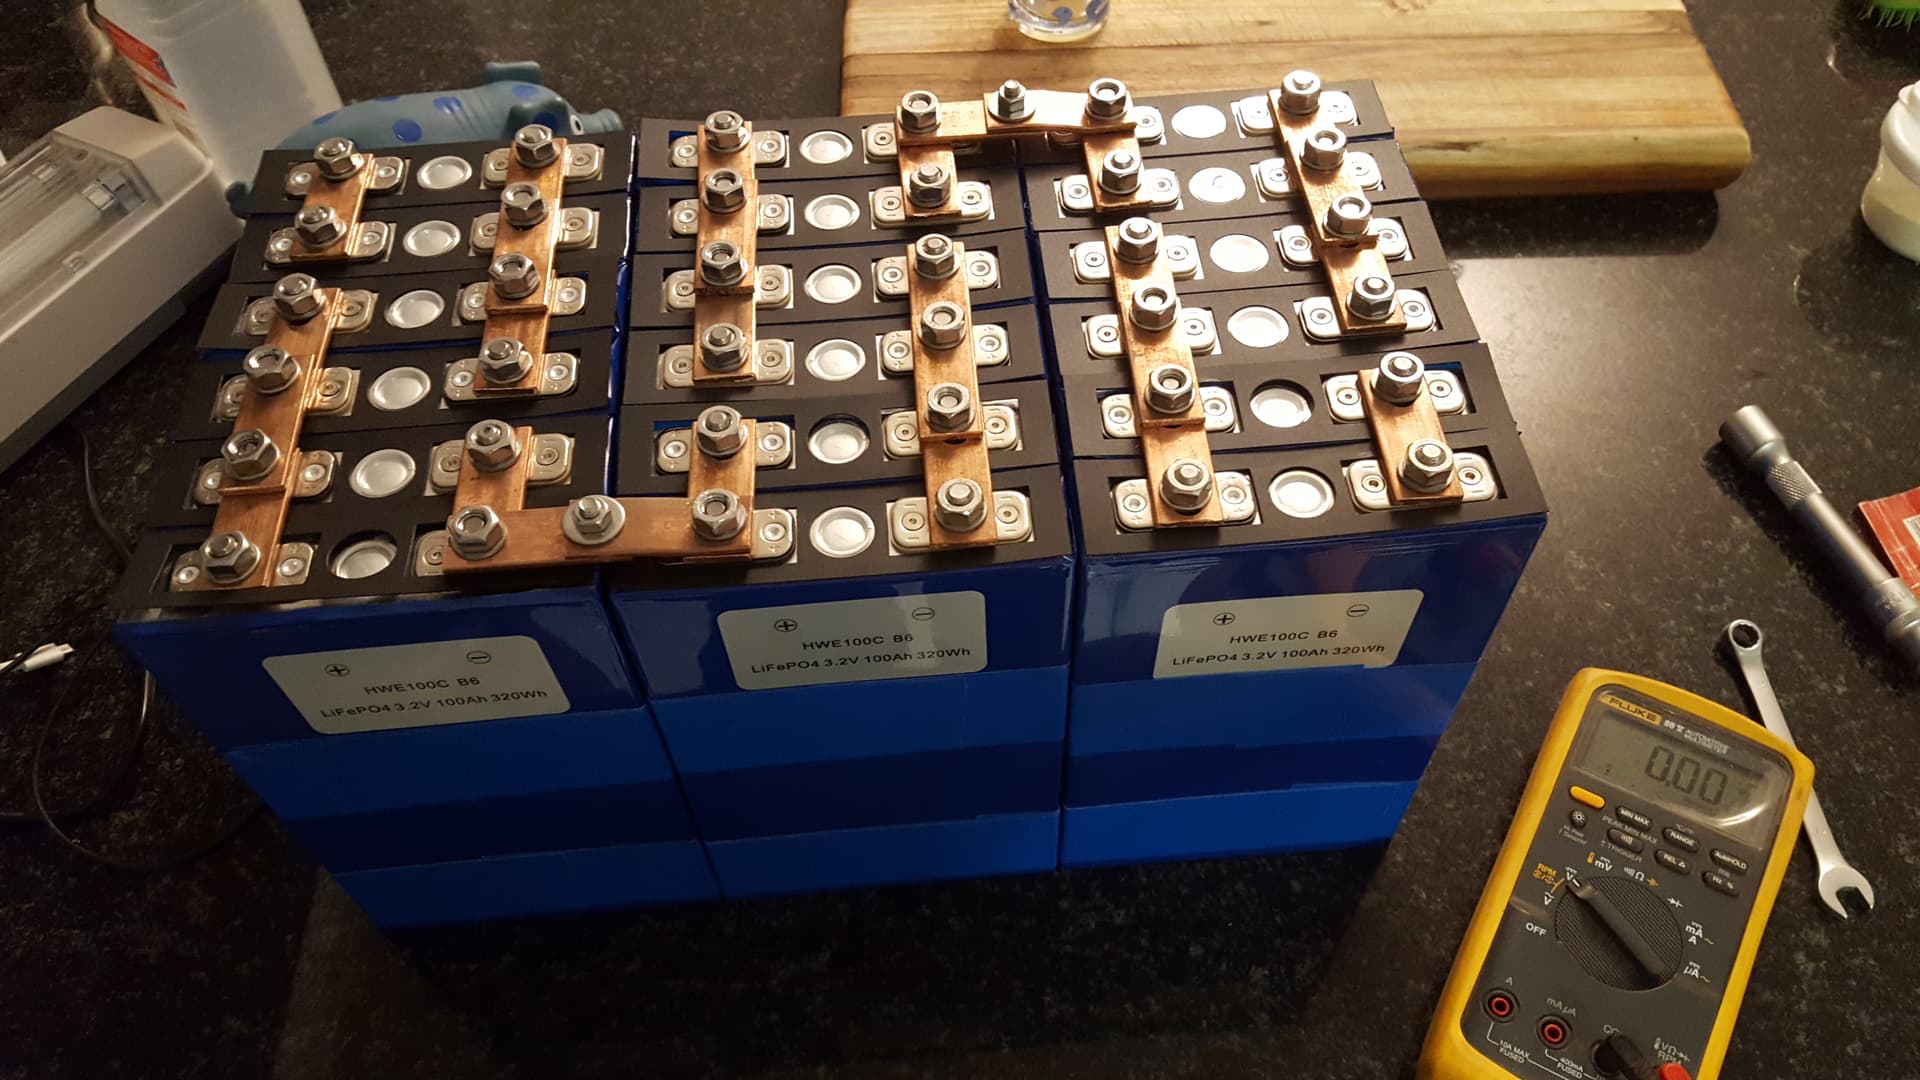
16s2p 100ah sells. Every enclosure is holding 200ah of storage running an Smart Ant+ Bms.
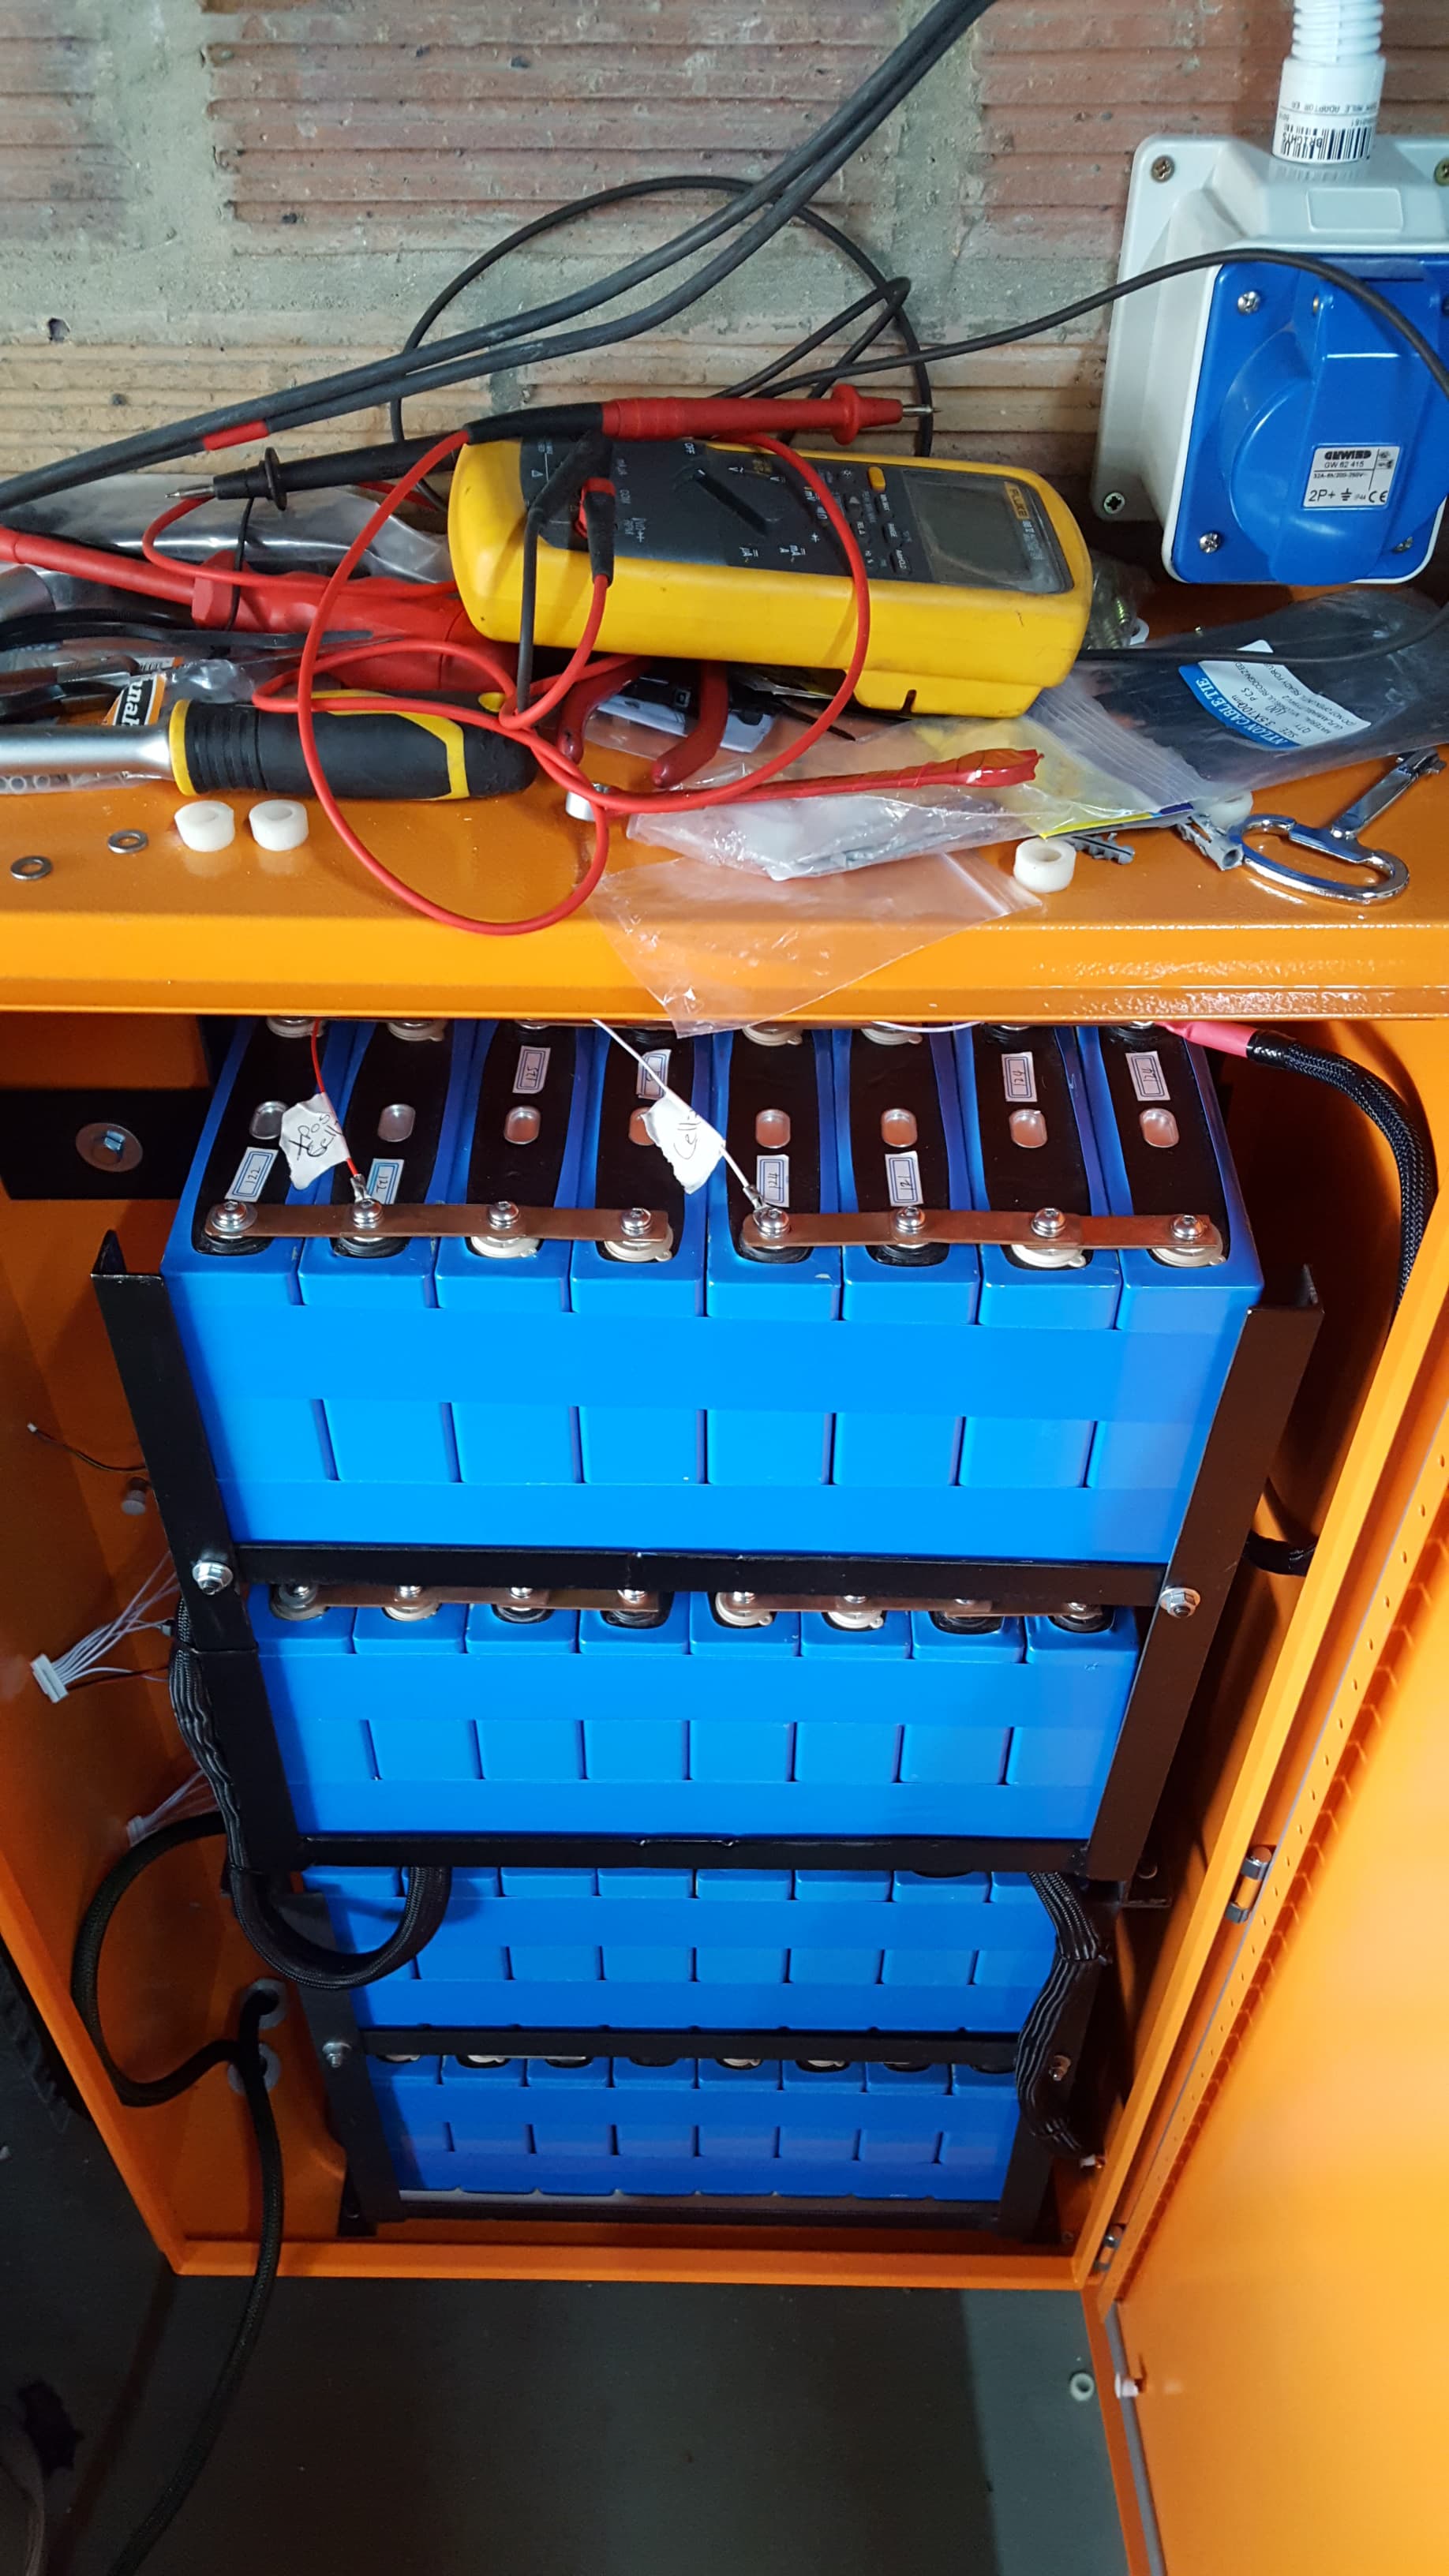
16s2p with 140ah storage sells that. Combination is 280ah.
So over the weekend I did small test run to see how the Victron mppts work and I’m really impress. Took 4 of the 430w panels to the front garden running solar cable to the one PV combiner box that is connected to the 250/100. Charge the 200ah units and some point it was hanging long around 1.8kw on the PV side.
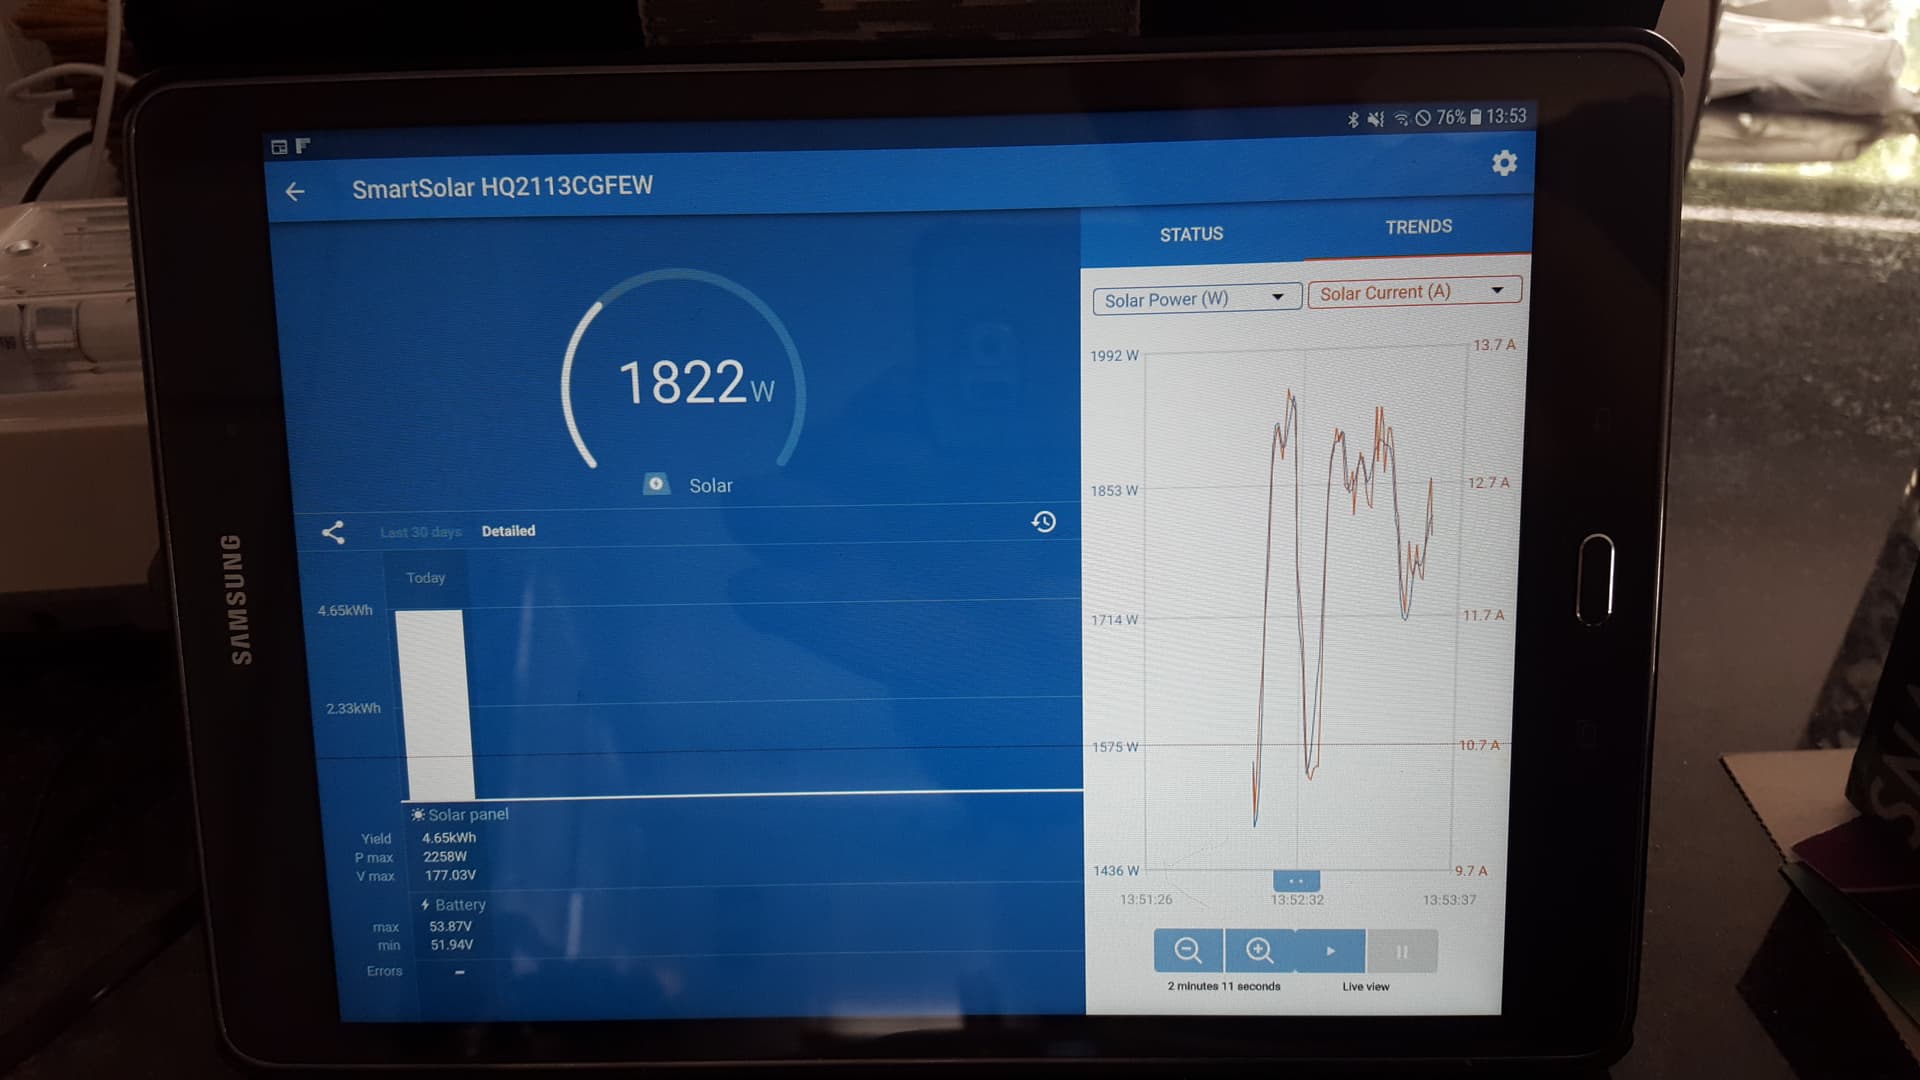
Did 7.9kwh for the Saturday and 9kwh for the Sunday charging the last bit on the 200ah units and then 280ah unit.
5 Likes
I guess I need to to a bit of update. So last few weeks was a busy one. Built a gray water system for the wife garden and between this sorting out building plans for the house and between al this the solar setup.
Submitted my forms last week to the City of Cape town for my SSEG before stacking any panels on my roof because they now on everyone case if you didn’t submit.
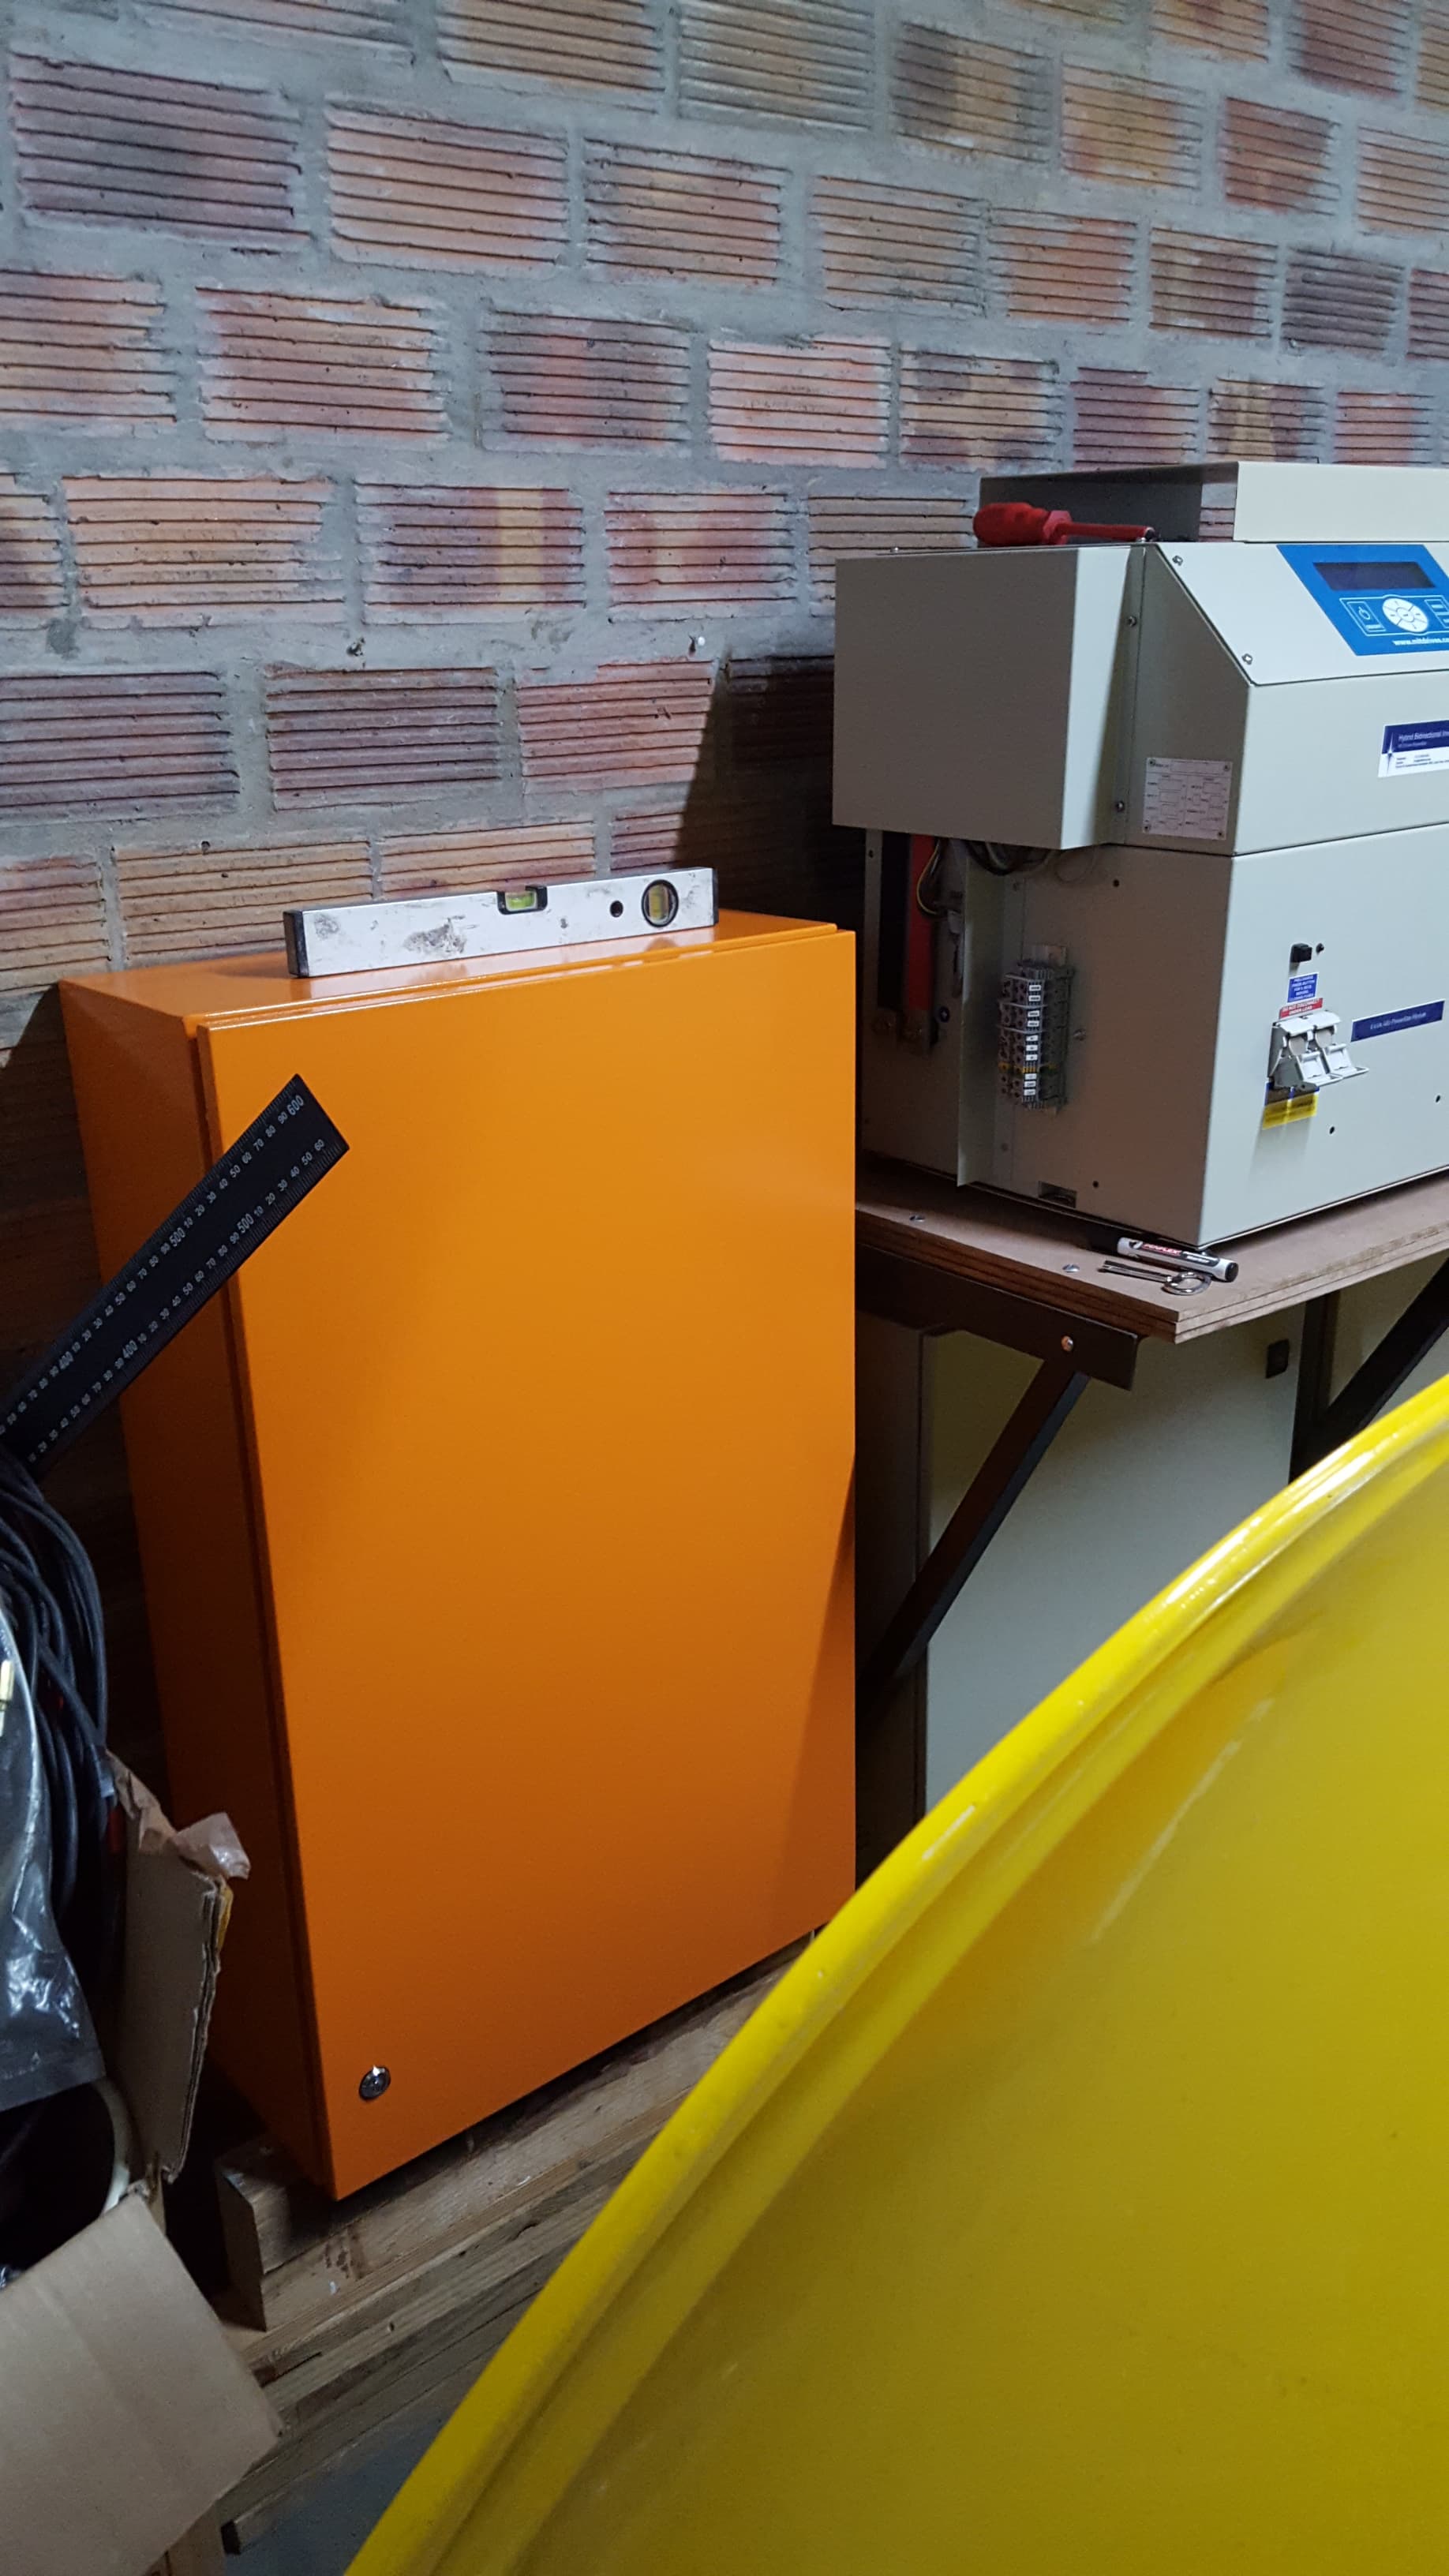
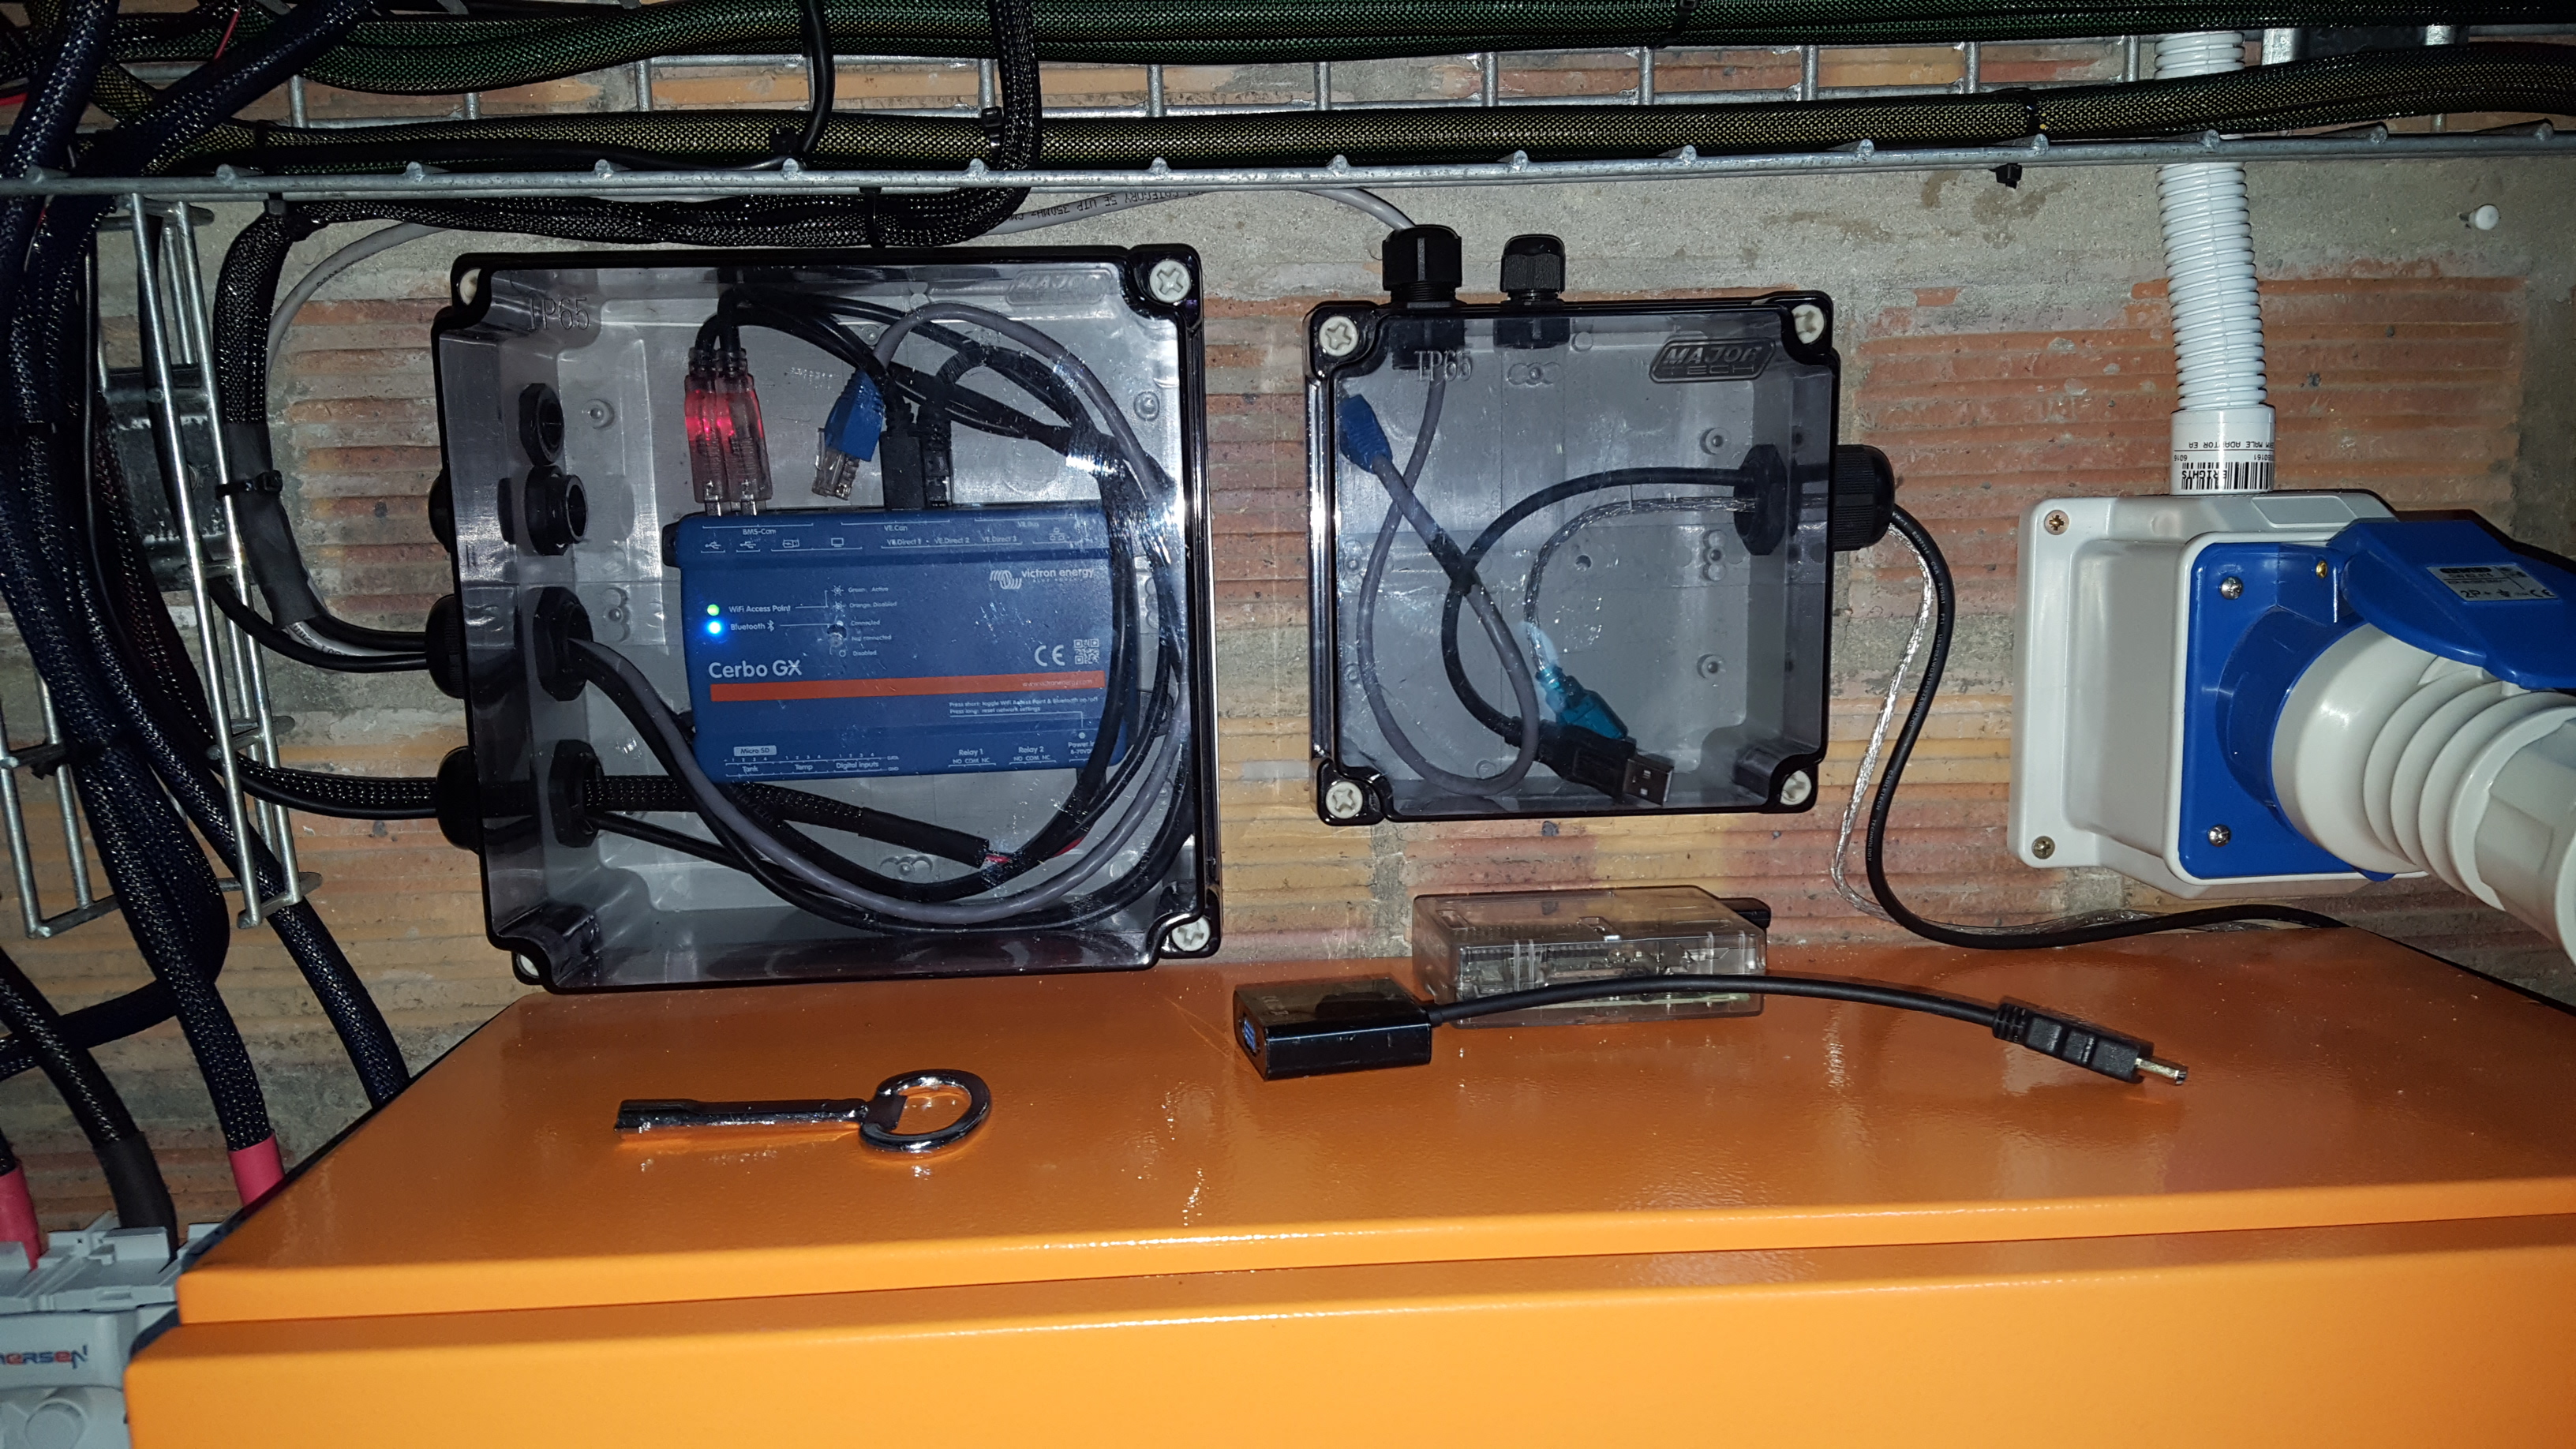
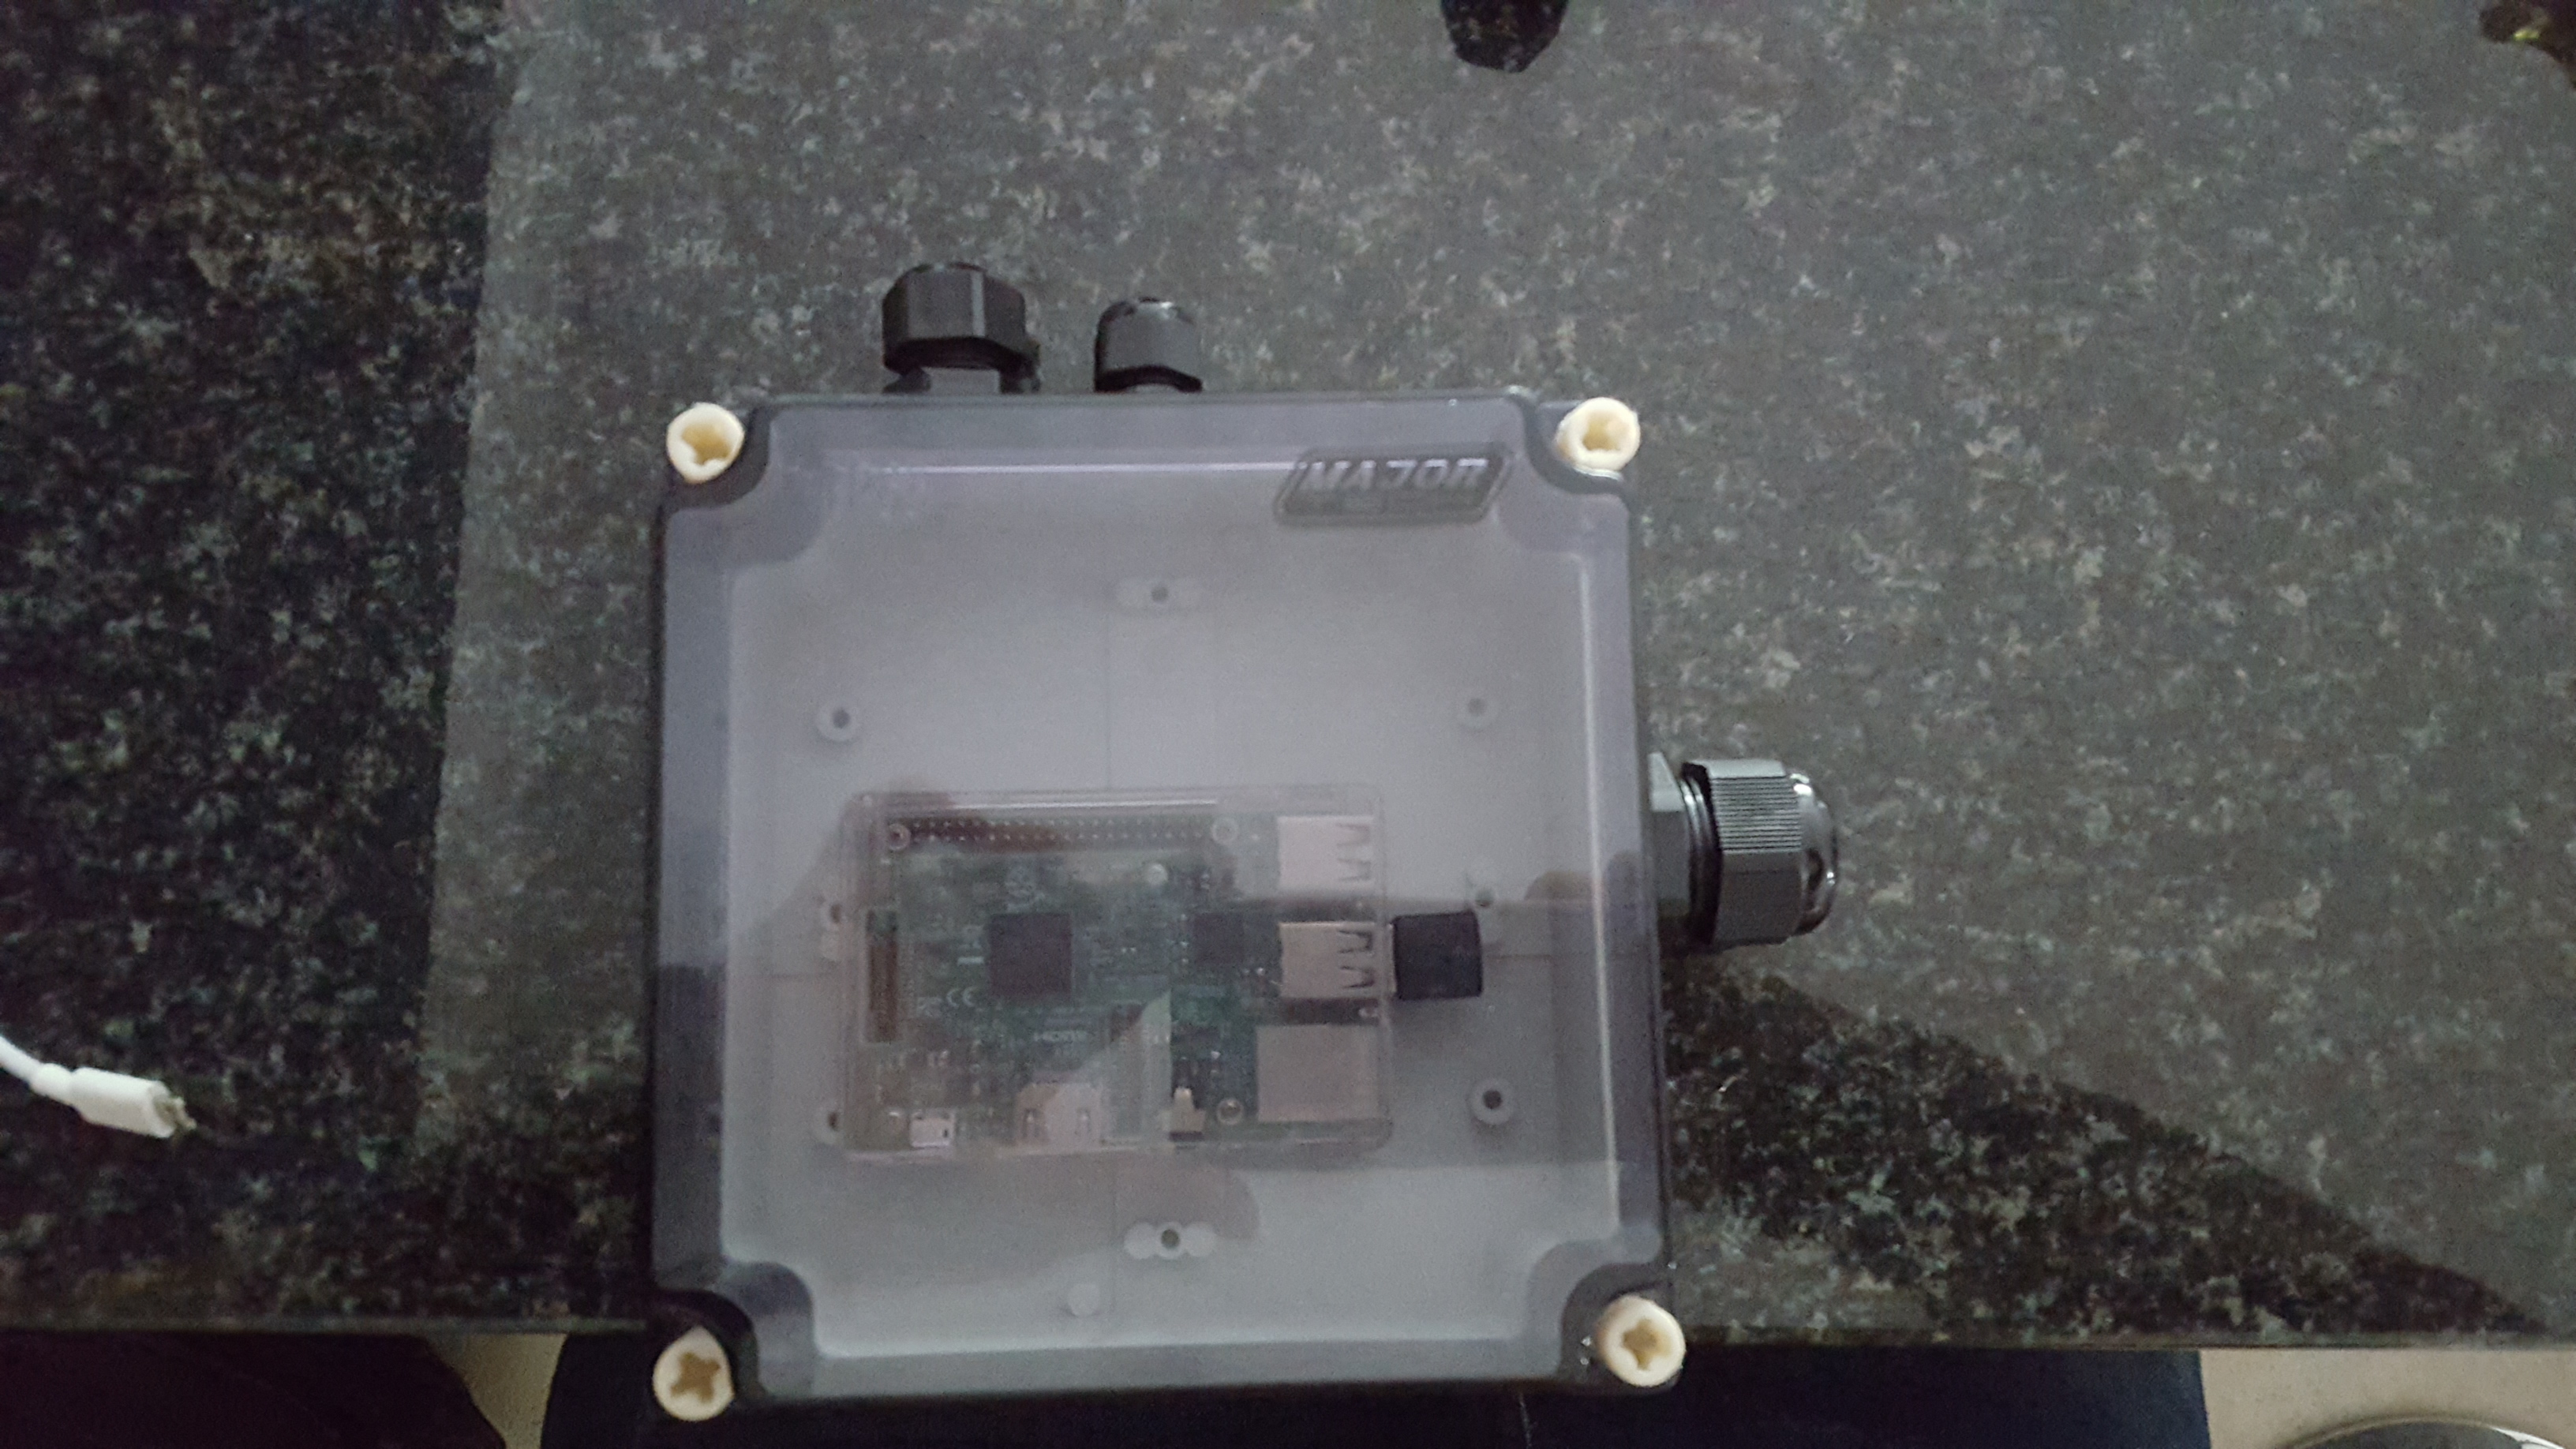
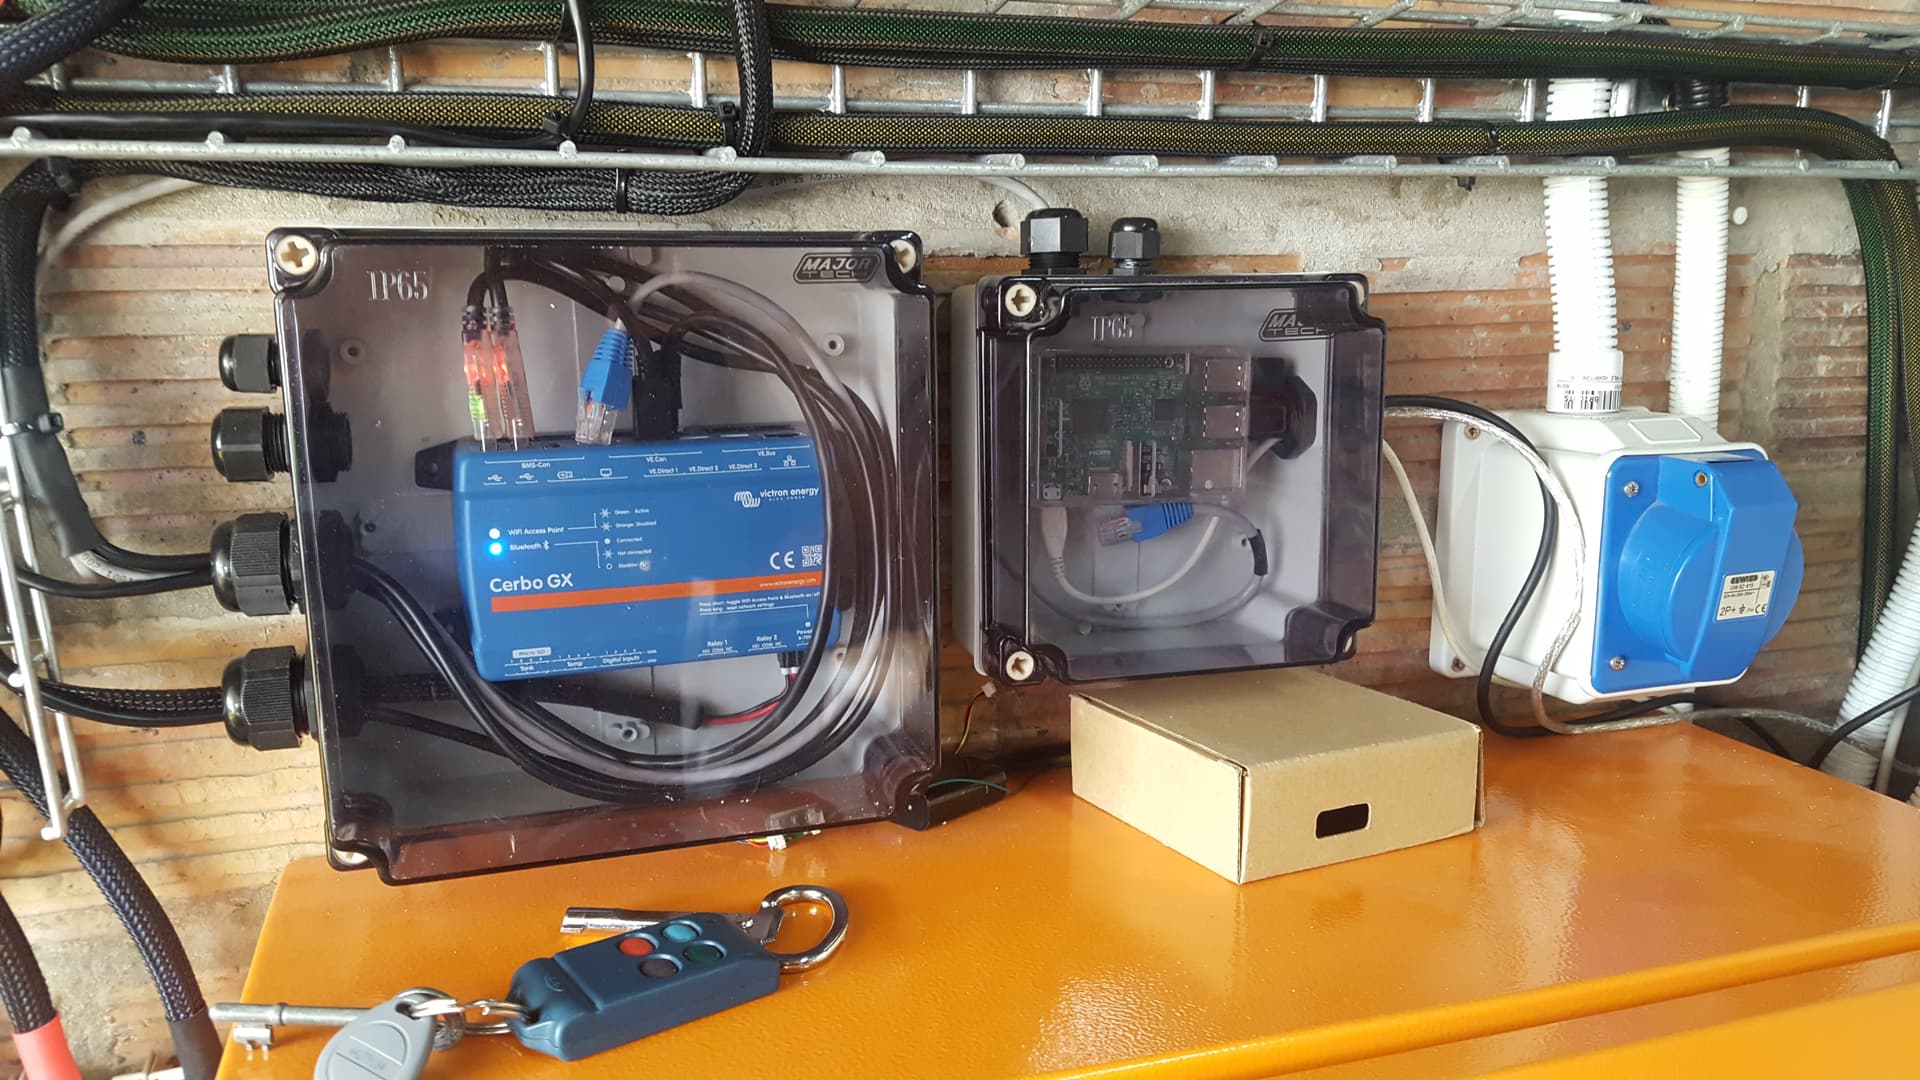
Mounted enclosure for the the Cerbo and for the Pi that runs the bridge software for the inverters. Change the 25mm conduit pipe to trunking because if found out quickly that 6 x 10mm2 wire and 3 x 6mm2 will not fit. Network cables and the rs485 cables for the Et112 is running in their own trunking. I still need to do a network switch setup for the house and garage because the wifi is just to far the Pi and the Cerbo sometimes lose connection.

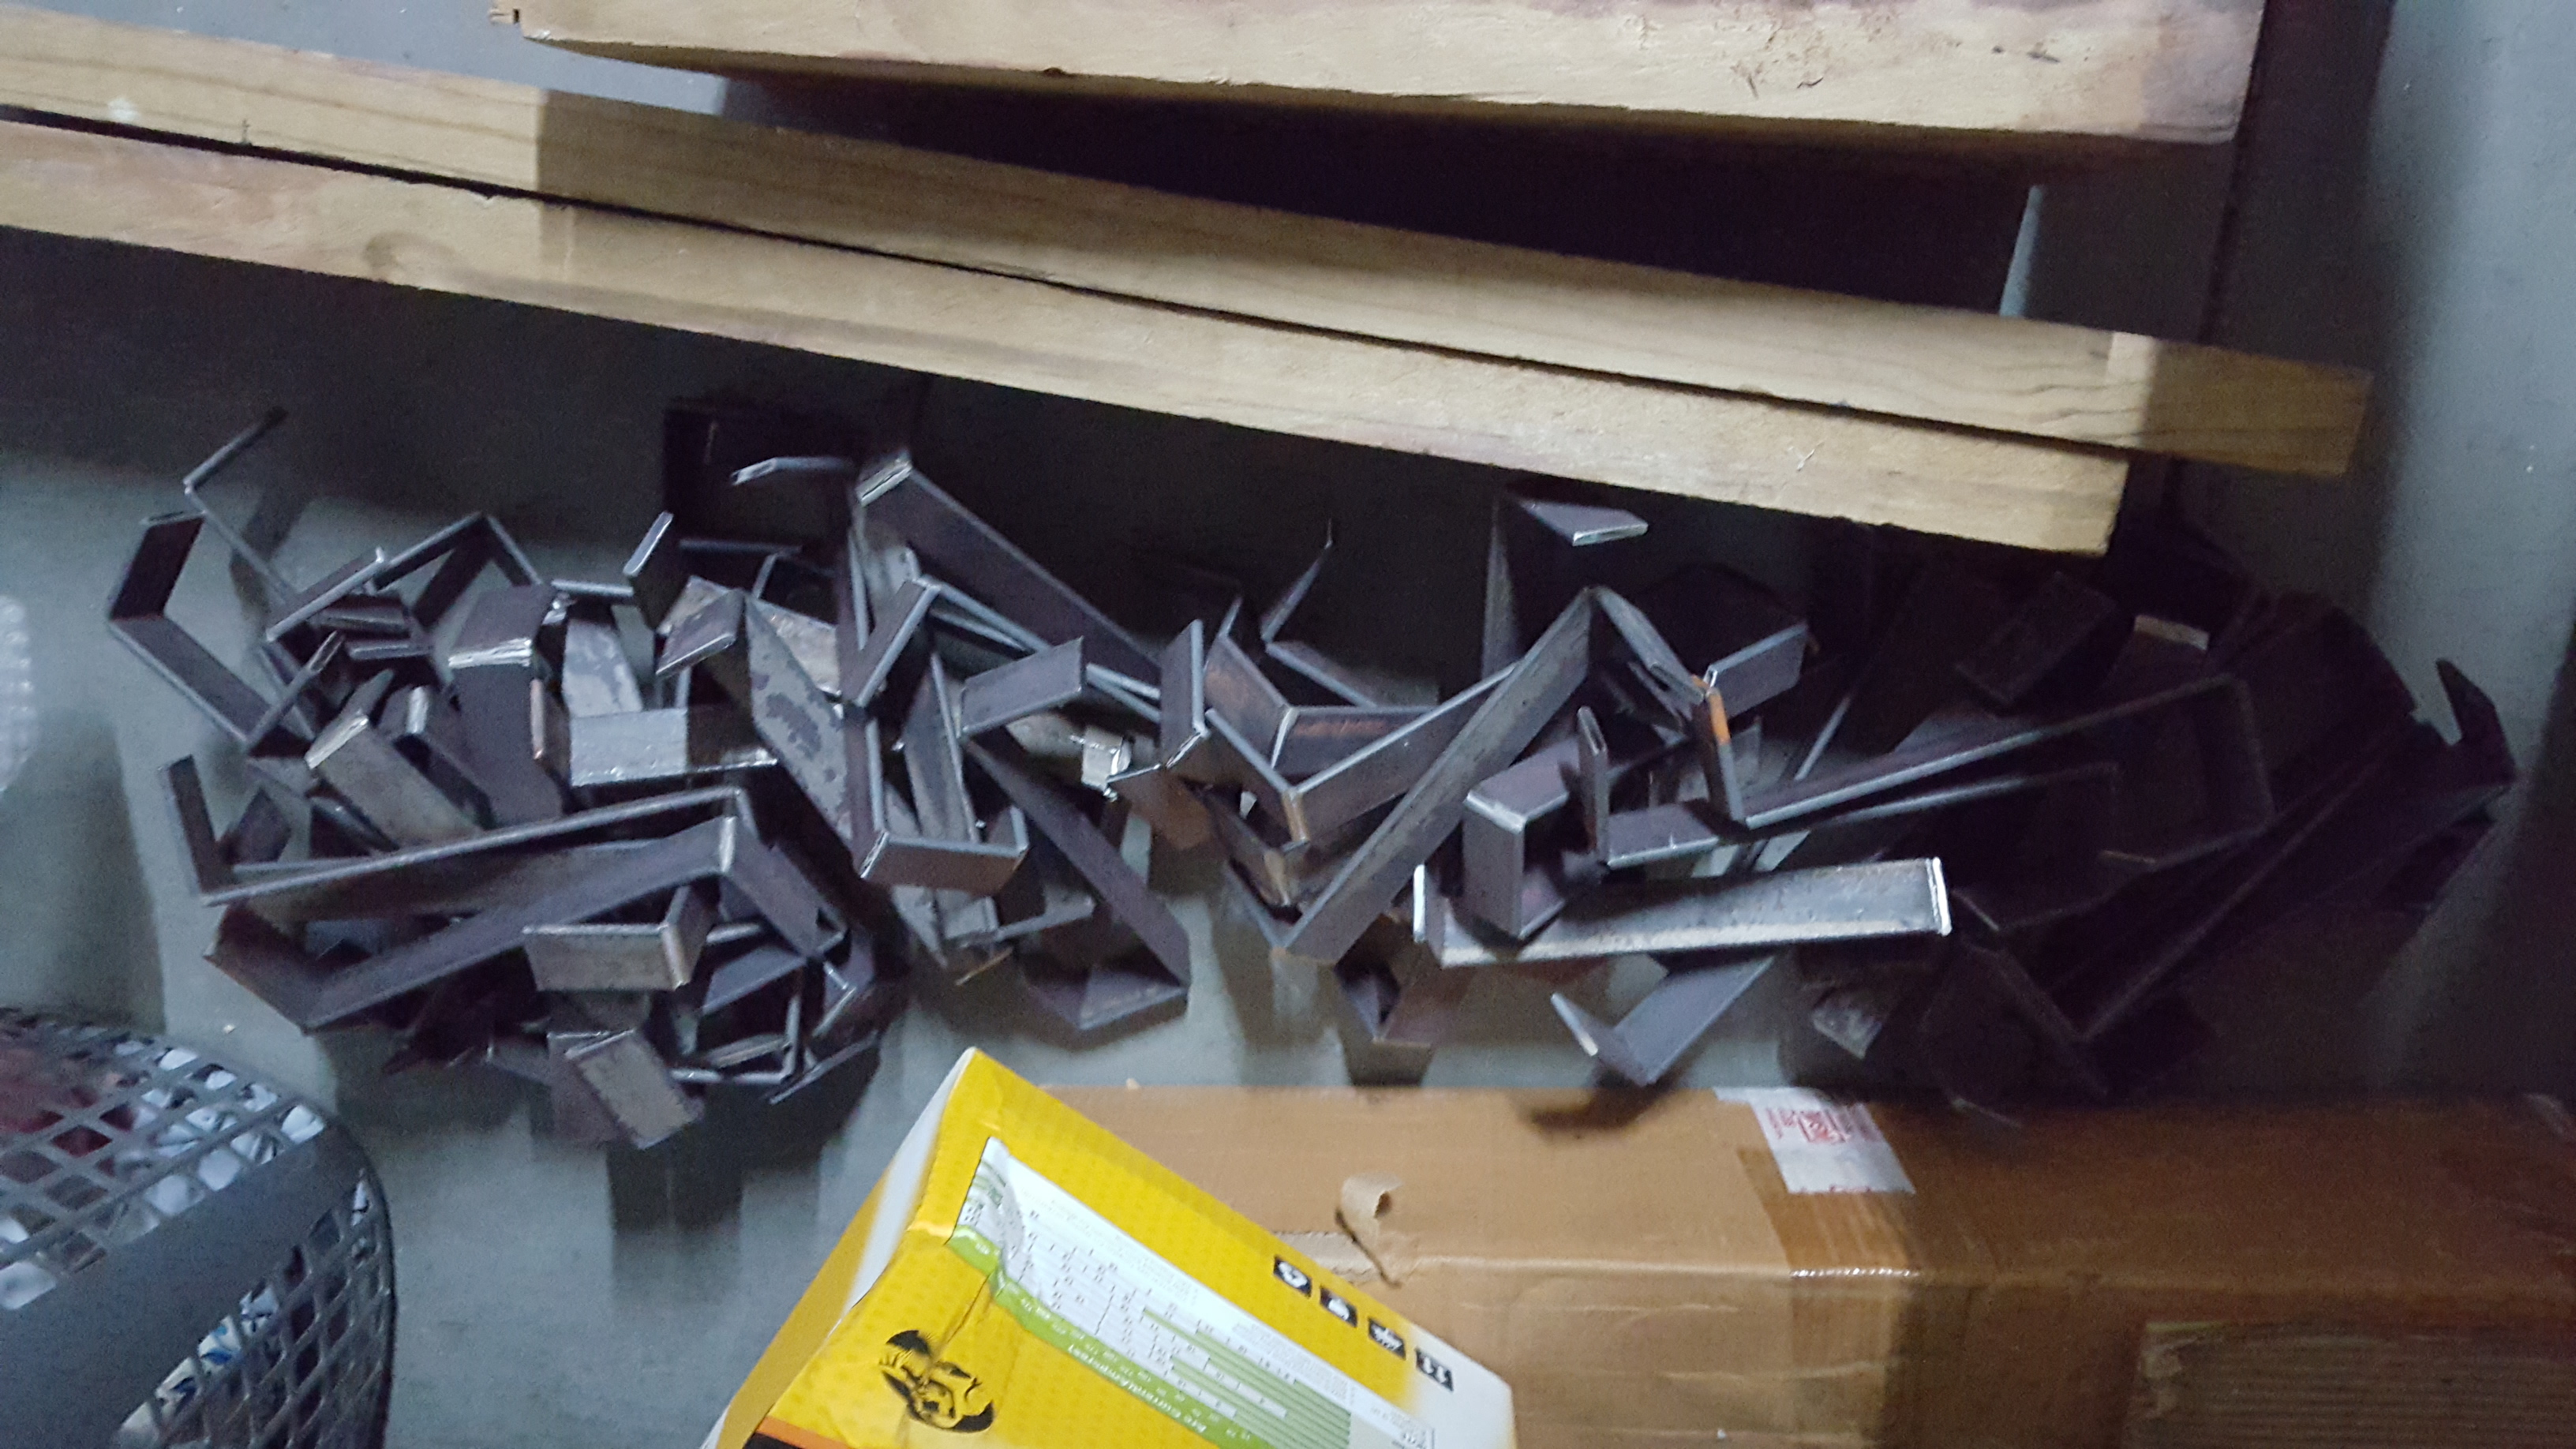
I had to make more roof tile brackets out of 5mm flat bar, 52 of them to add with my other 30 I got that I made for the other house. Had me busy for a few days all the cutting and welding. Forgot how bad a arc weld can tan your arms because i’m use to the my father MIG welder.
Before pic.
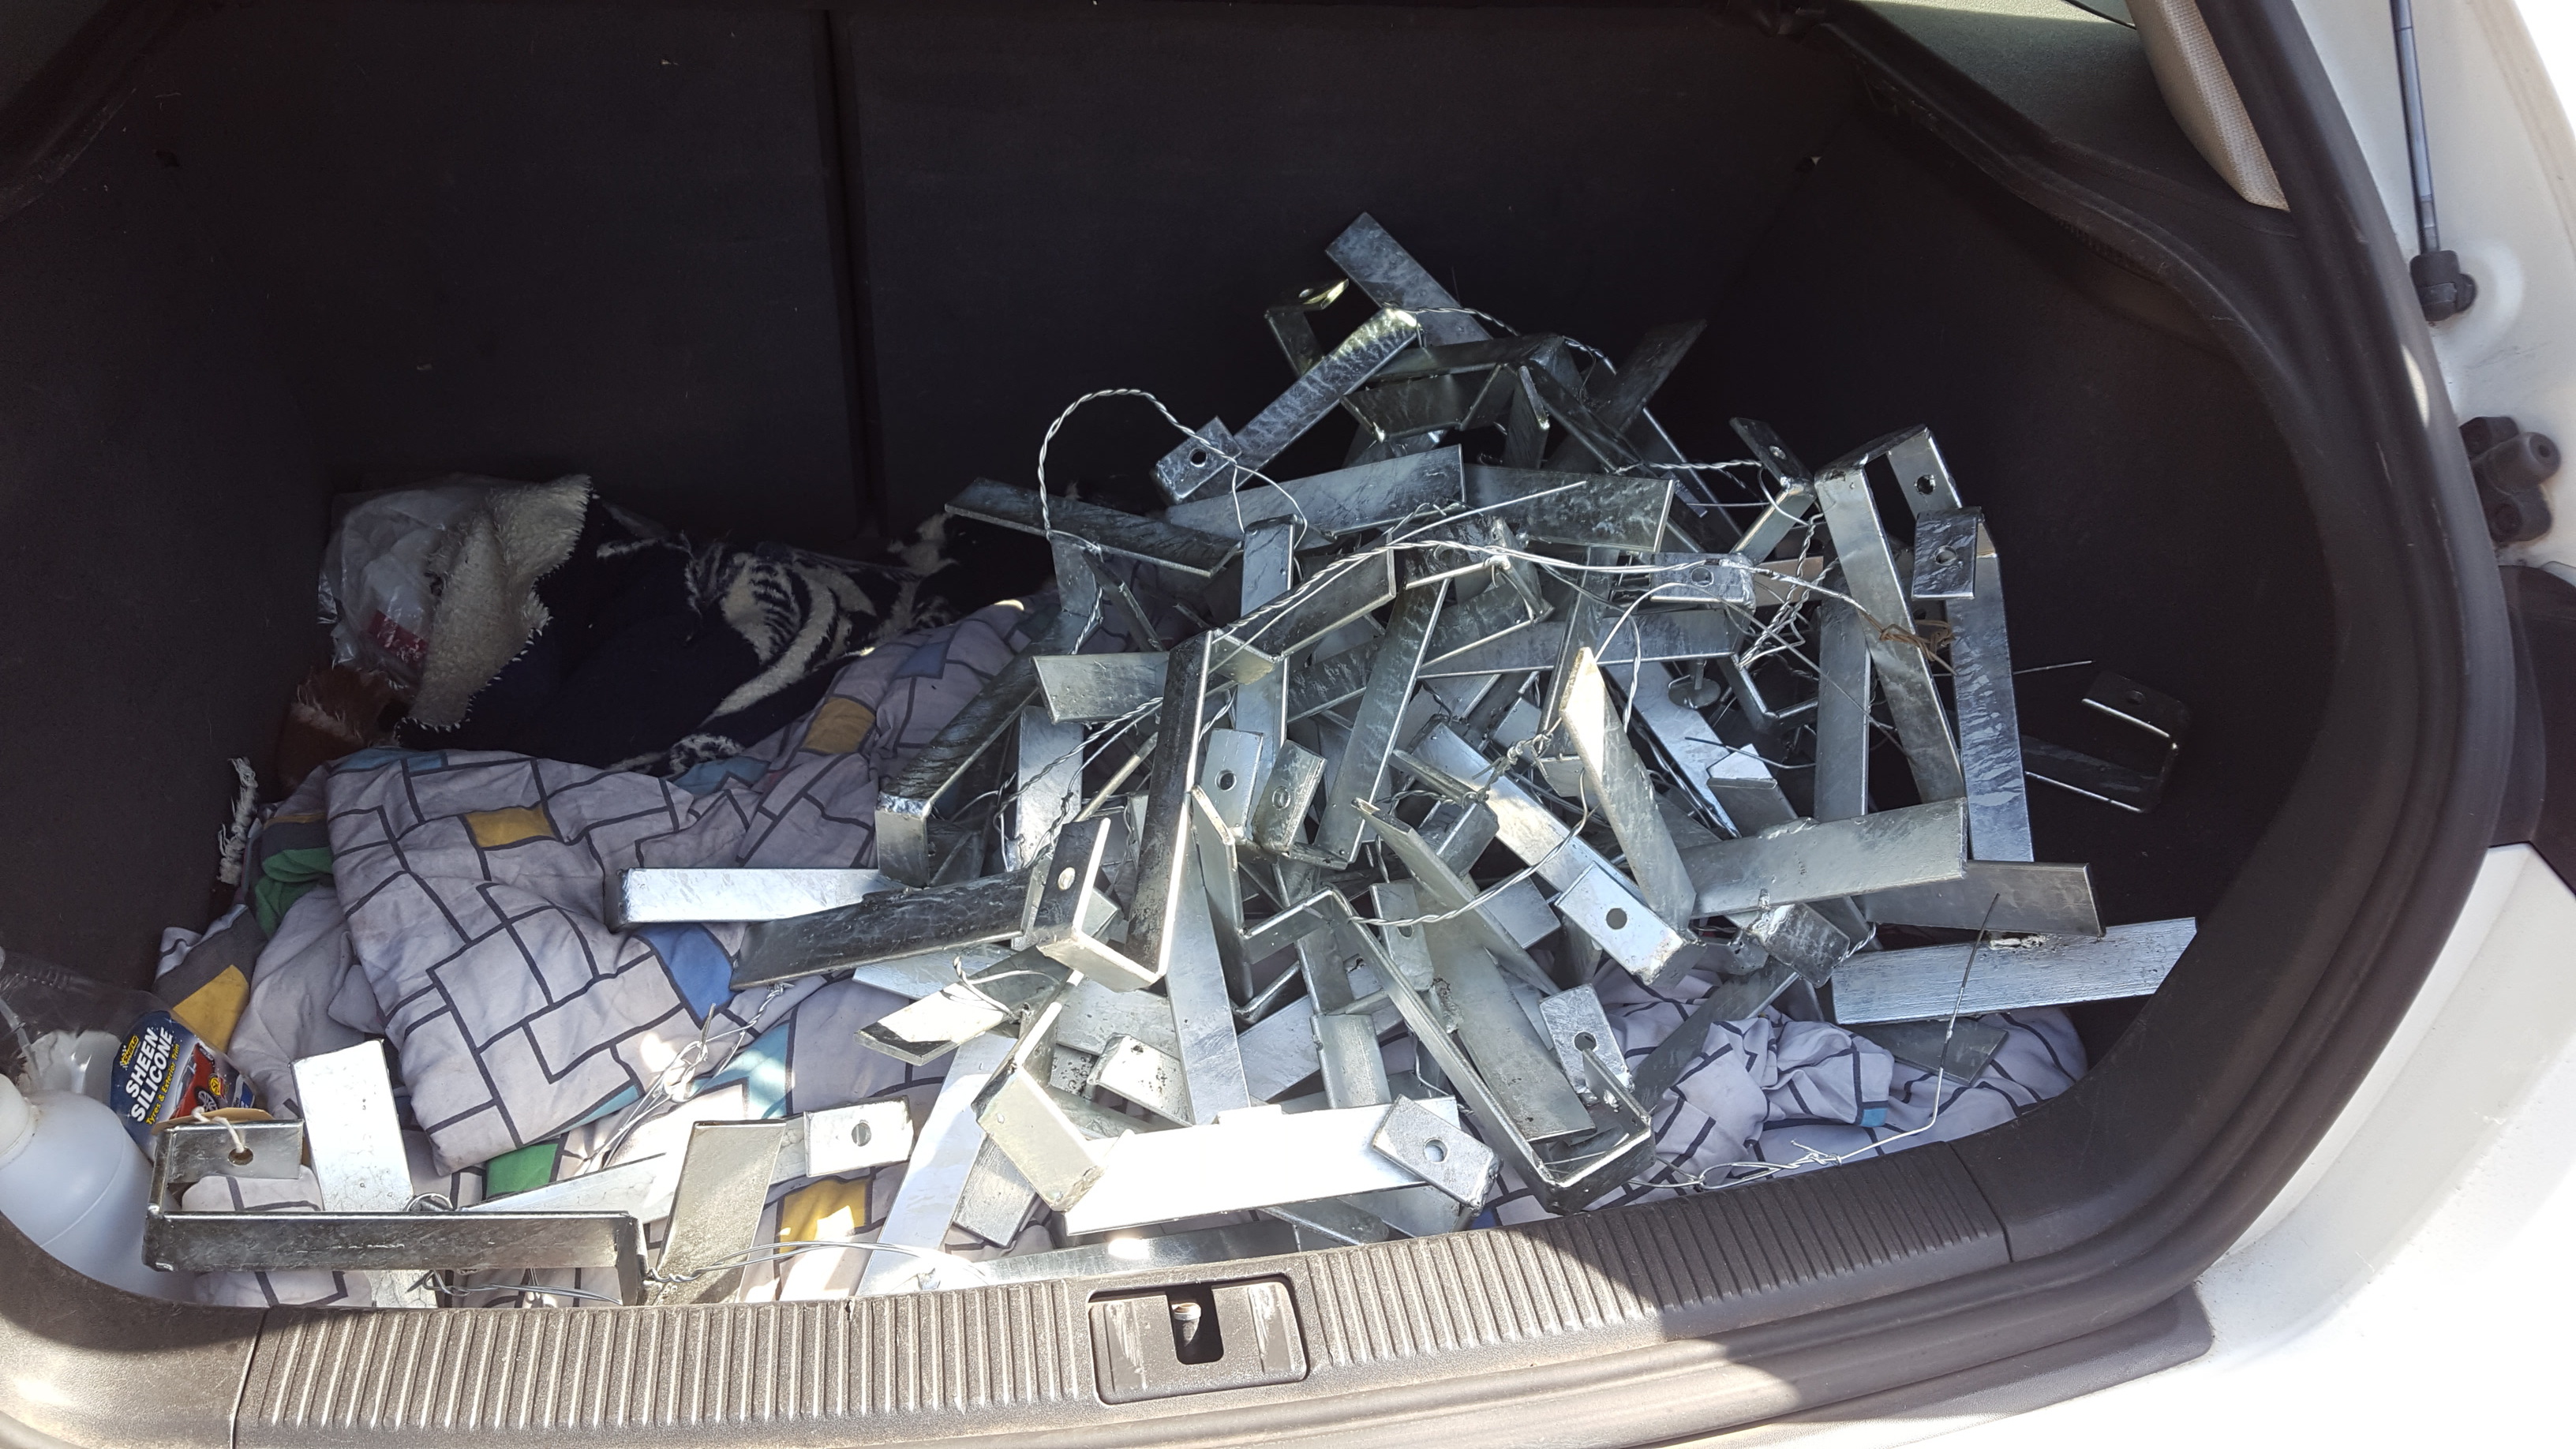
After pic after all the welding and drilling and sending of galv.
The other bracket design I had from my other house.

Twee weekends ago I started to mount the brackets on the North and West side.
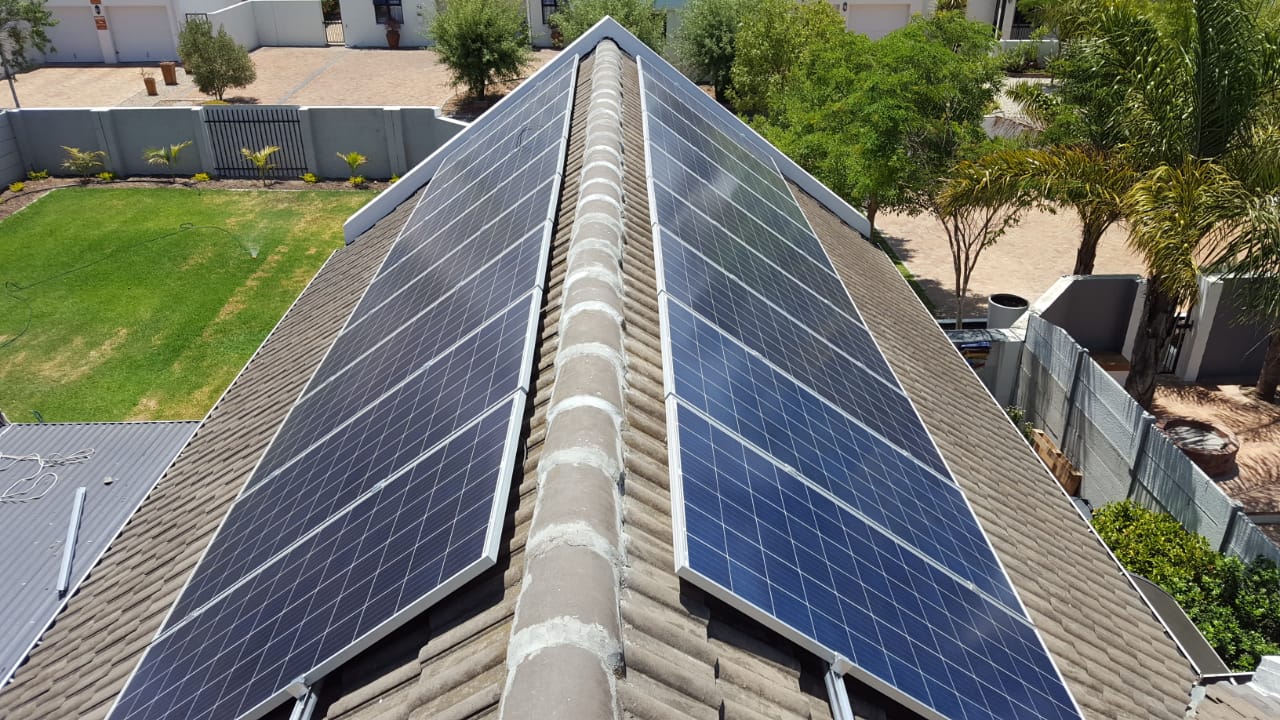
It’s super tight fit but 9 x 430w panels will fit on the north facing roof.
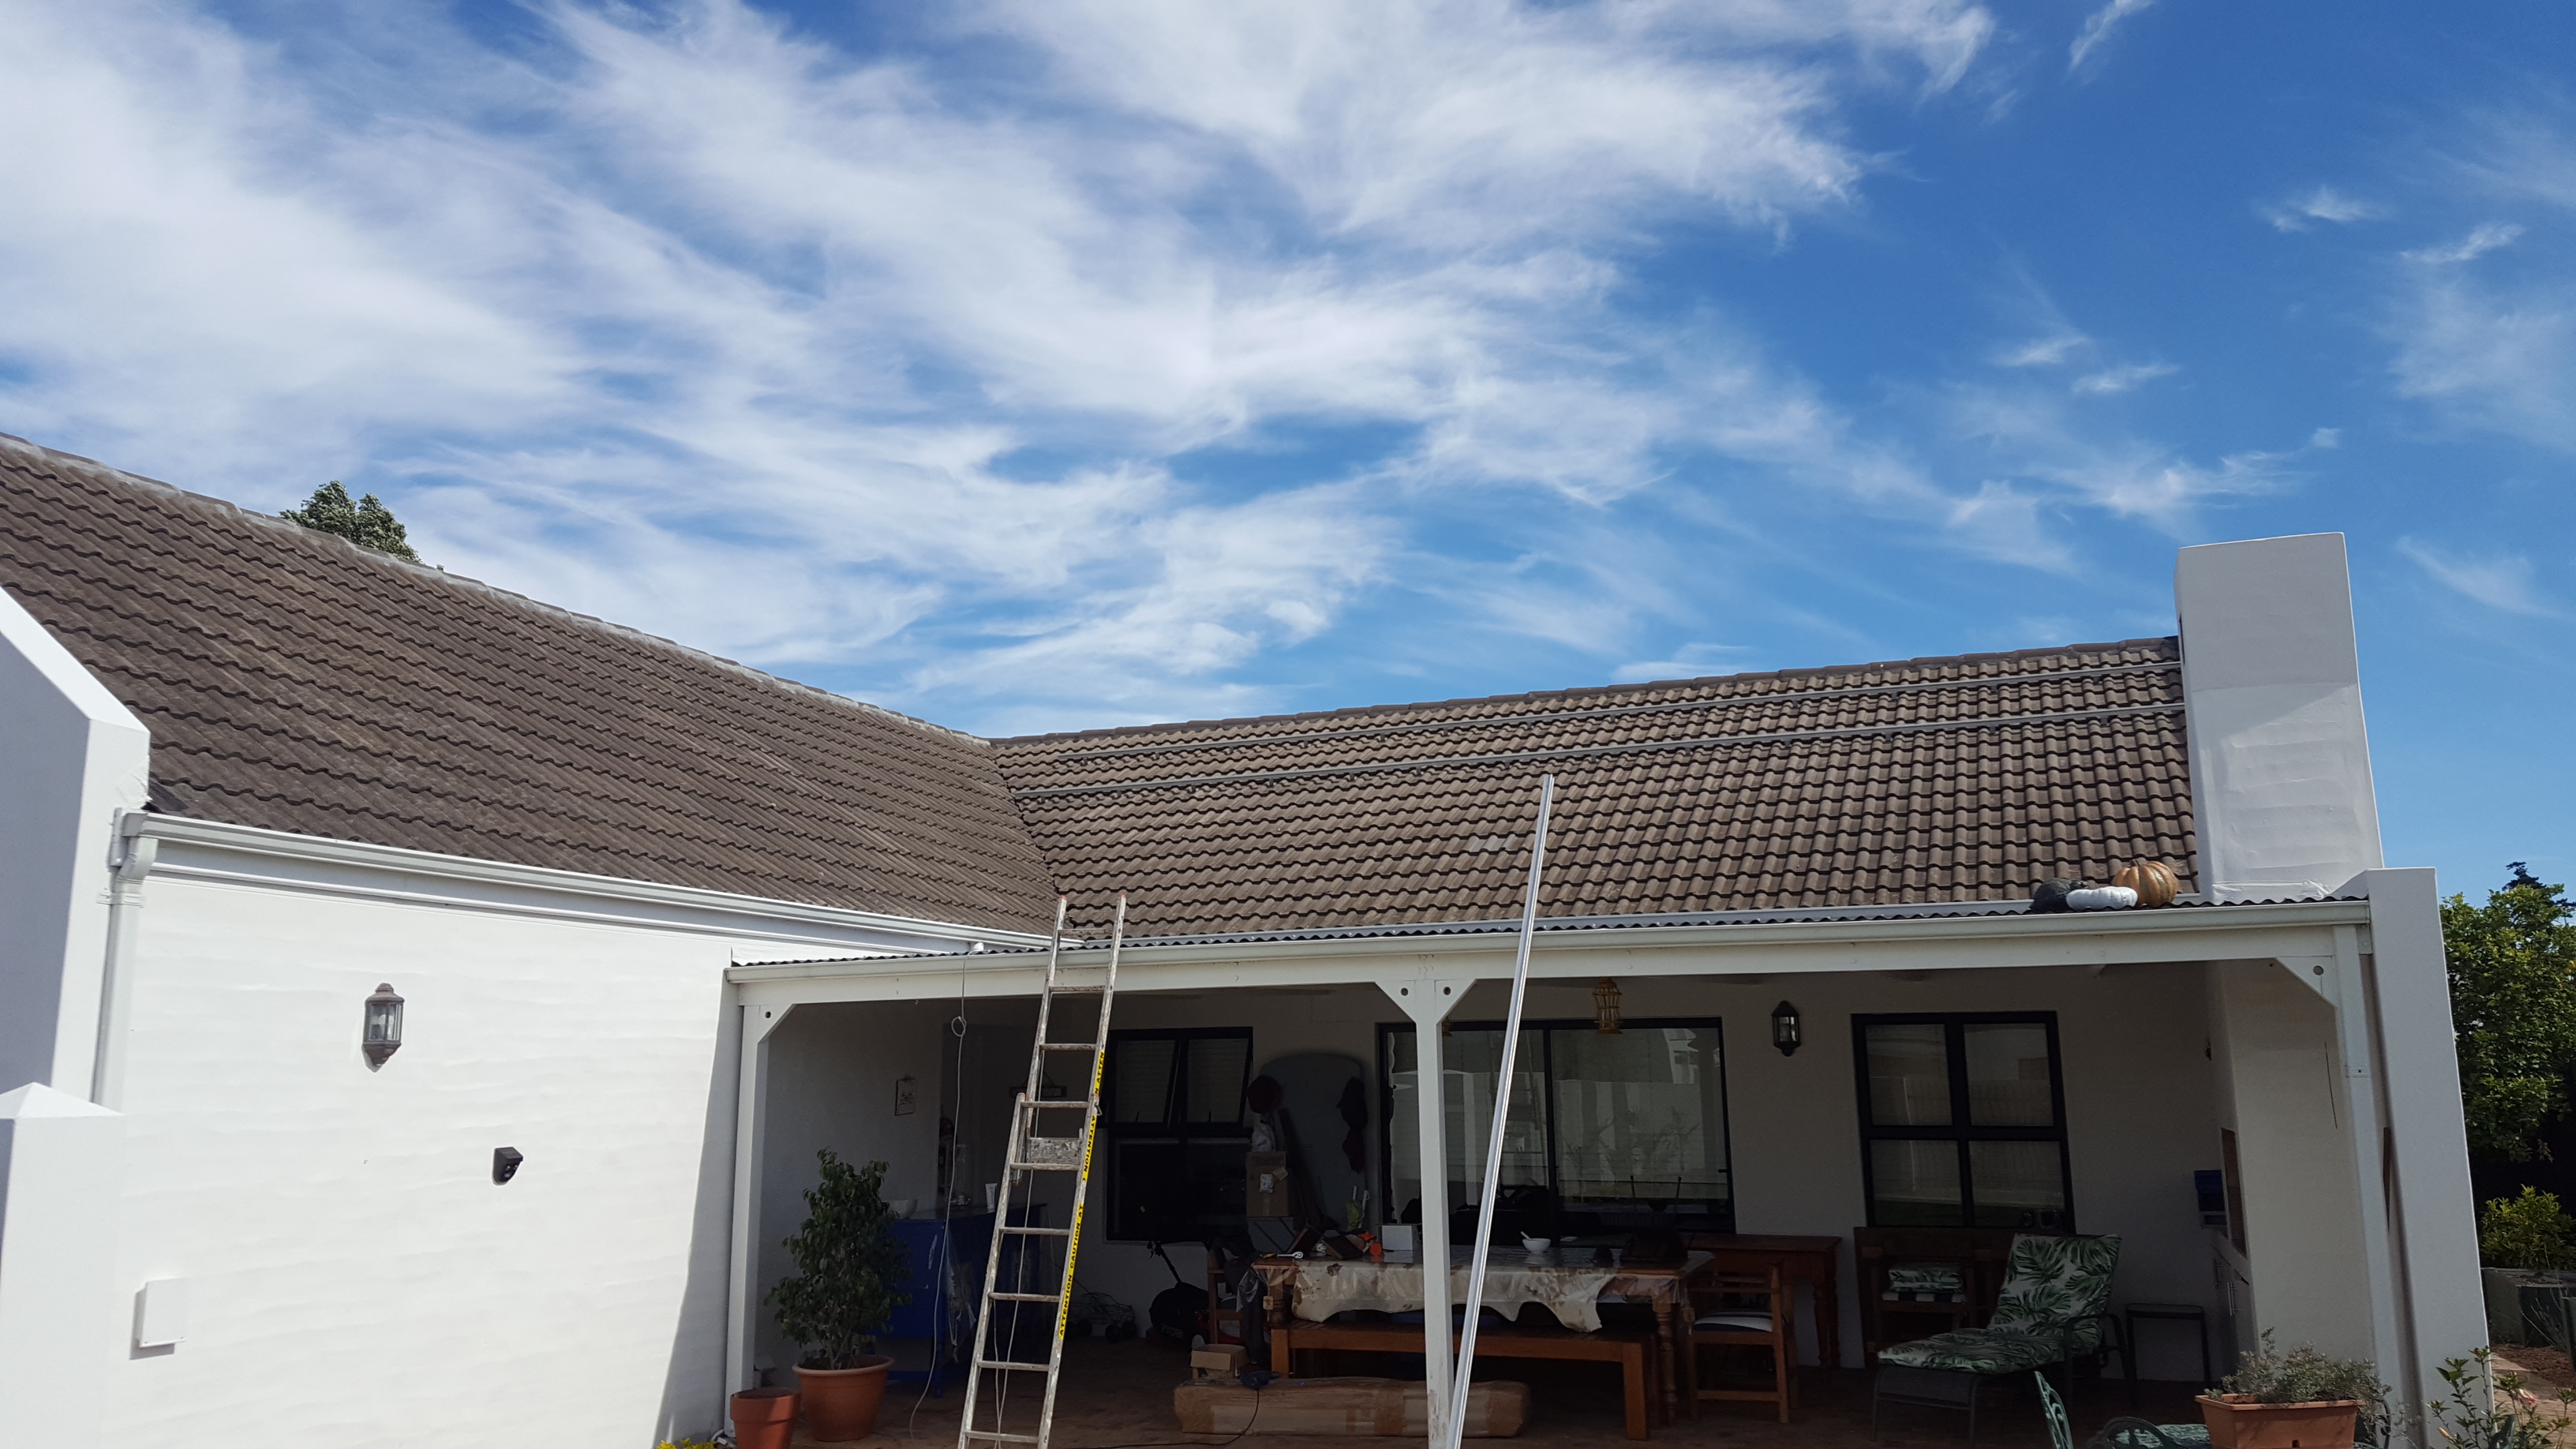
And 9 x 330w panels will fit on the West roof.
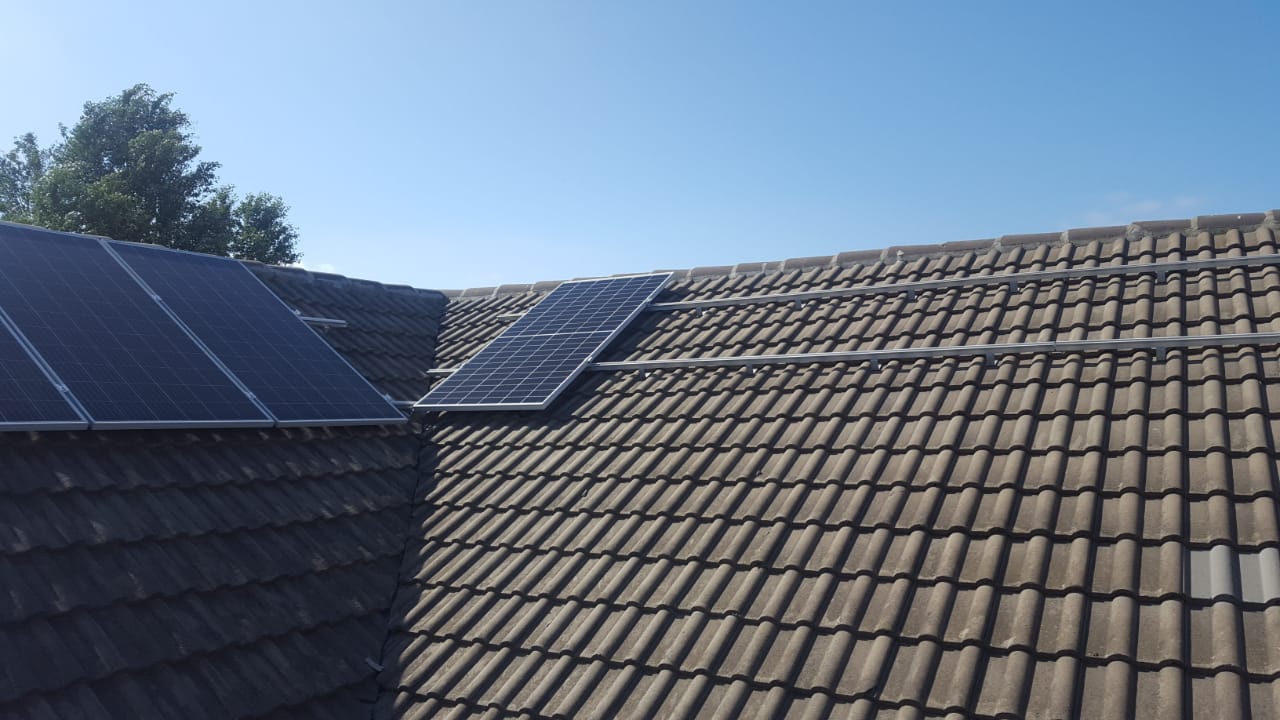
I still need to fit brackets and rails on the East side of the roof but will wait first for the City of Cape Town approval for my application.
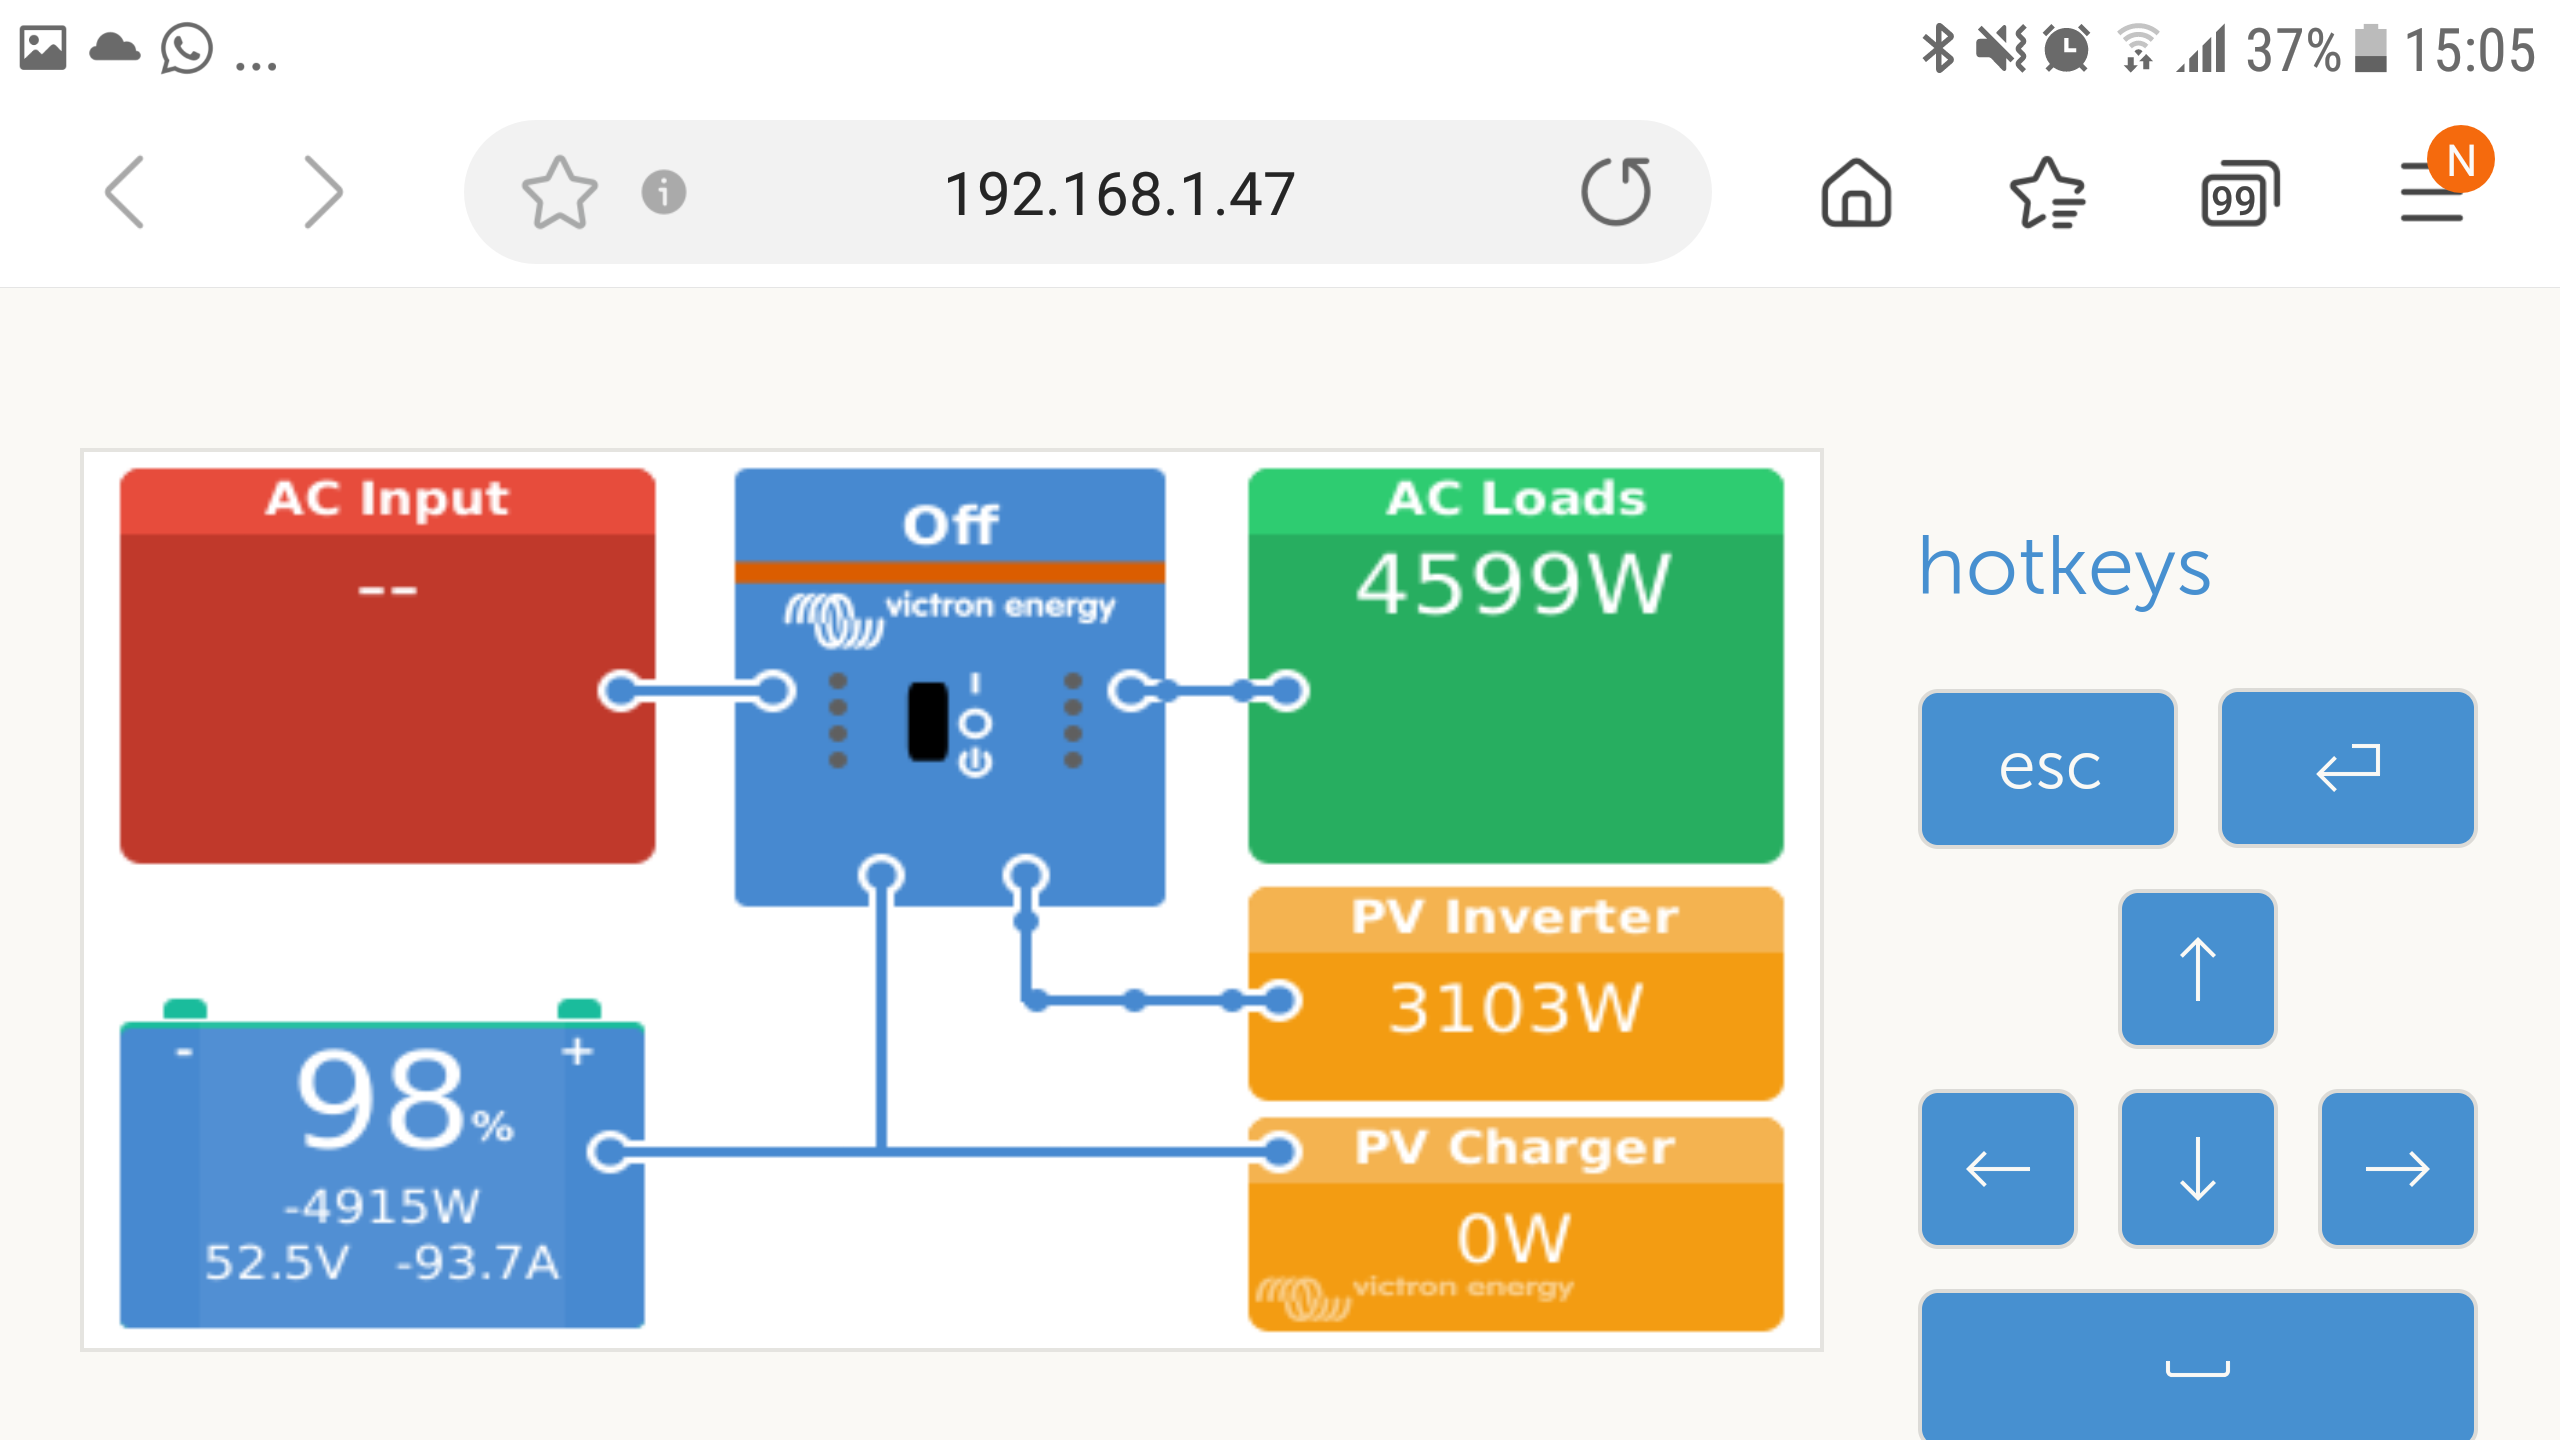
So over the weekend I did some AC electrical work and adjusted the MLT script on the Pi to get both inverters on the MLT portal.
The New DB is split in two parts. Top part is for the MLT H8.0 inverter that is suppling the the Garage and the geyser and the middle part is for the H10.0 that is suppling the house. Bottom part will be for extra stuff like for the home automation stuff and for the Shelly Pro4. Still need to add all the Shelly Em clamps in the DB.

I guess I need to test and see if everything works from the inverters suppling the house. So I switch on the geyser quickly on the one inverter and the house with the Aircon on on the other inverter.

Ignore the PV inverter, I still need to play around with the ET112 settings because I’m running two of them, one per MLT inverter output.
4 Likes
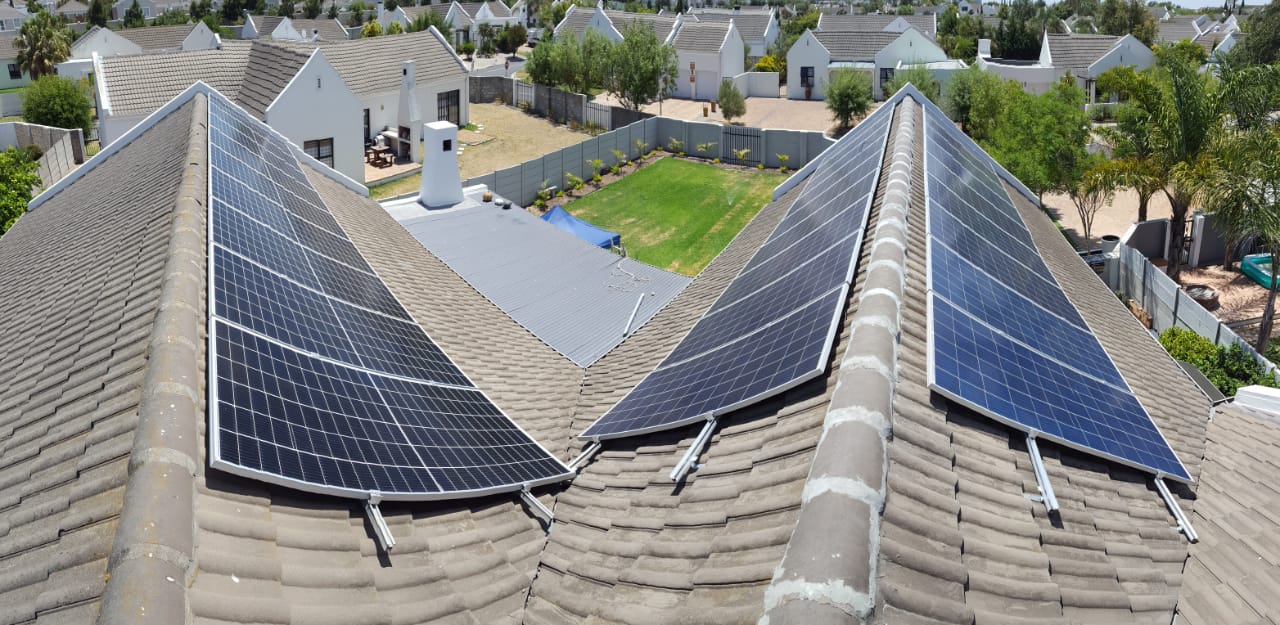
Time for a update. From my last post last year till 2 weeks ago, I finished all my stuff, submitted my forms last year for SSEG at CoCT and new prepaid meter installed from the City side and did my COC and got the go ahead from them that I’m registered at the City and I can use my system.
Some photos:
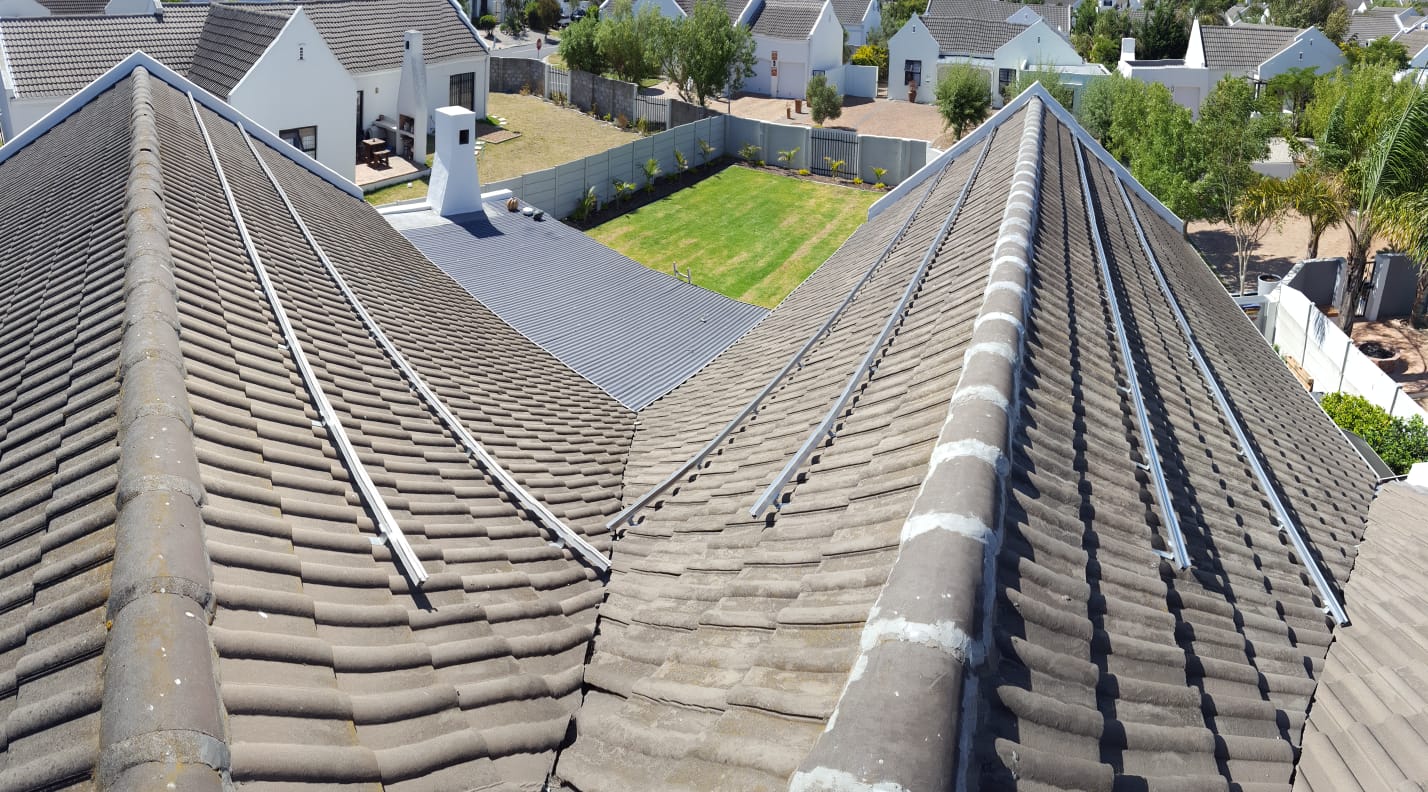
We where away on holiday over December so didn’t had a lot of time in December to do stuff, we came back in January in that first week when it was so hot. So late in the afternoon I will get on the roof to open the roof tiles to mount the brackets and rails. All done on my own without help.
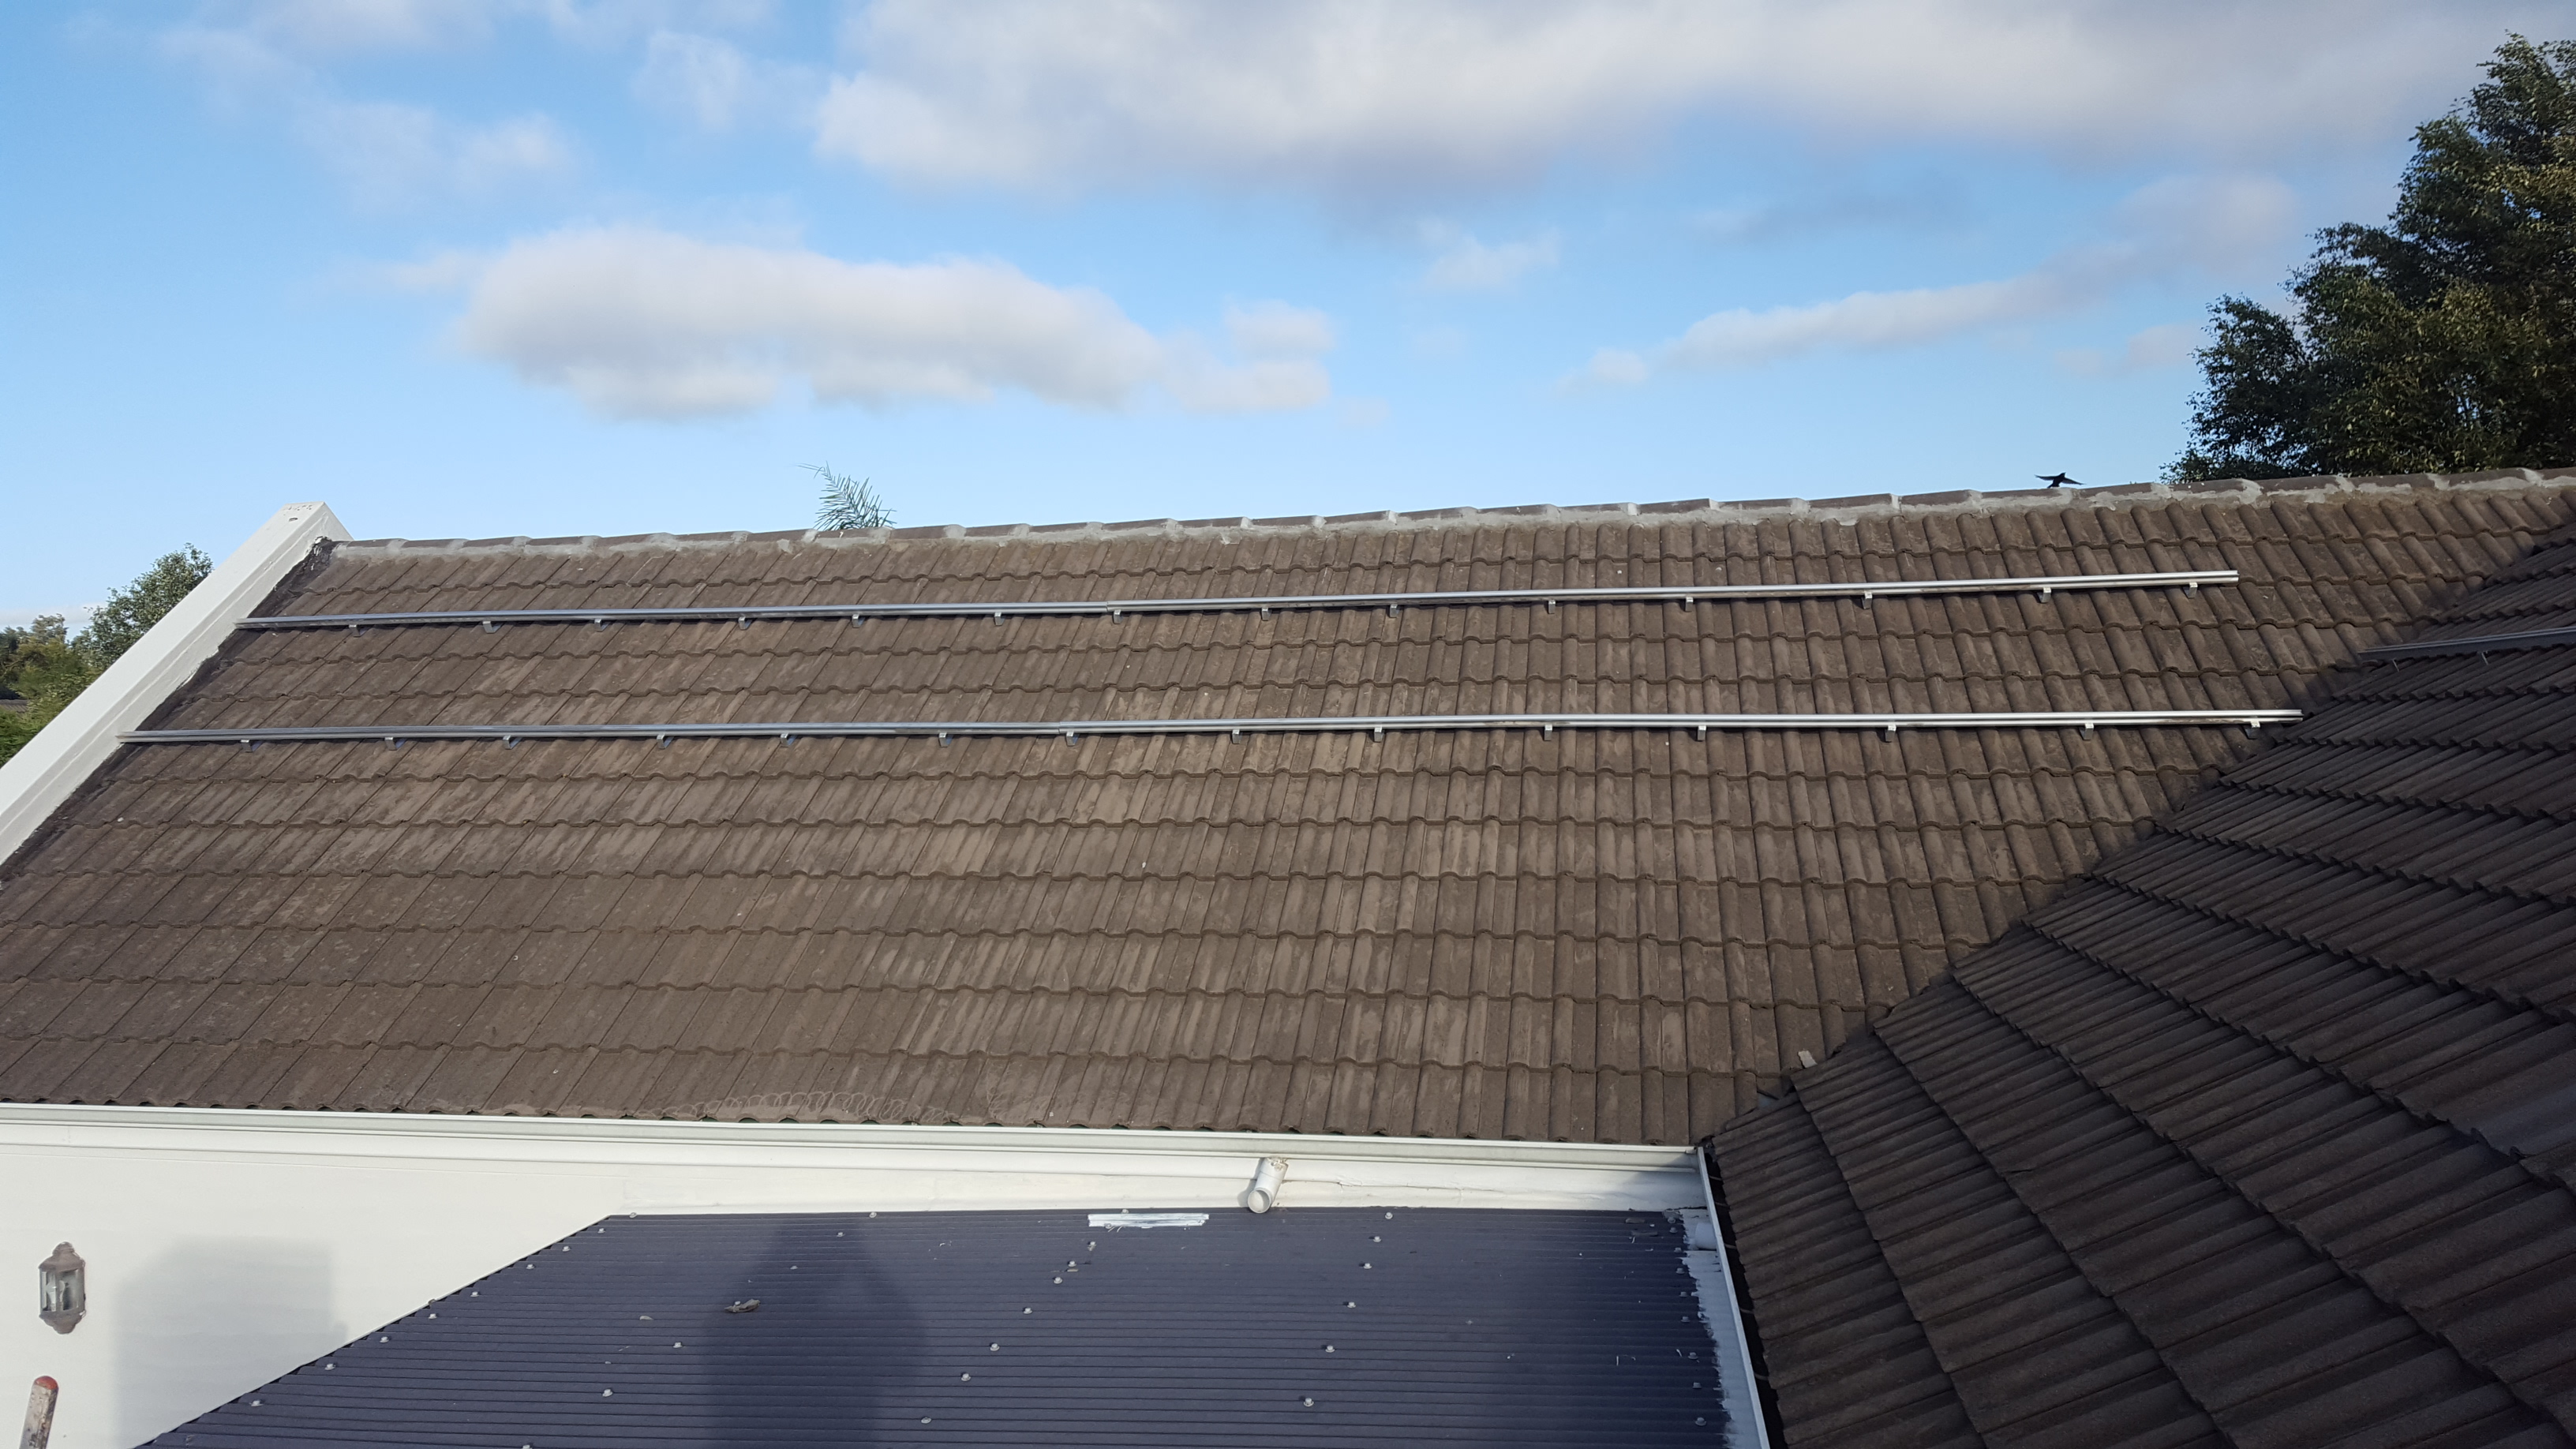
East array rails.
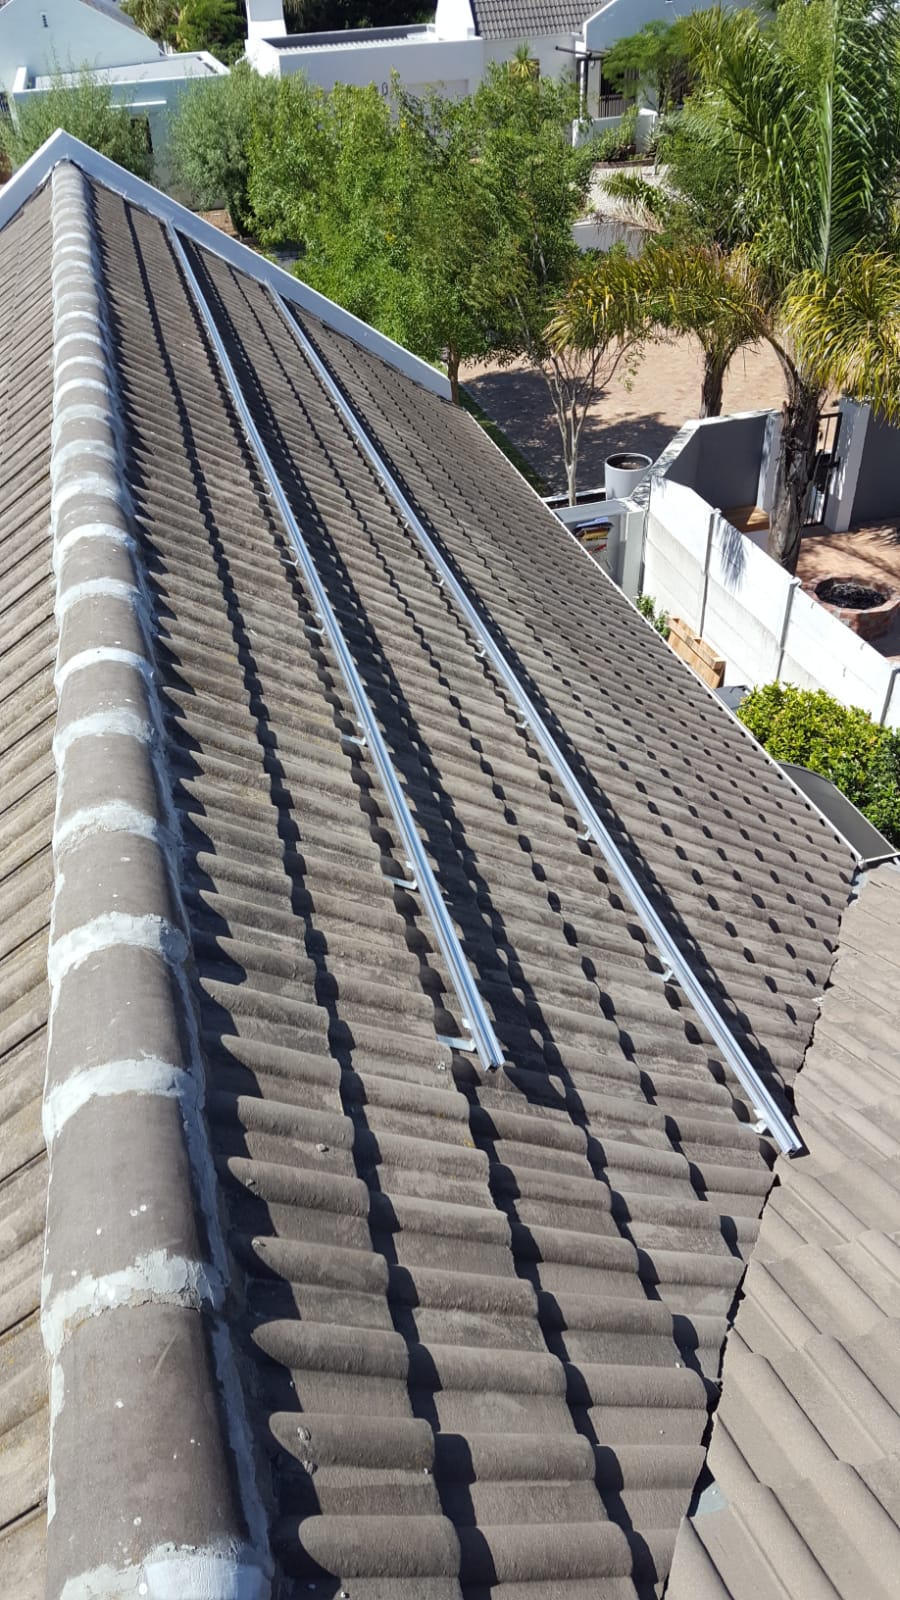
East and West rails
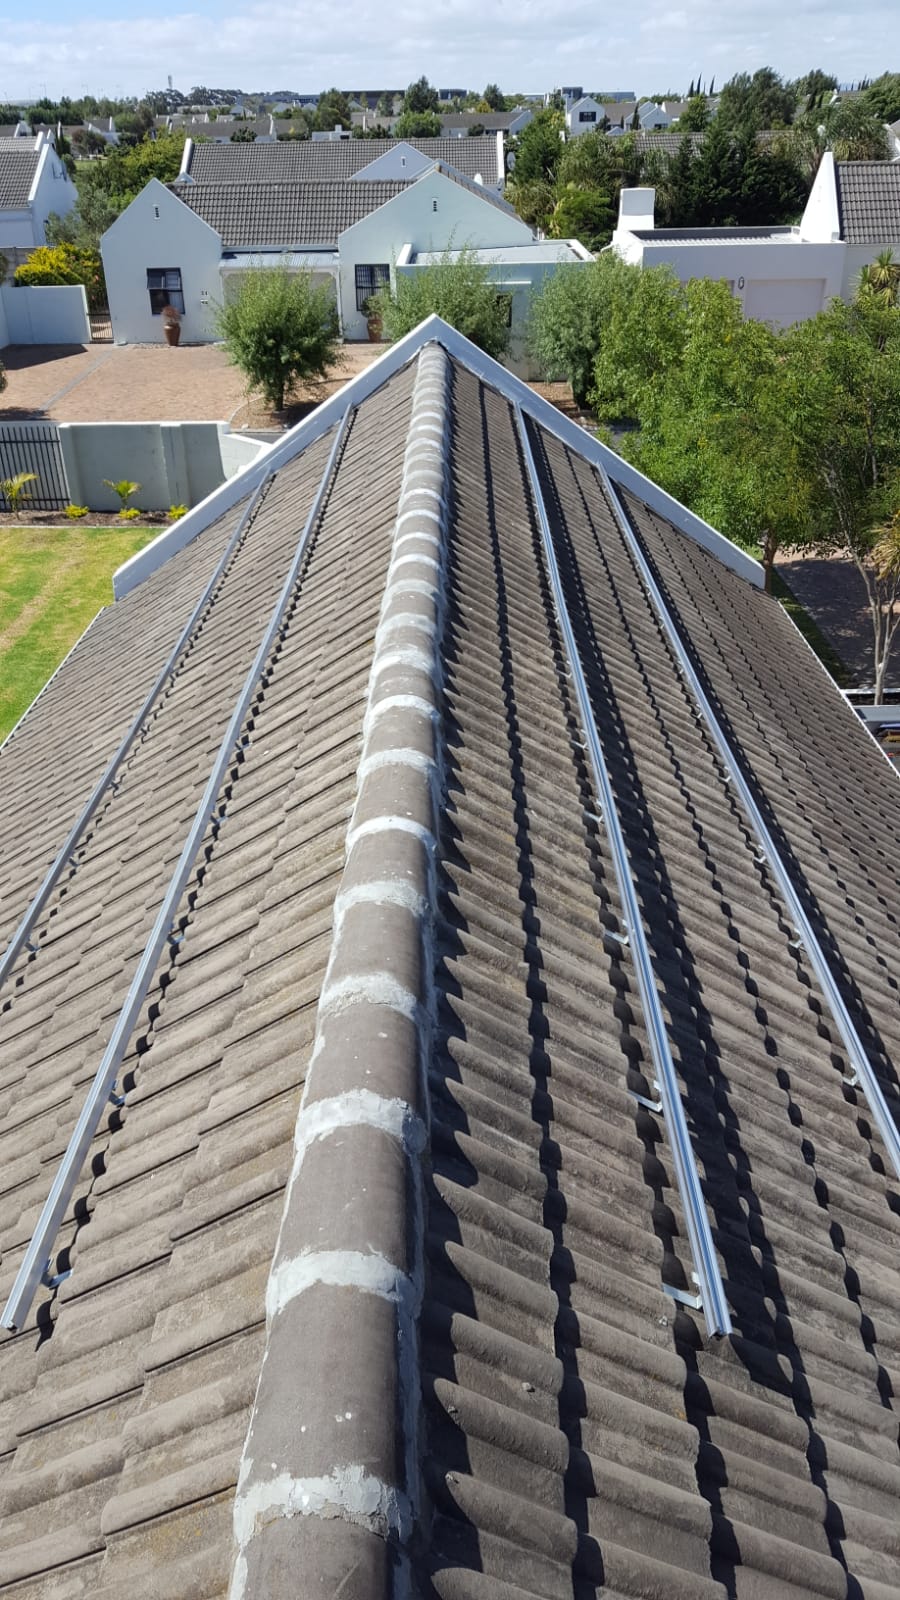
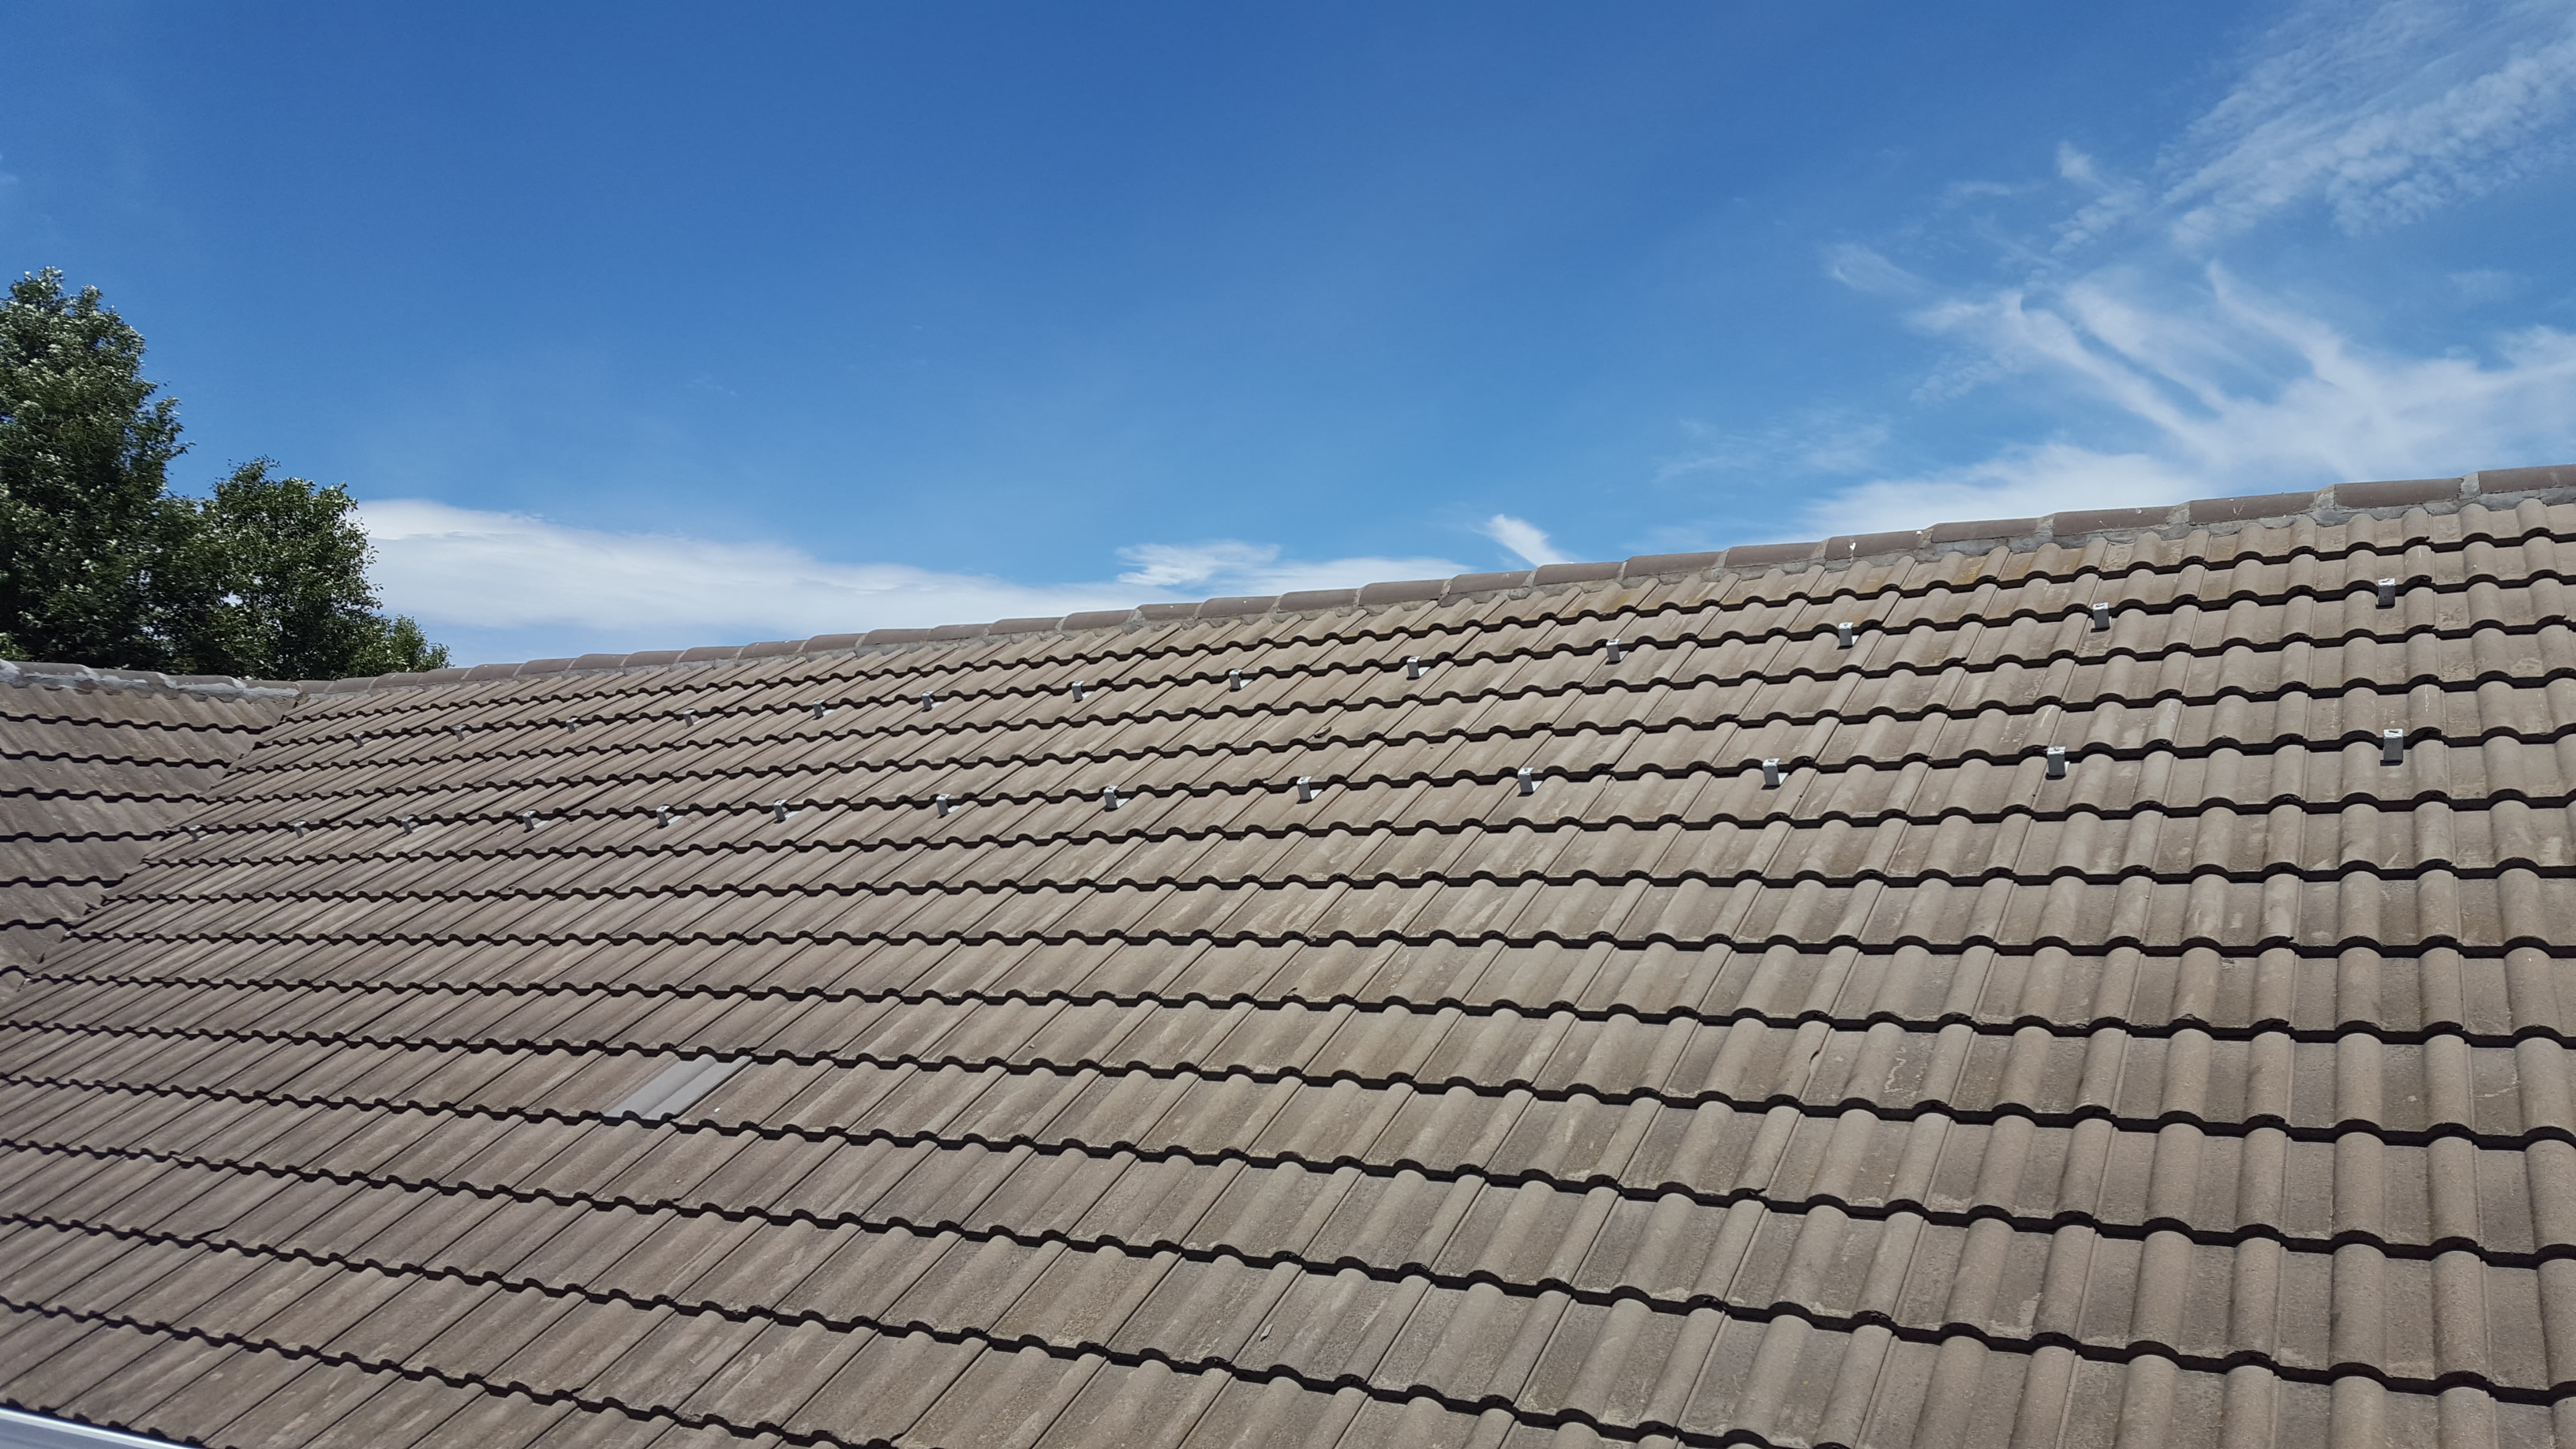
North and East and West rails all mounted and ready
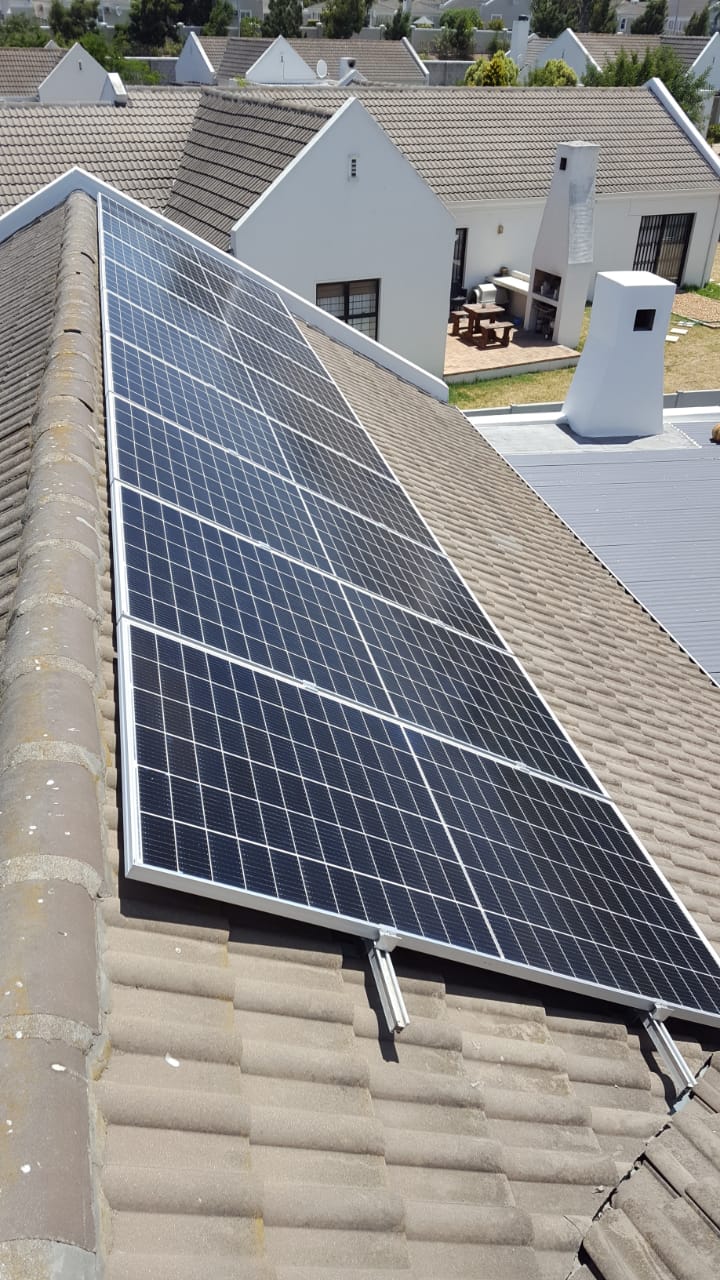
East panels stacked on a Tuesday 9 x 330w
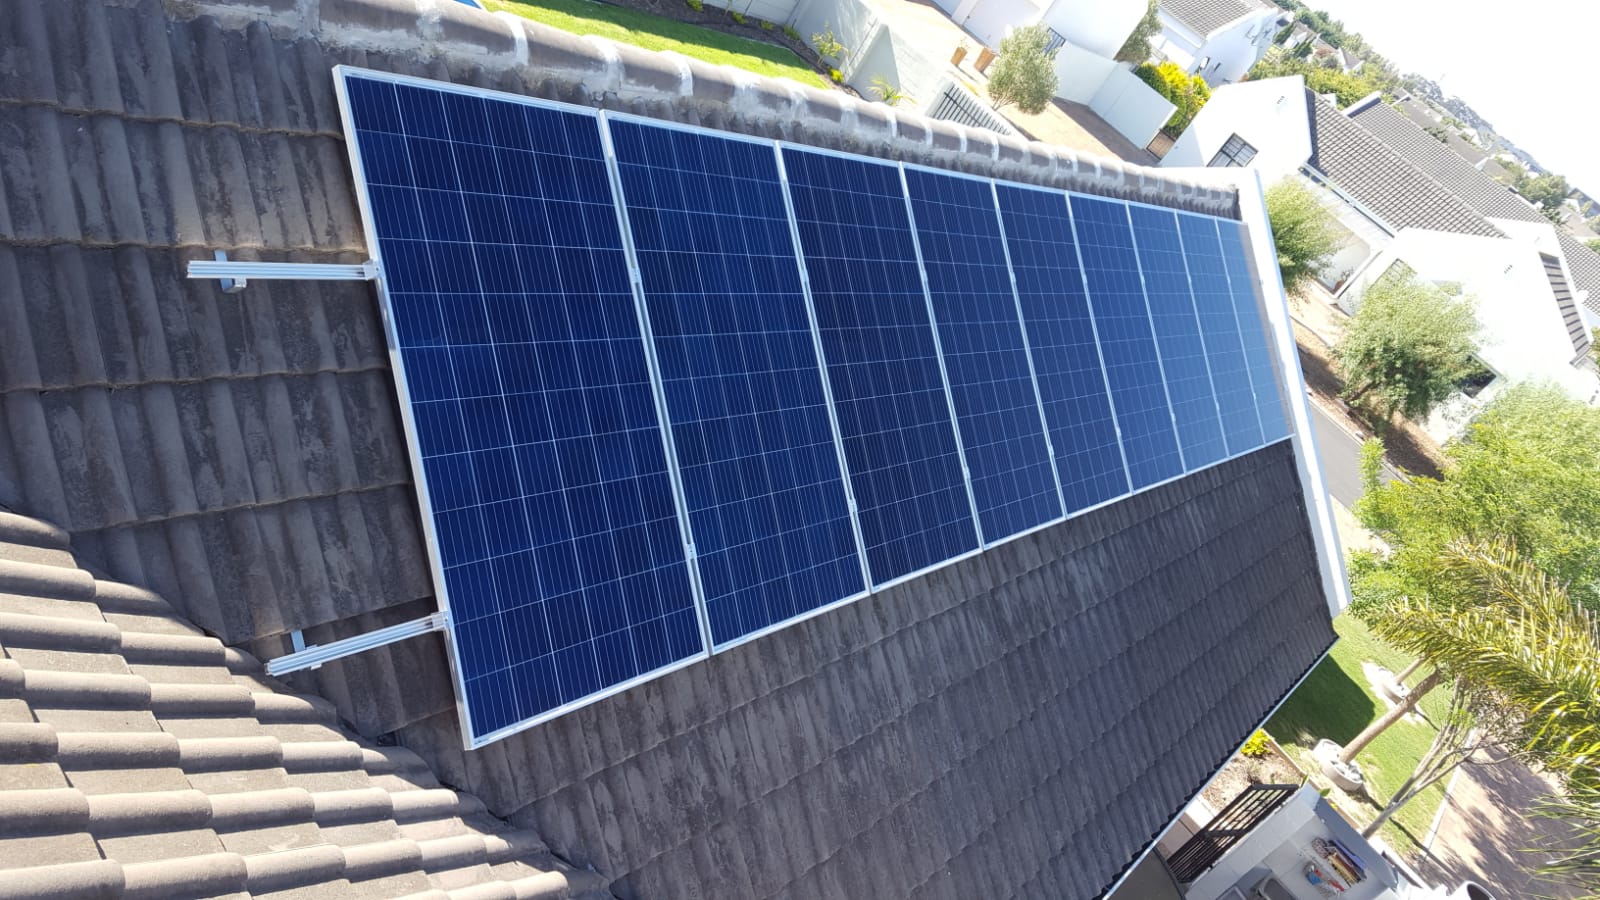
West panels stacked on the Wednesday 9 x 330w
Panels was later drop a bit lower on the rail because I wasn’t sure with the stacking with the first one on the north facing end will fit when all 9 panels are on the rail because it was a tight fit, but all fitted so I drop them a bit to the correct clamping position on the rails. Did this after I took the Photos.
The Thursday and Friday Cape Town was hit by a heat wave so I stayed of the roof that 2 days. On Saturday I started to stack the last 9 panels, the 430w ones.
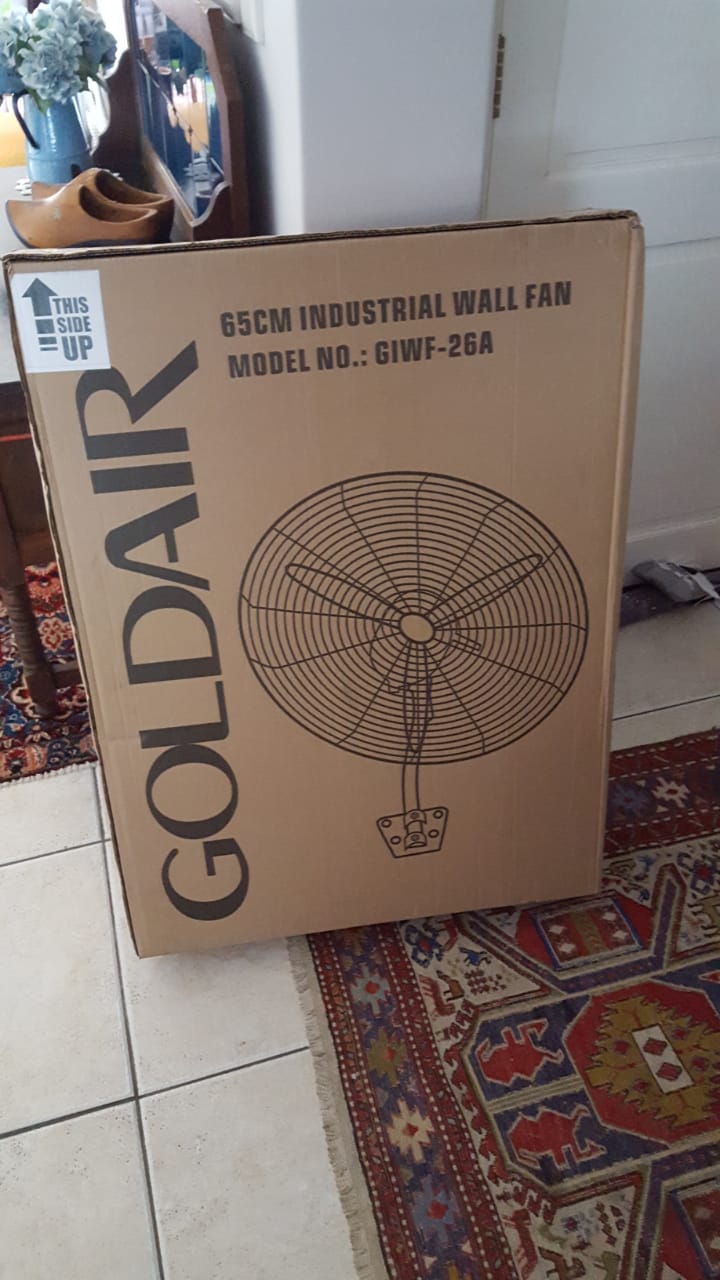
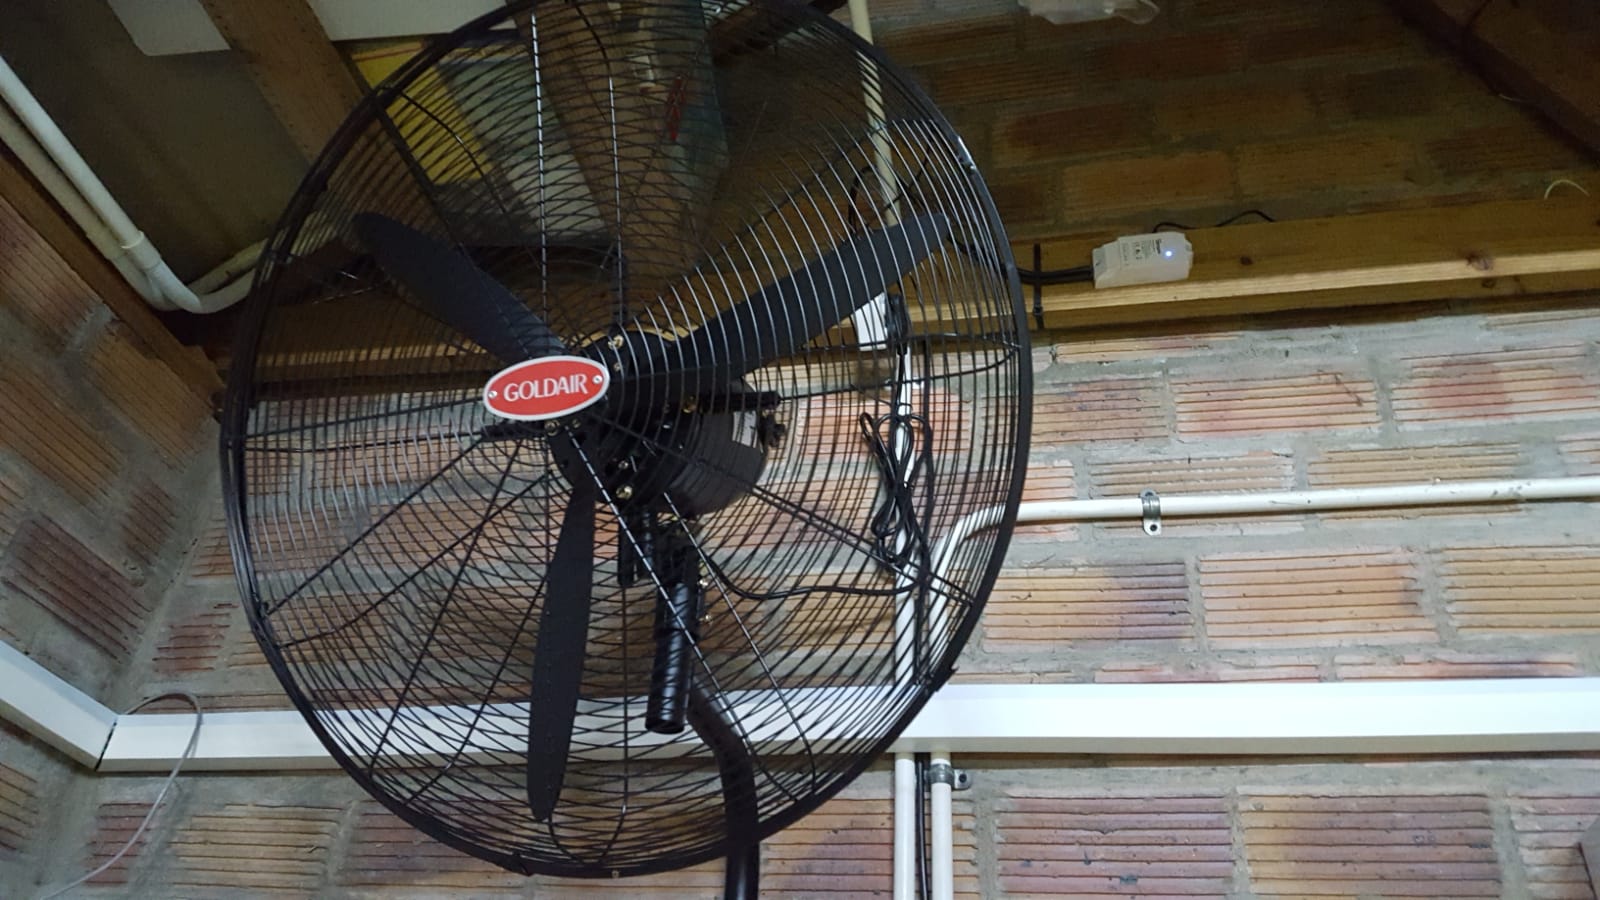
In that time I ordered a big wall mount fan for the garage to mount it close to the equipment connected to a TH16 to switch on when the garage started to get warm.
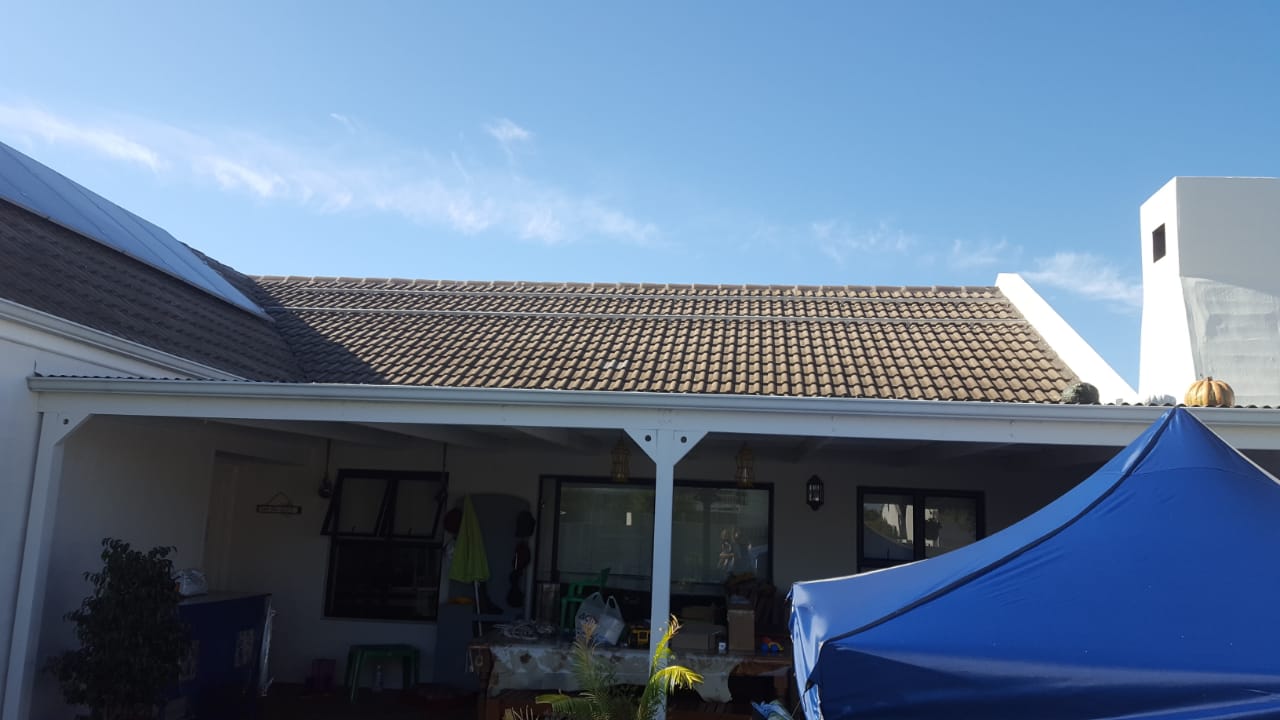
Here is the end product.

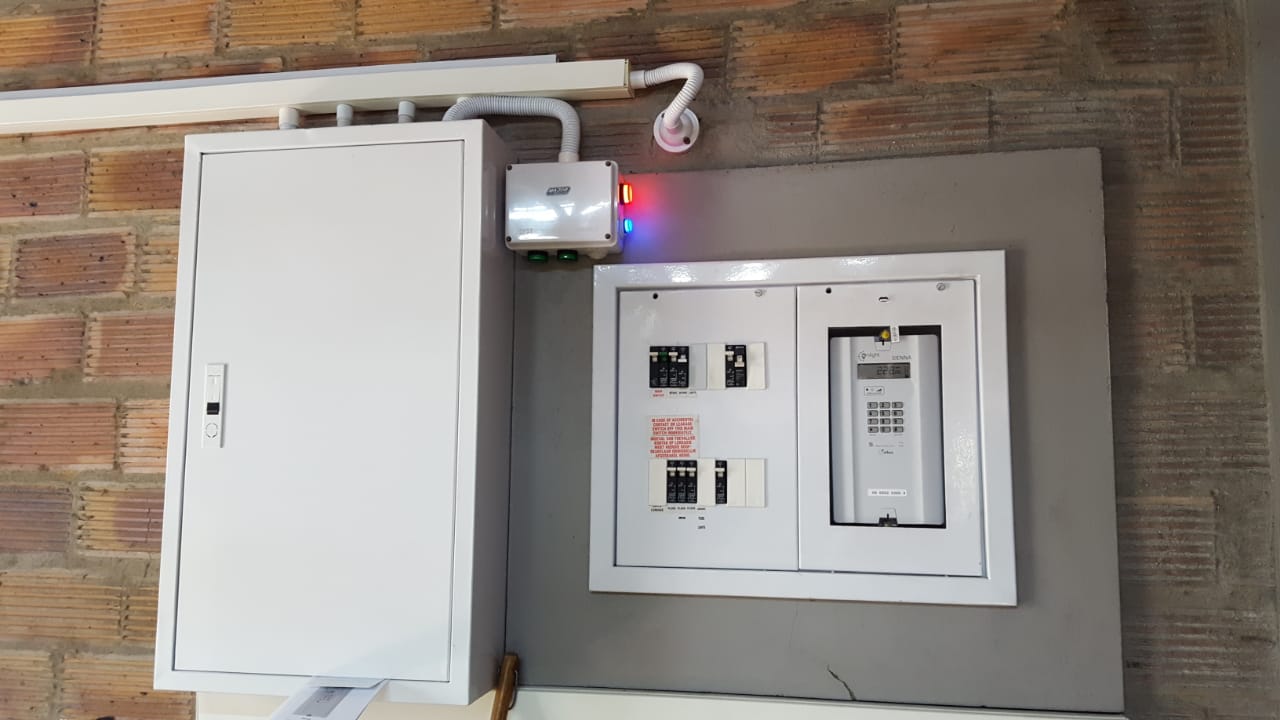
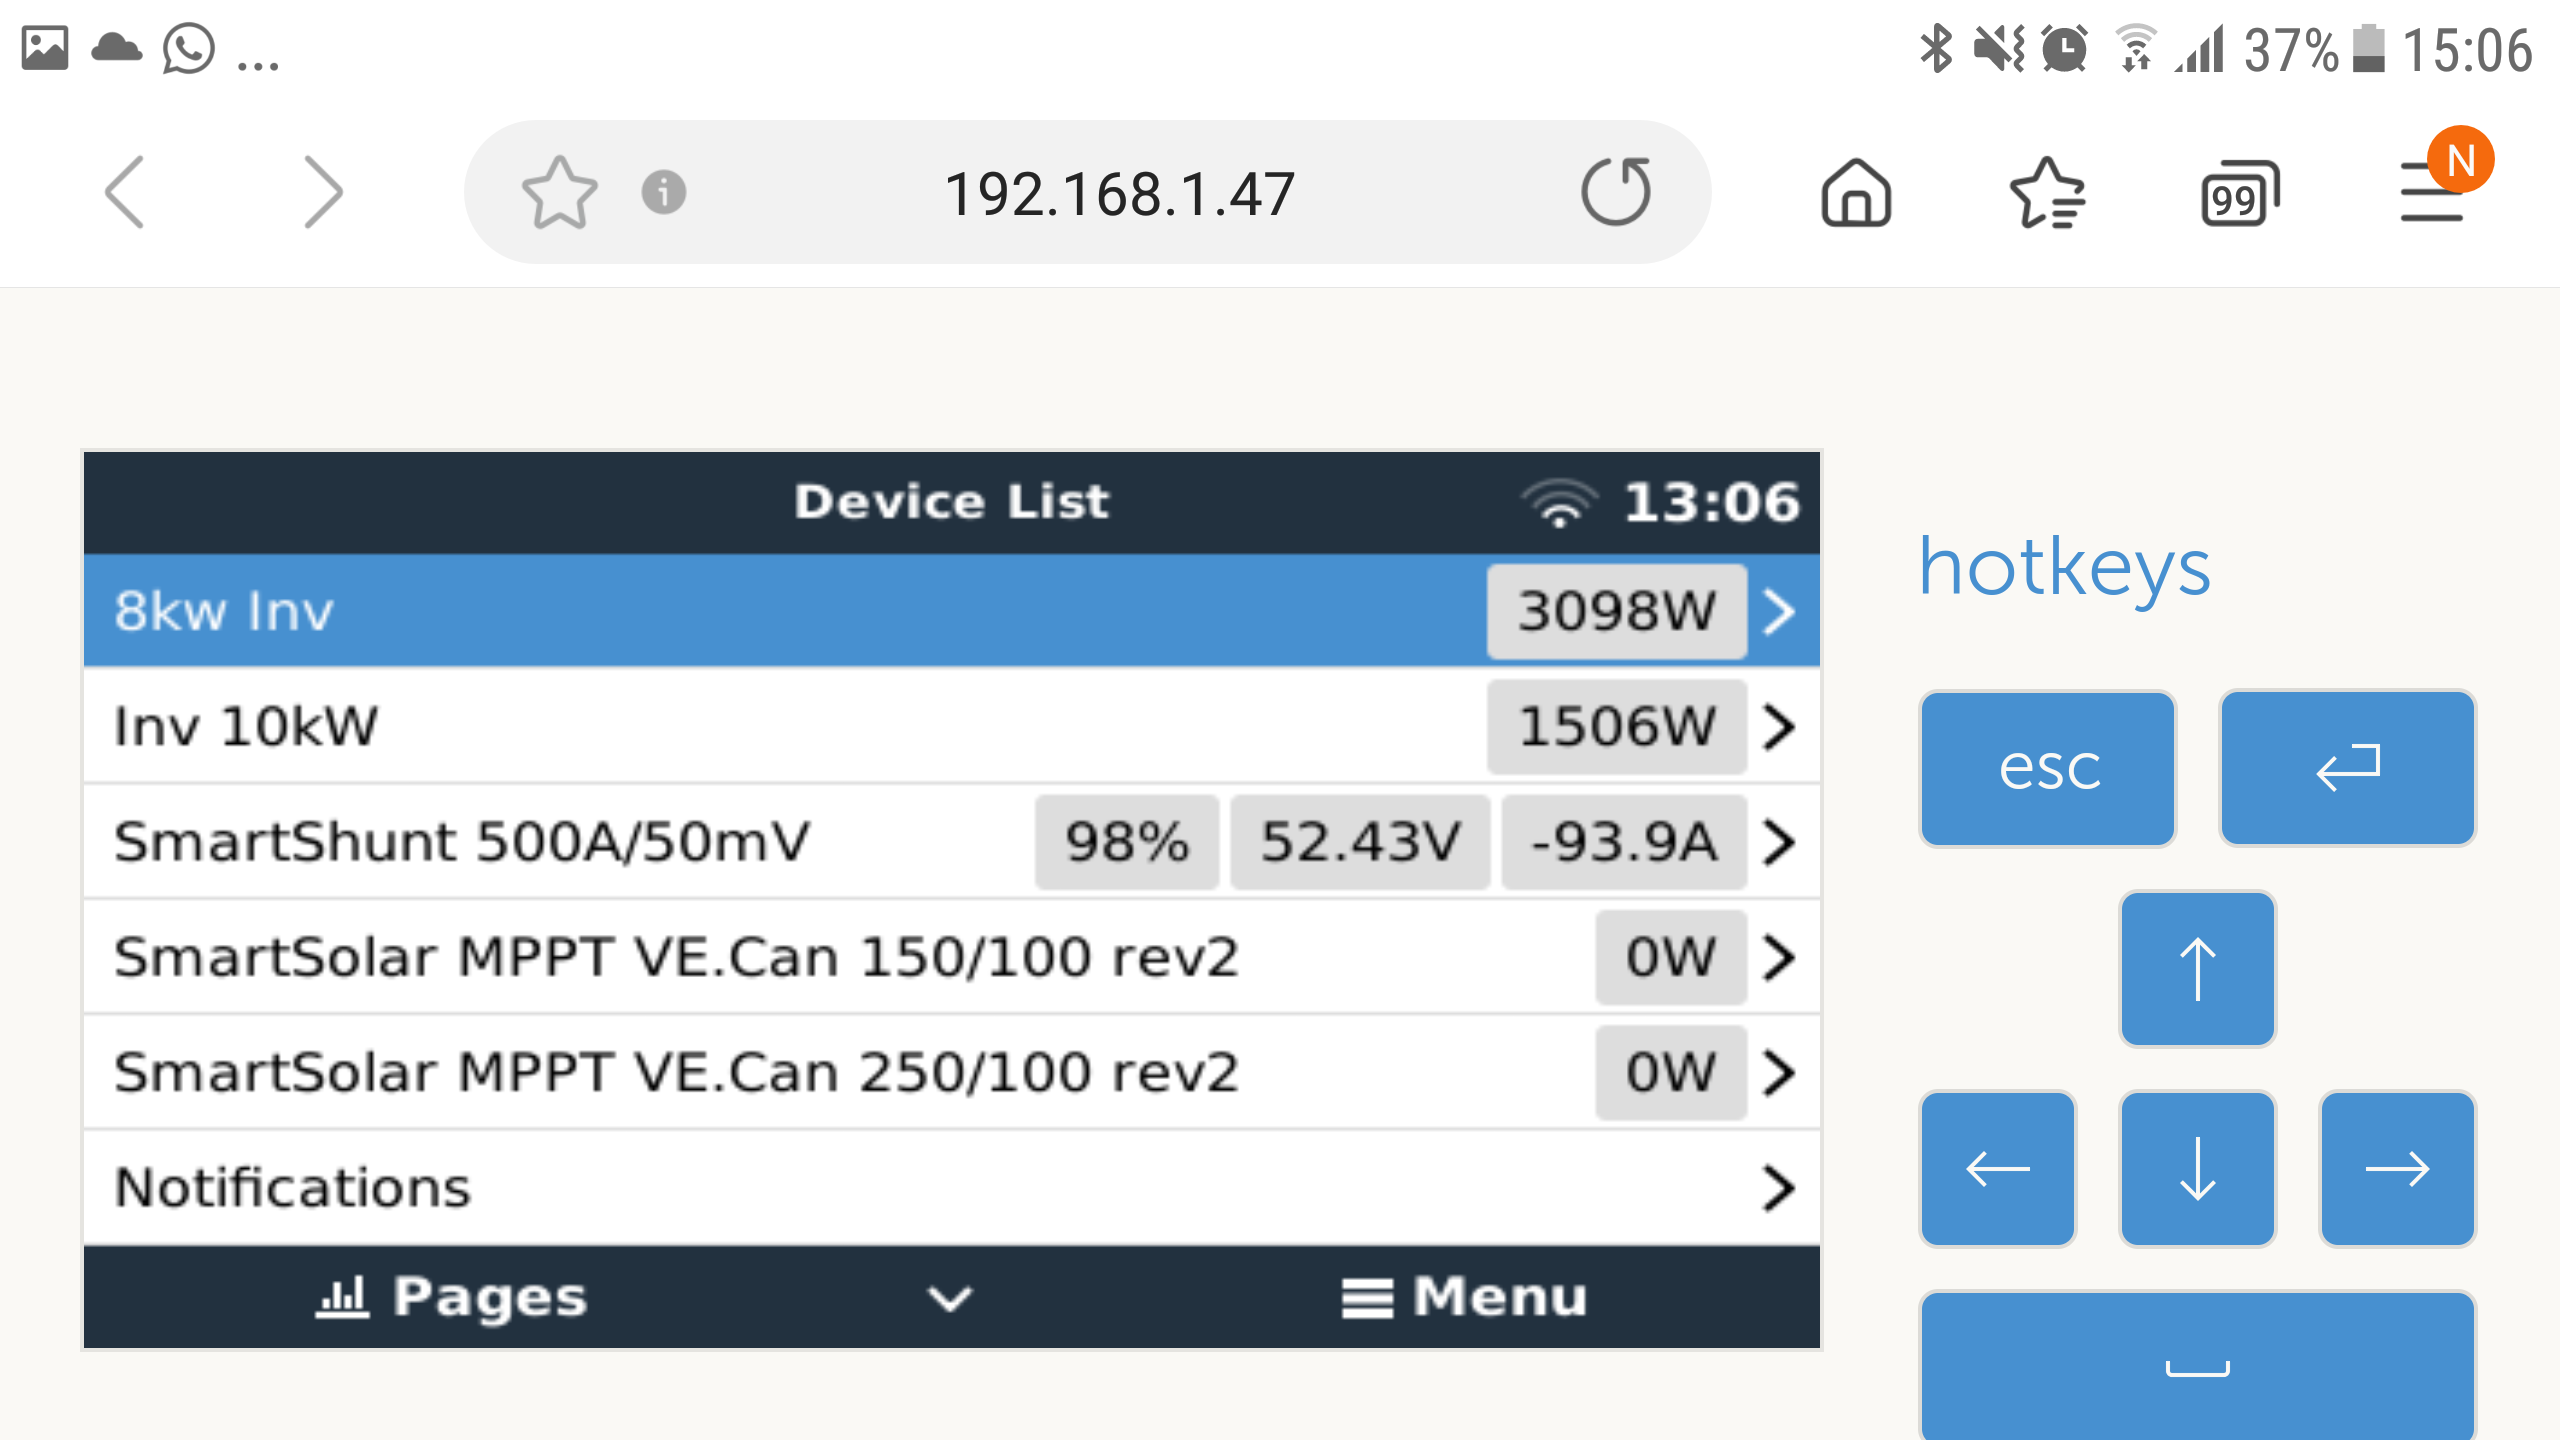
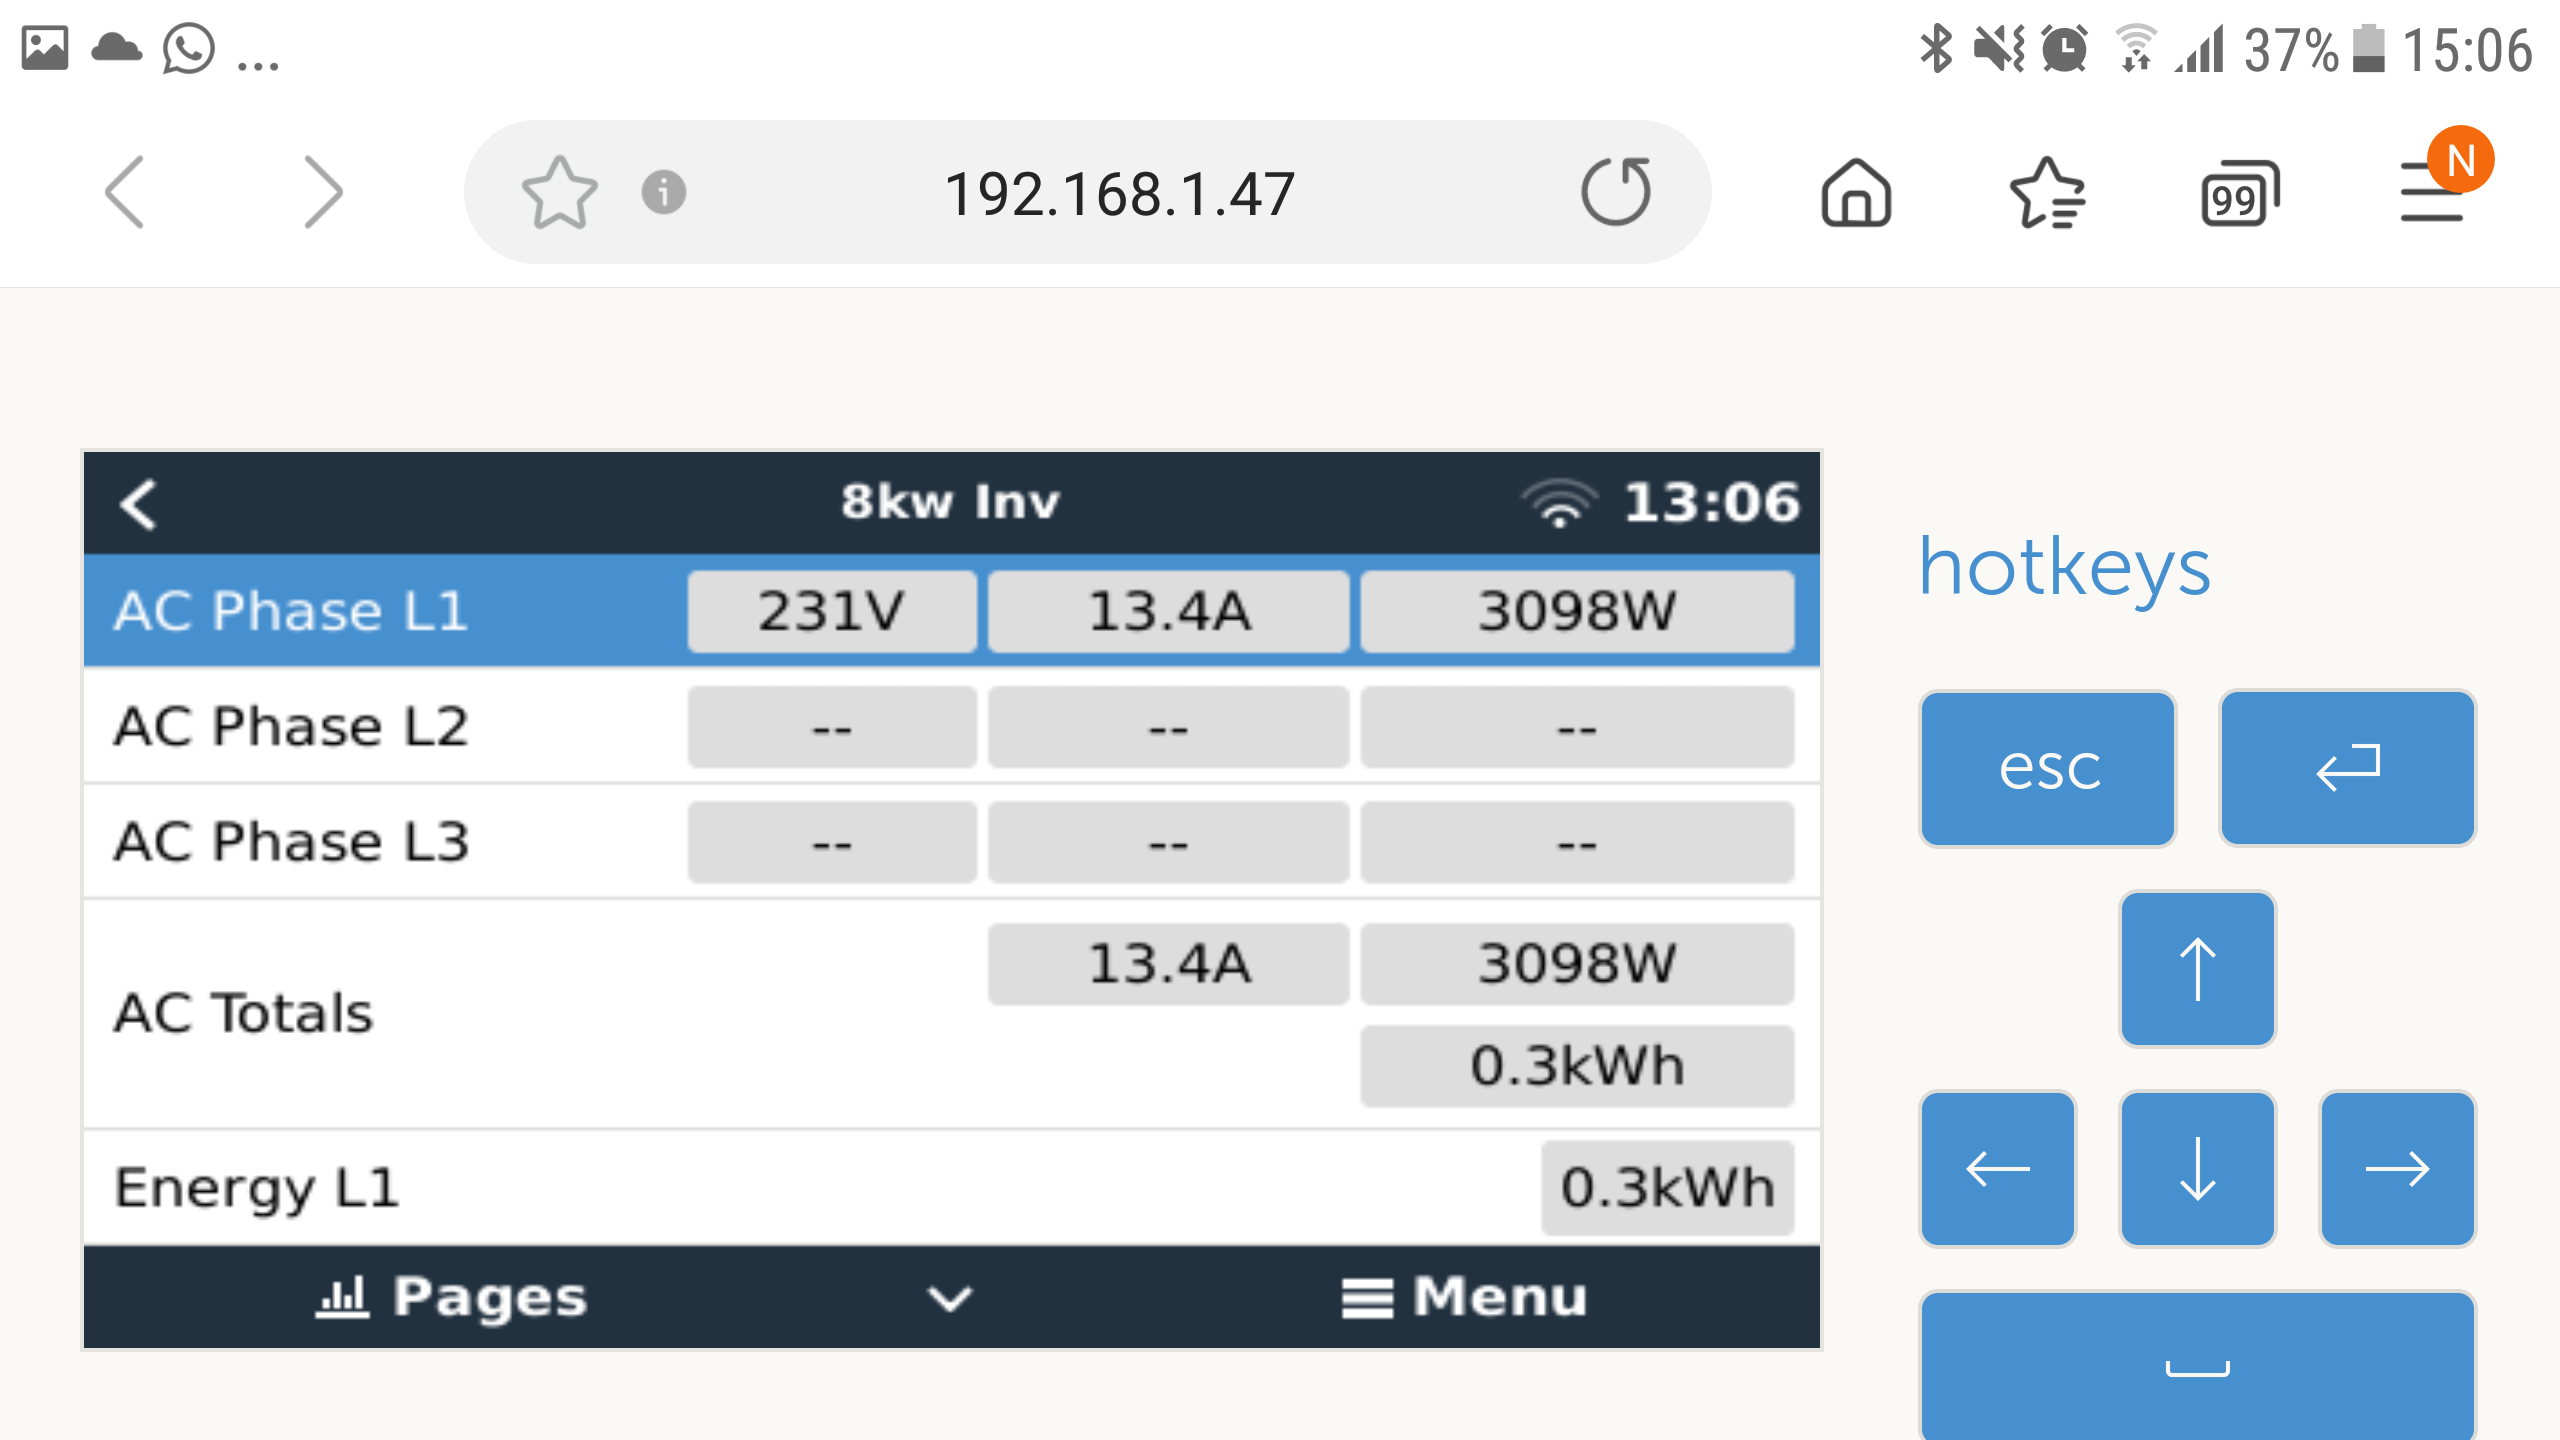
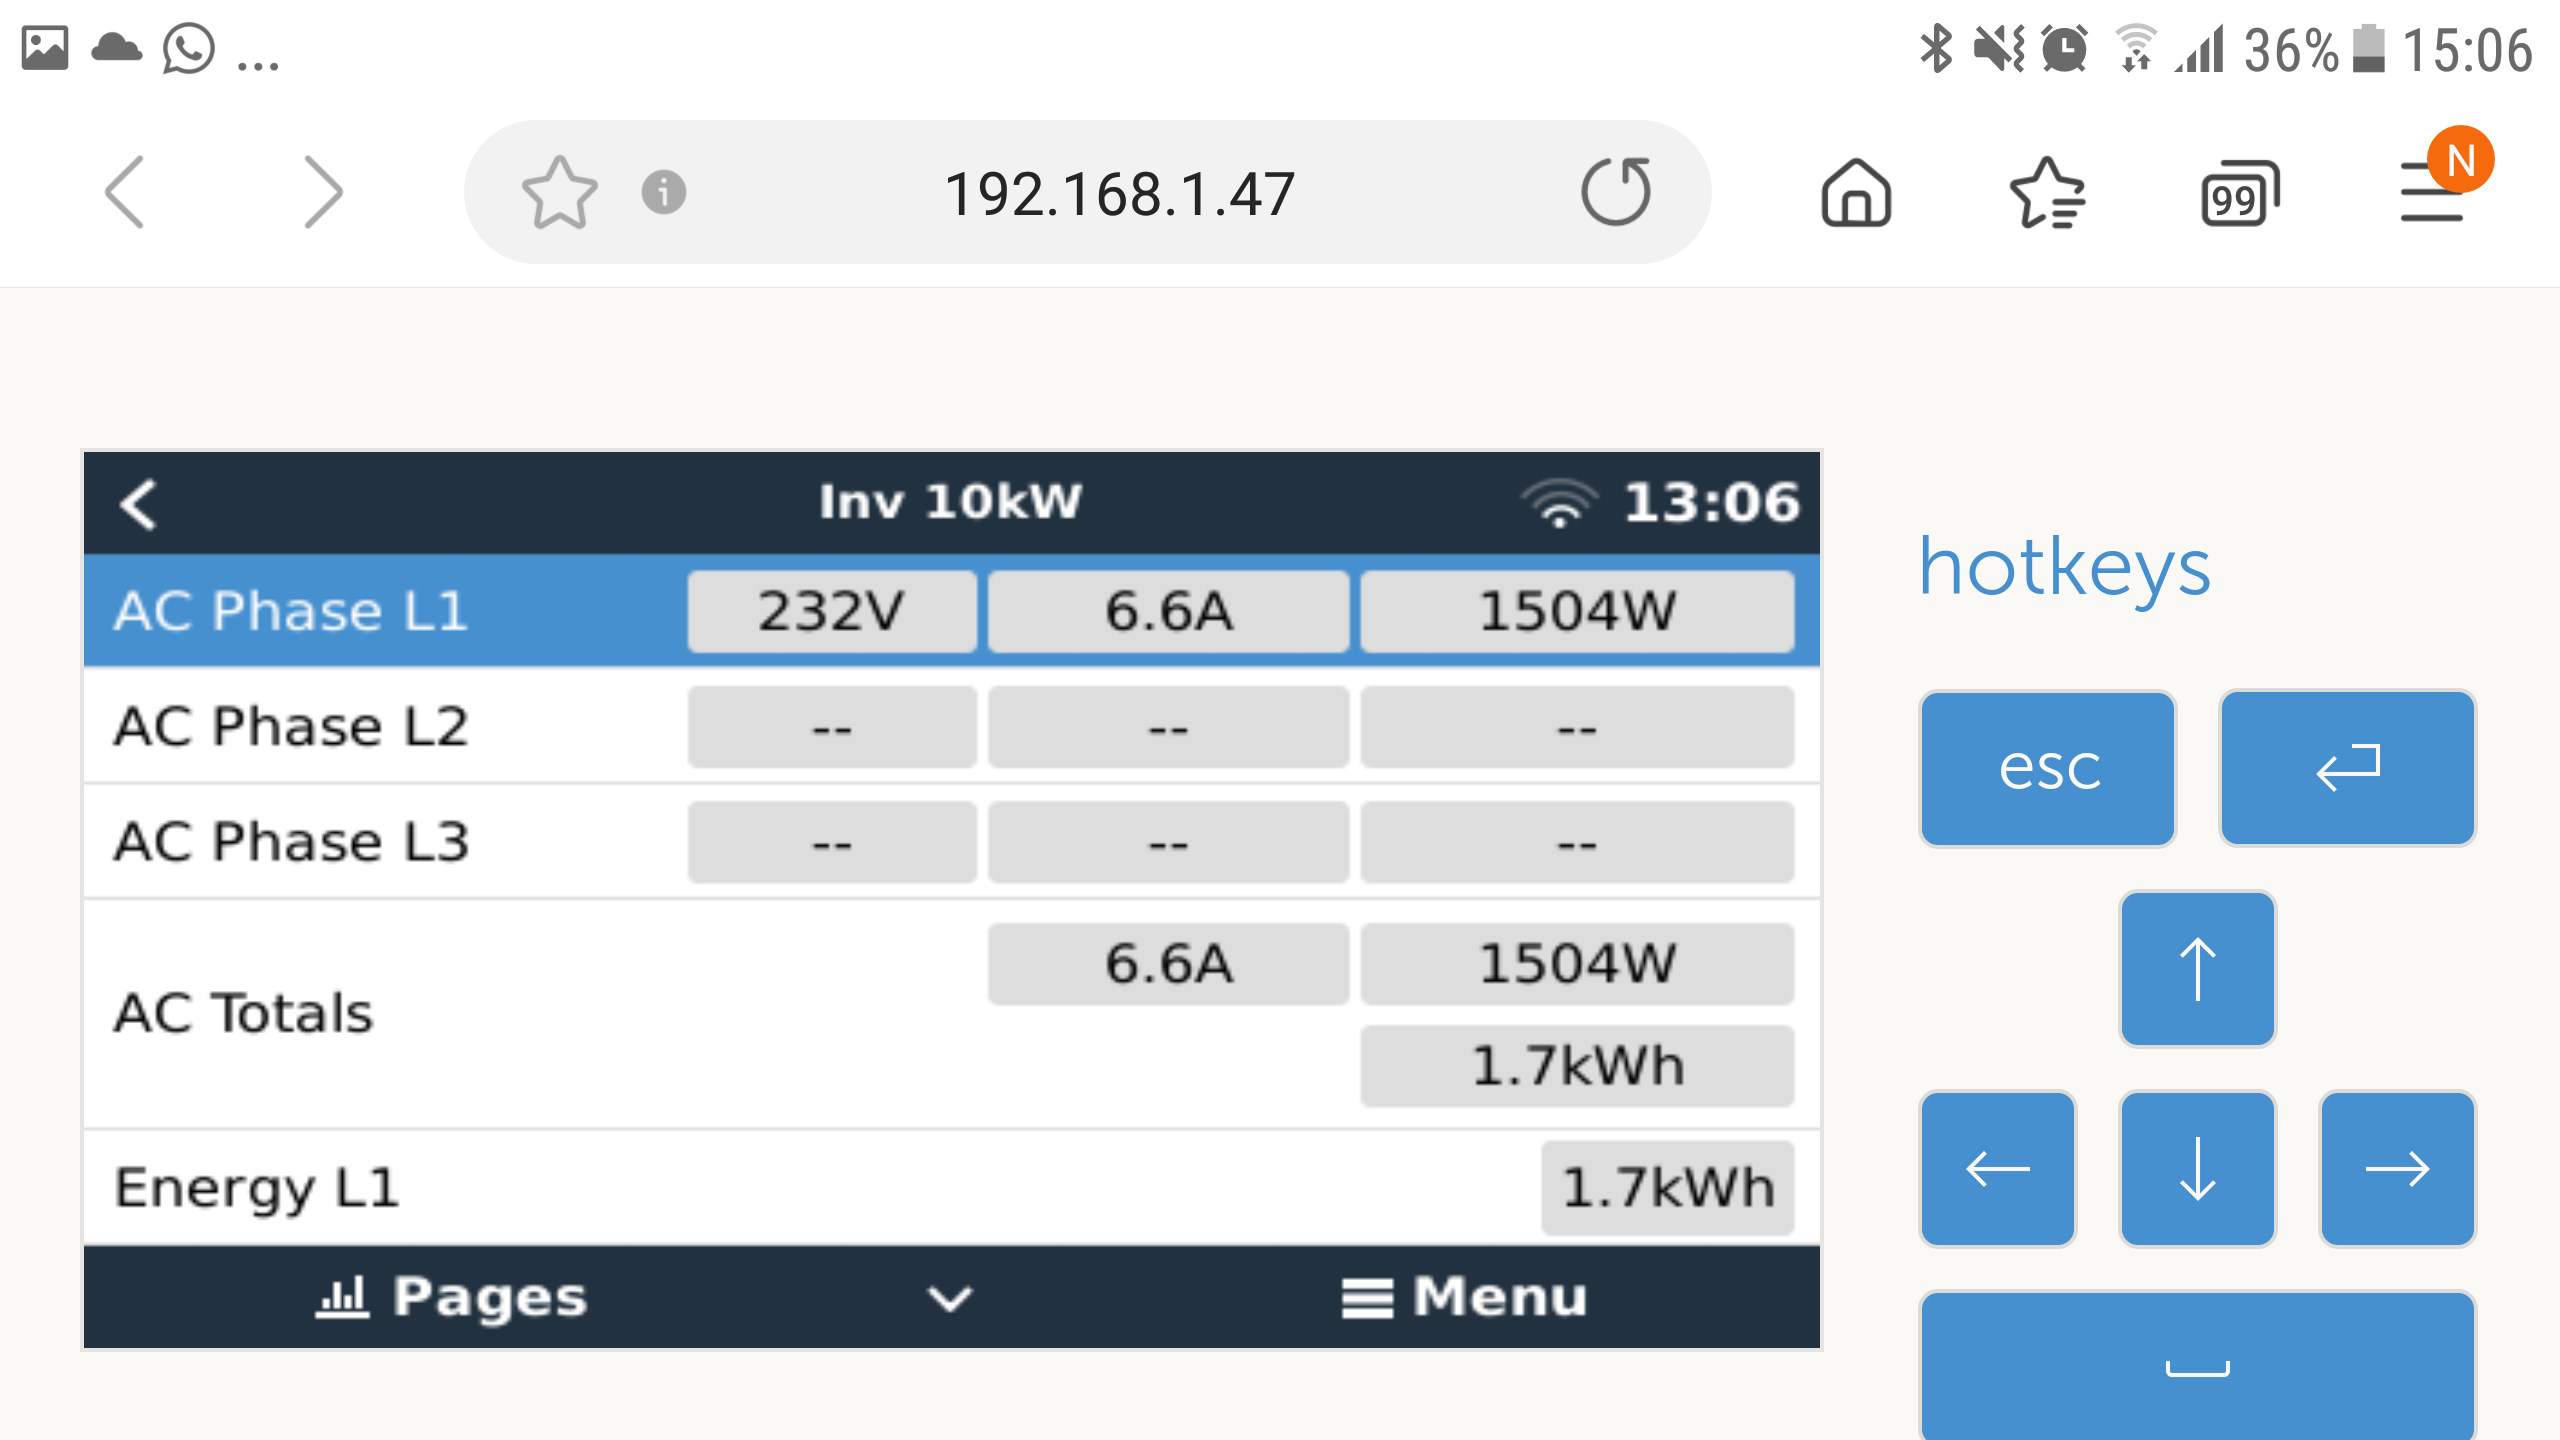
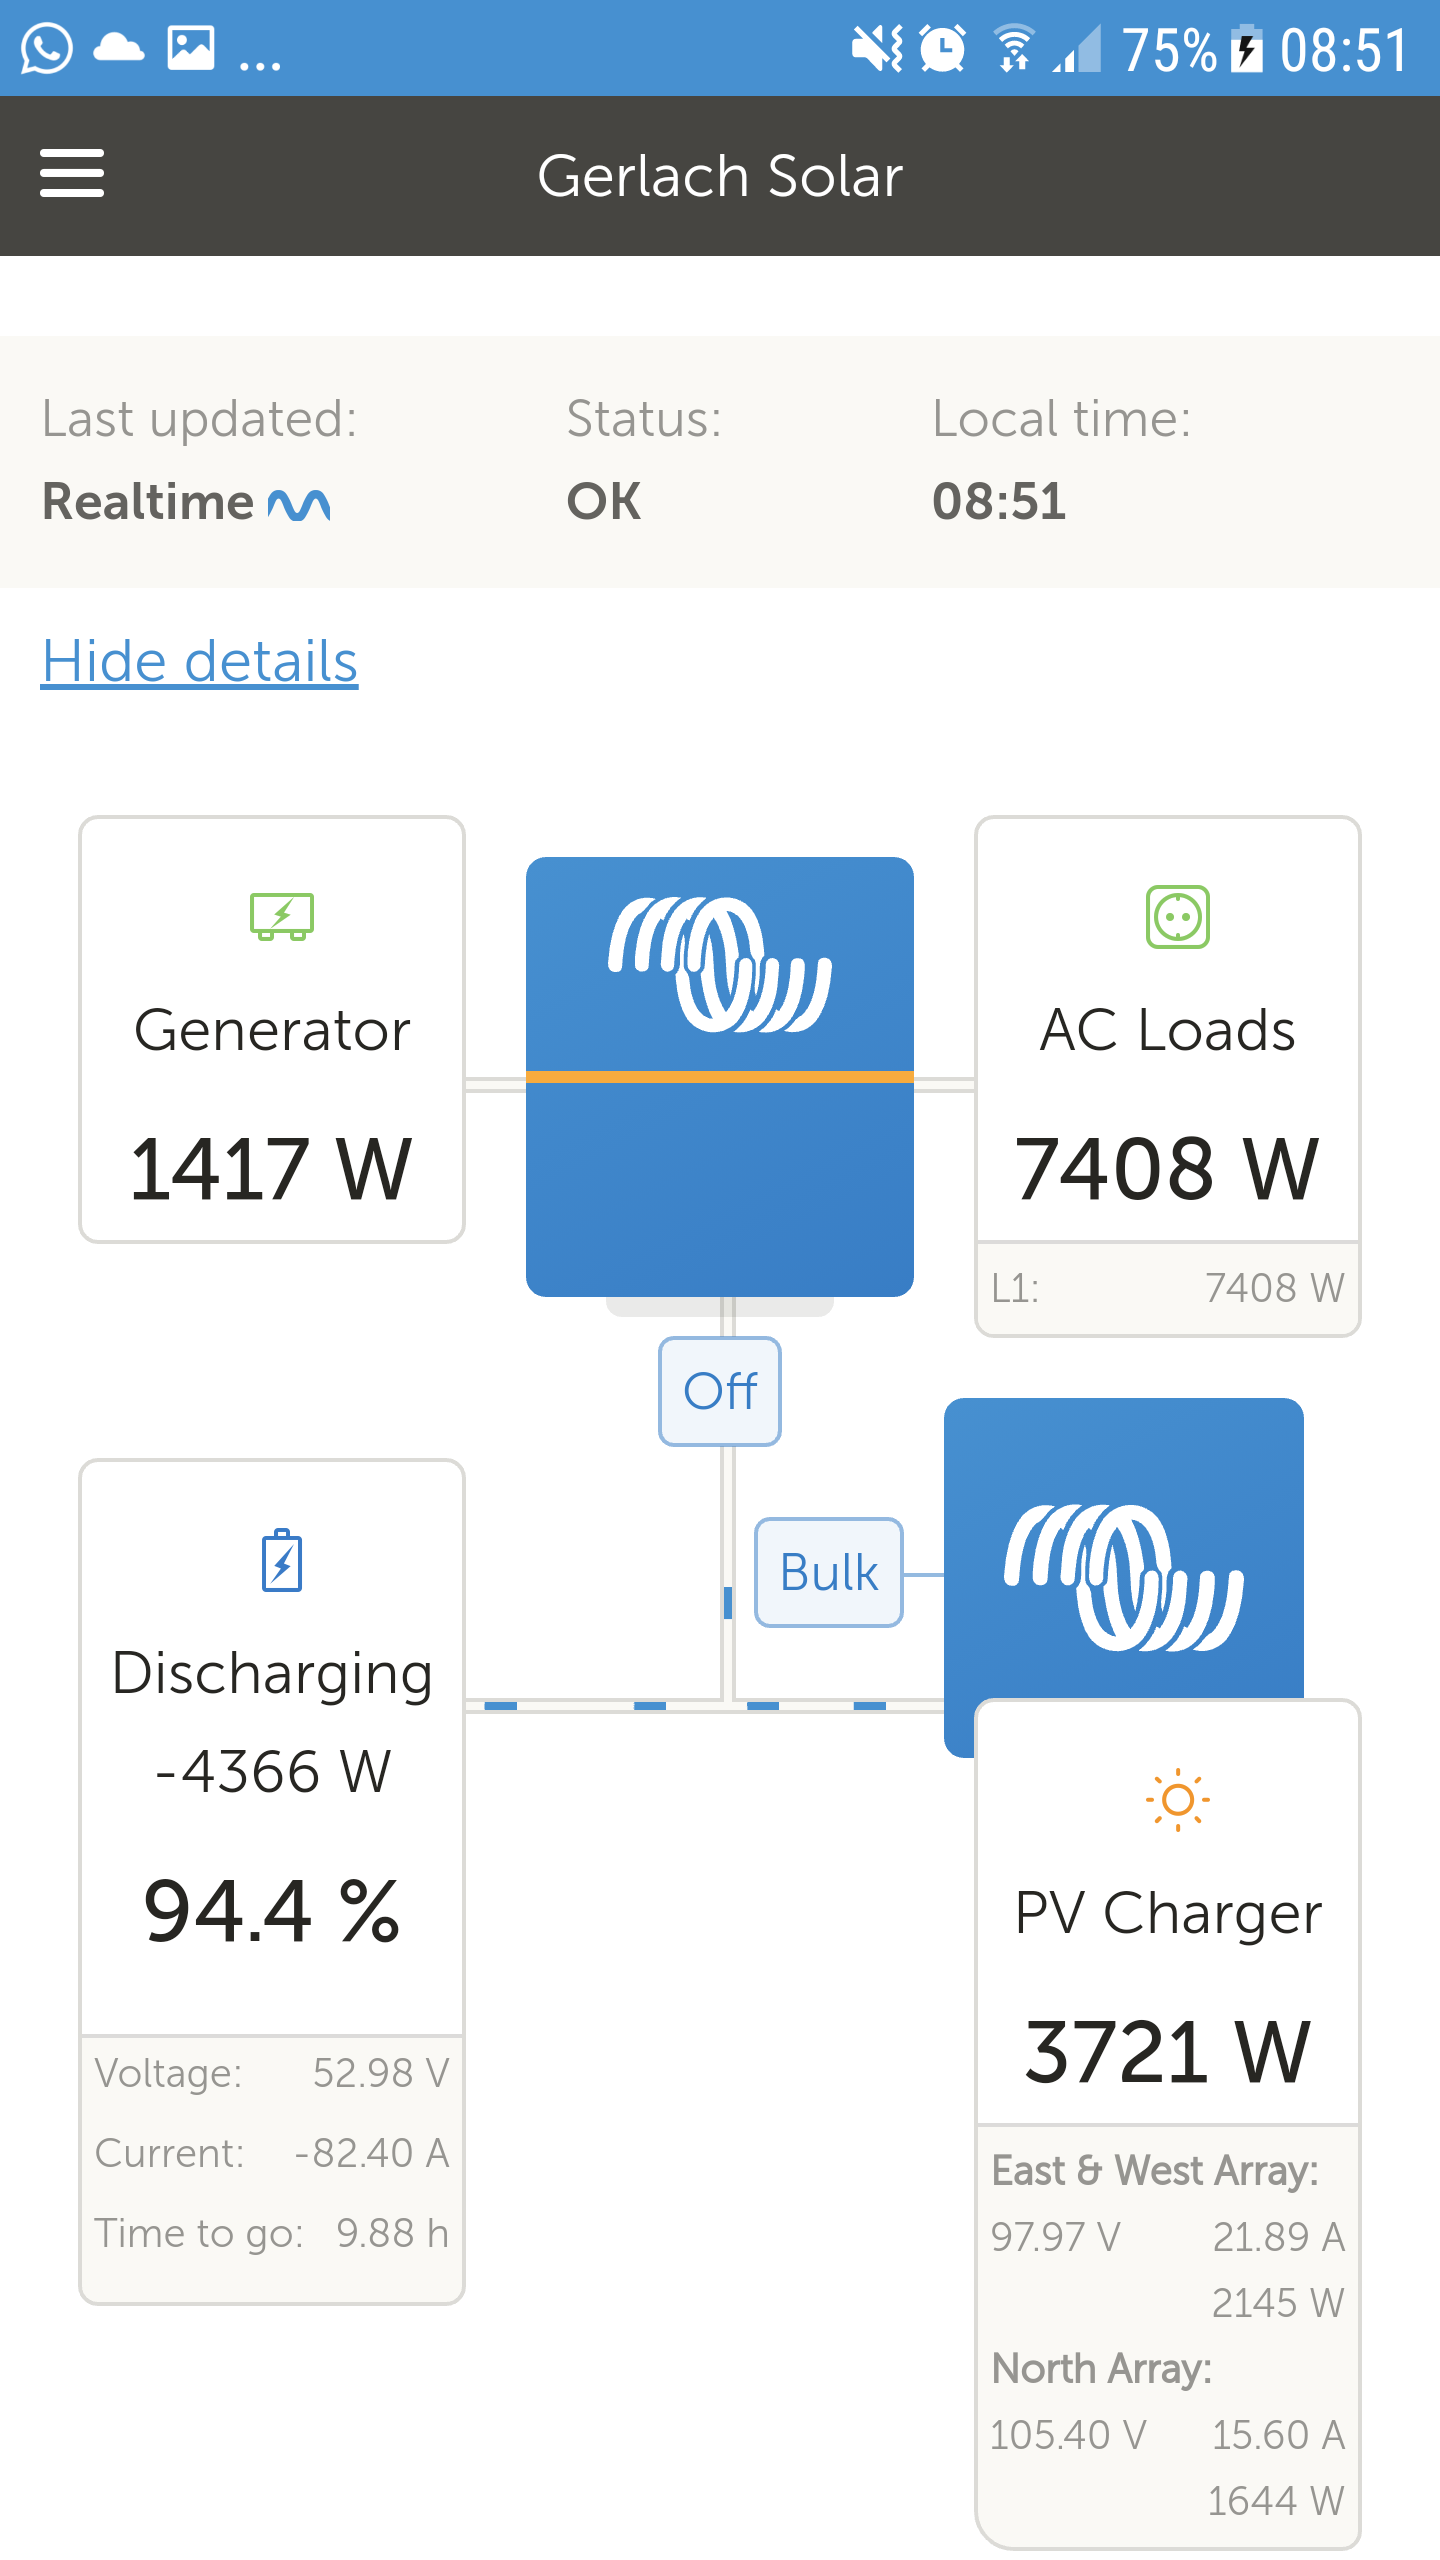
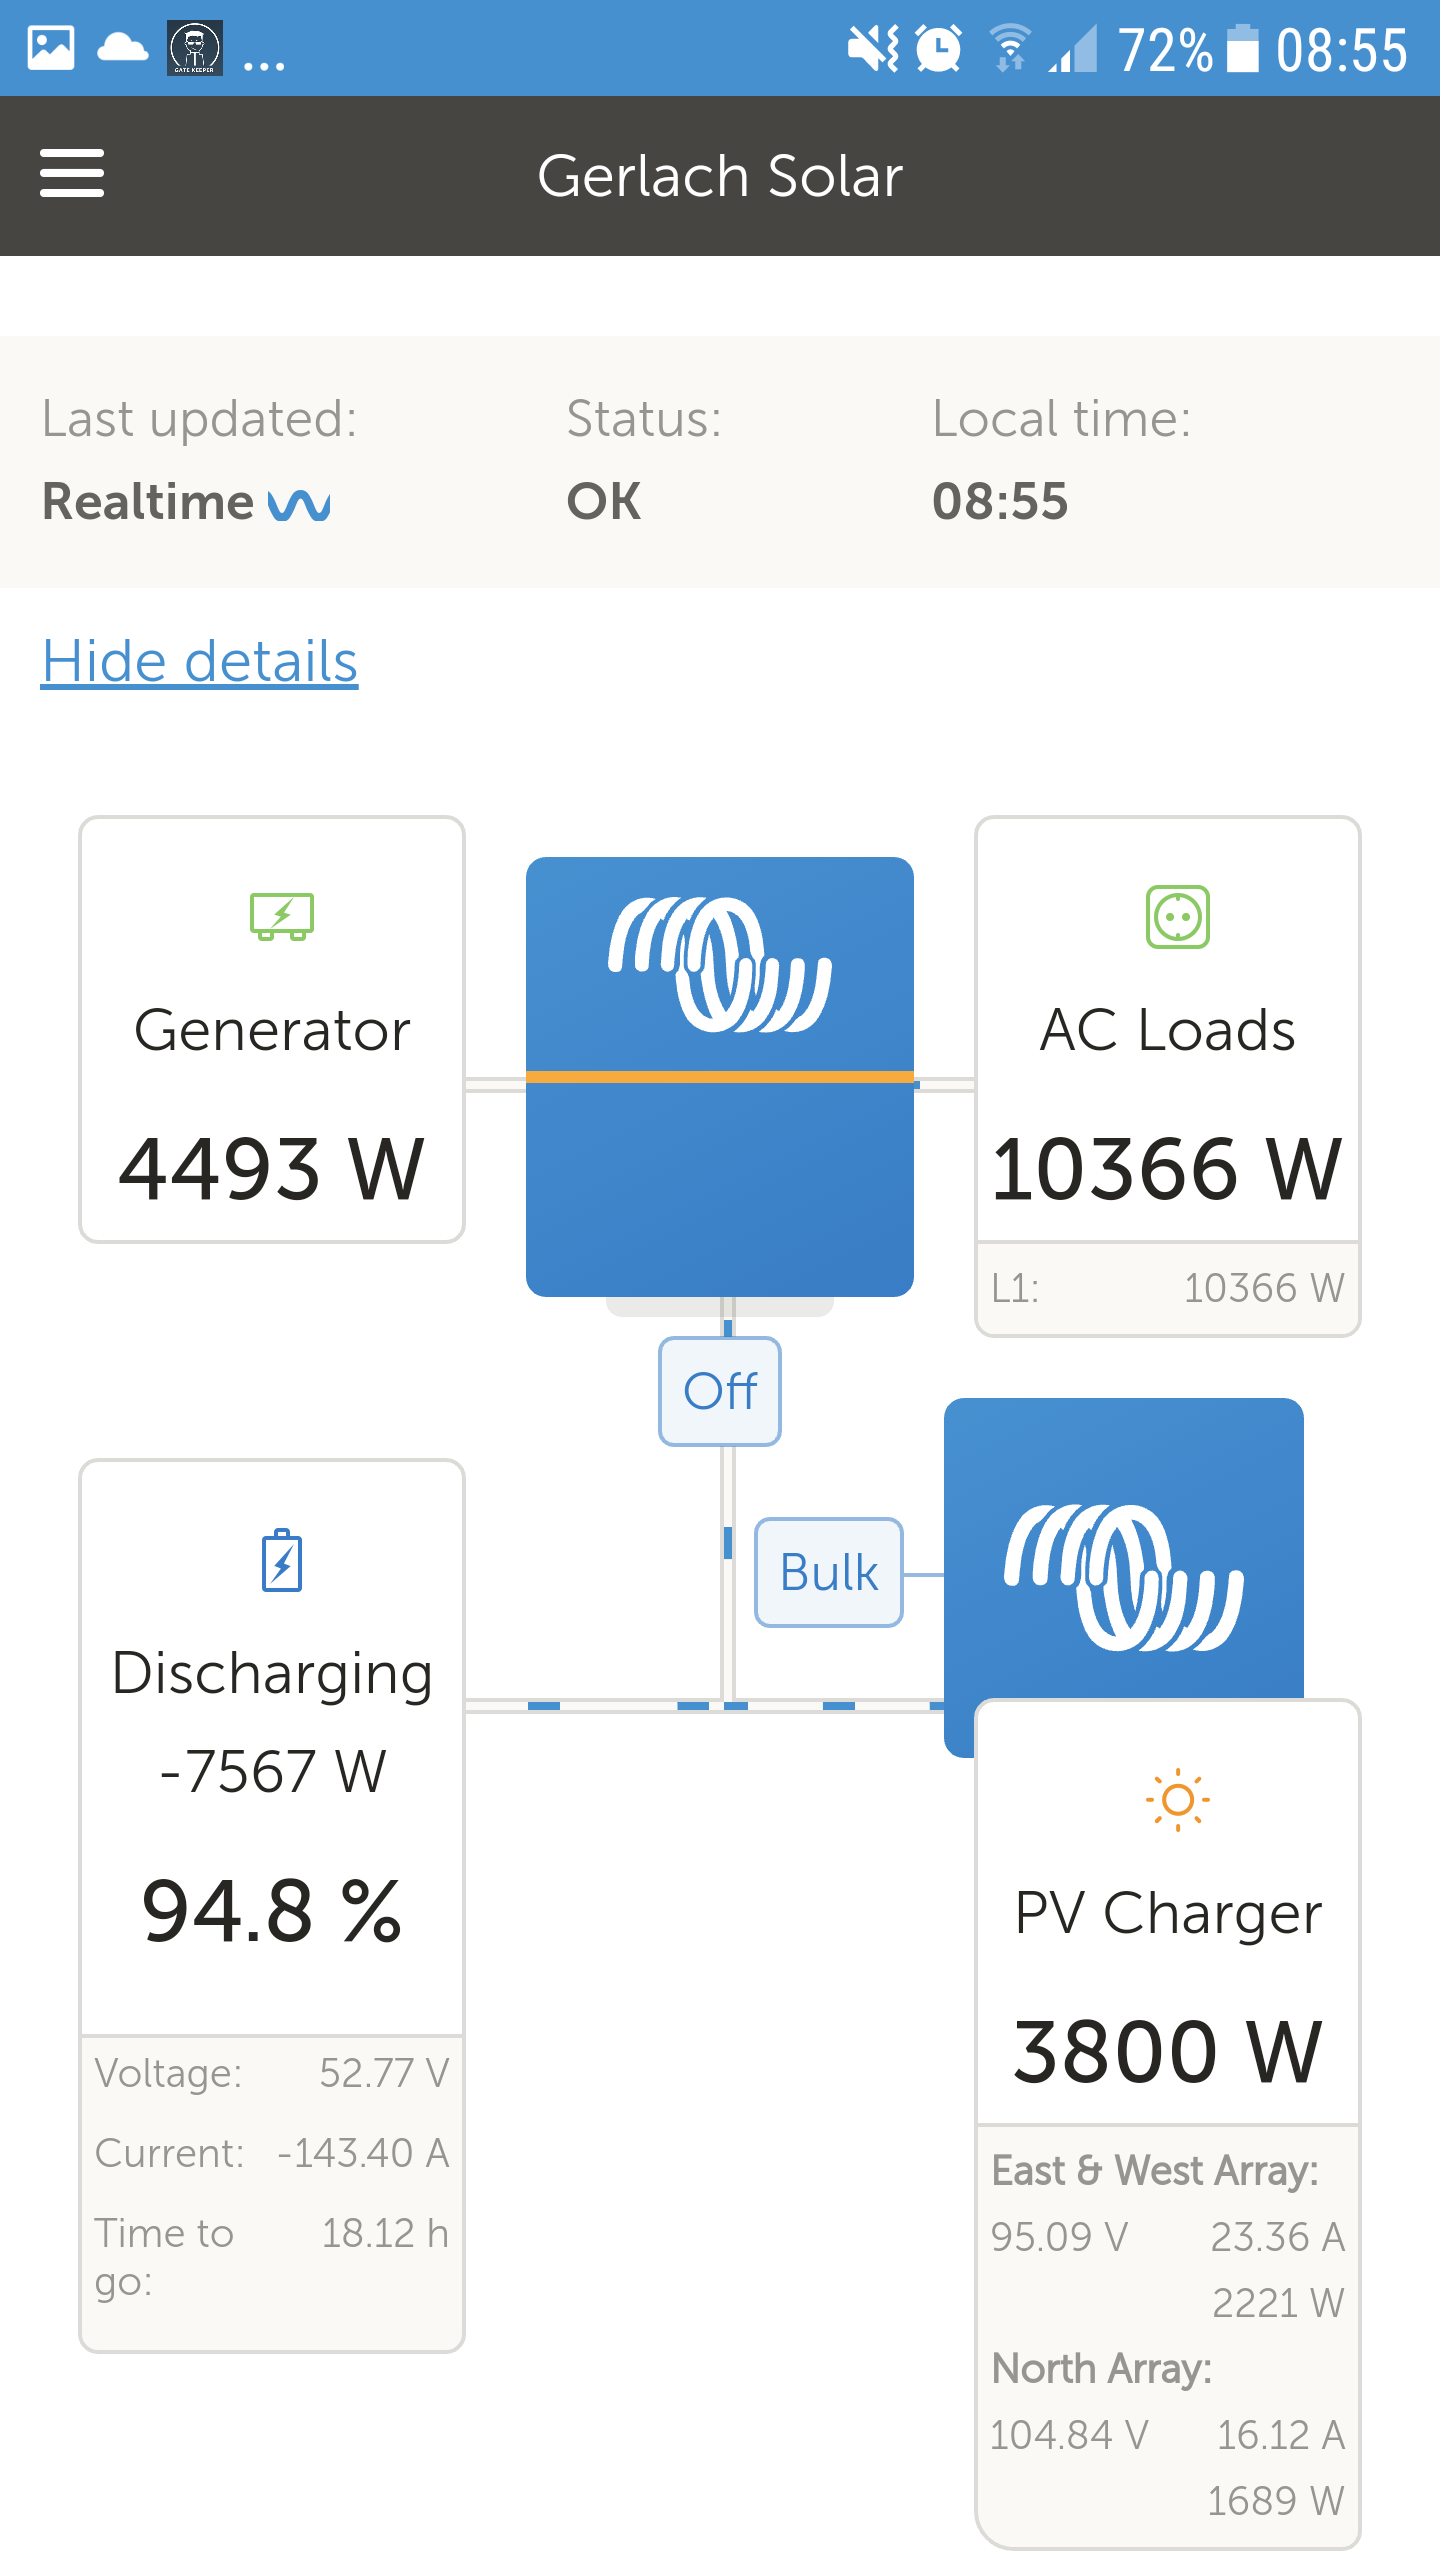
I still need to check in the new 2.80 update to get the ET112 to read correctly. The one that shows Generator is the MLT H8.0 one and the AC Loads one is the combine on the H8.0 and H10.0 output.

2 Likes
One comment, watch them temps in those boxes for the PI and GX devices… You may have to poke some holes in them… Looking good!
Groetnis
2 Likes
Lovely install!!!
Thanks for that one. Jip, I still need to get some LM 335Z from mantech. One for inside the box where the Cerbo unit is, one on every mppt and one just to check the temps on… on… still need check where to place the 4th one. Pi isn’t working so hard. It’s for the the 2 MLT inverters to send there stuff to MLT portal.
well done. looks great and its quite satisfying doing it yourself.
Next project is a ceiling for your garage 
Hahahahah!! thanks!! there is 3 projects still waiting for me. Need to finish my Wilson Audio Sasha DAW speakers that I’m busy building, then 2 moerse projects, that stoep in the one photo needs to get stacking doors and ceiling and then a carport with a size of 63m2. Got my sign off last week with the SANS engineer for the steel work and all the other paperwork is with the CITY. So just waiting for the go-ahead from there side.
1 Like
62 German 6V beetle (1 vote)
@Sarel.Wagner can send that one for me. He just need to give his bank card to 
 so that i can order parts from the states side from CB performance and Scat and from VW heritage in the UK.
Sarel, let me know if you are looking for parts. I got a guy up that side that import parts for vw aircooled and not Empi stuff. Friend of mine in cape town side import Scat and CB performance parts. I’m sitting with R120k motor that I’m still need to finish
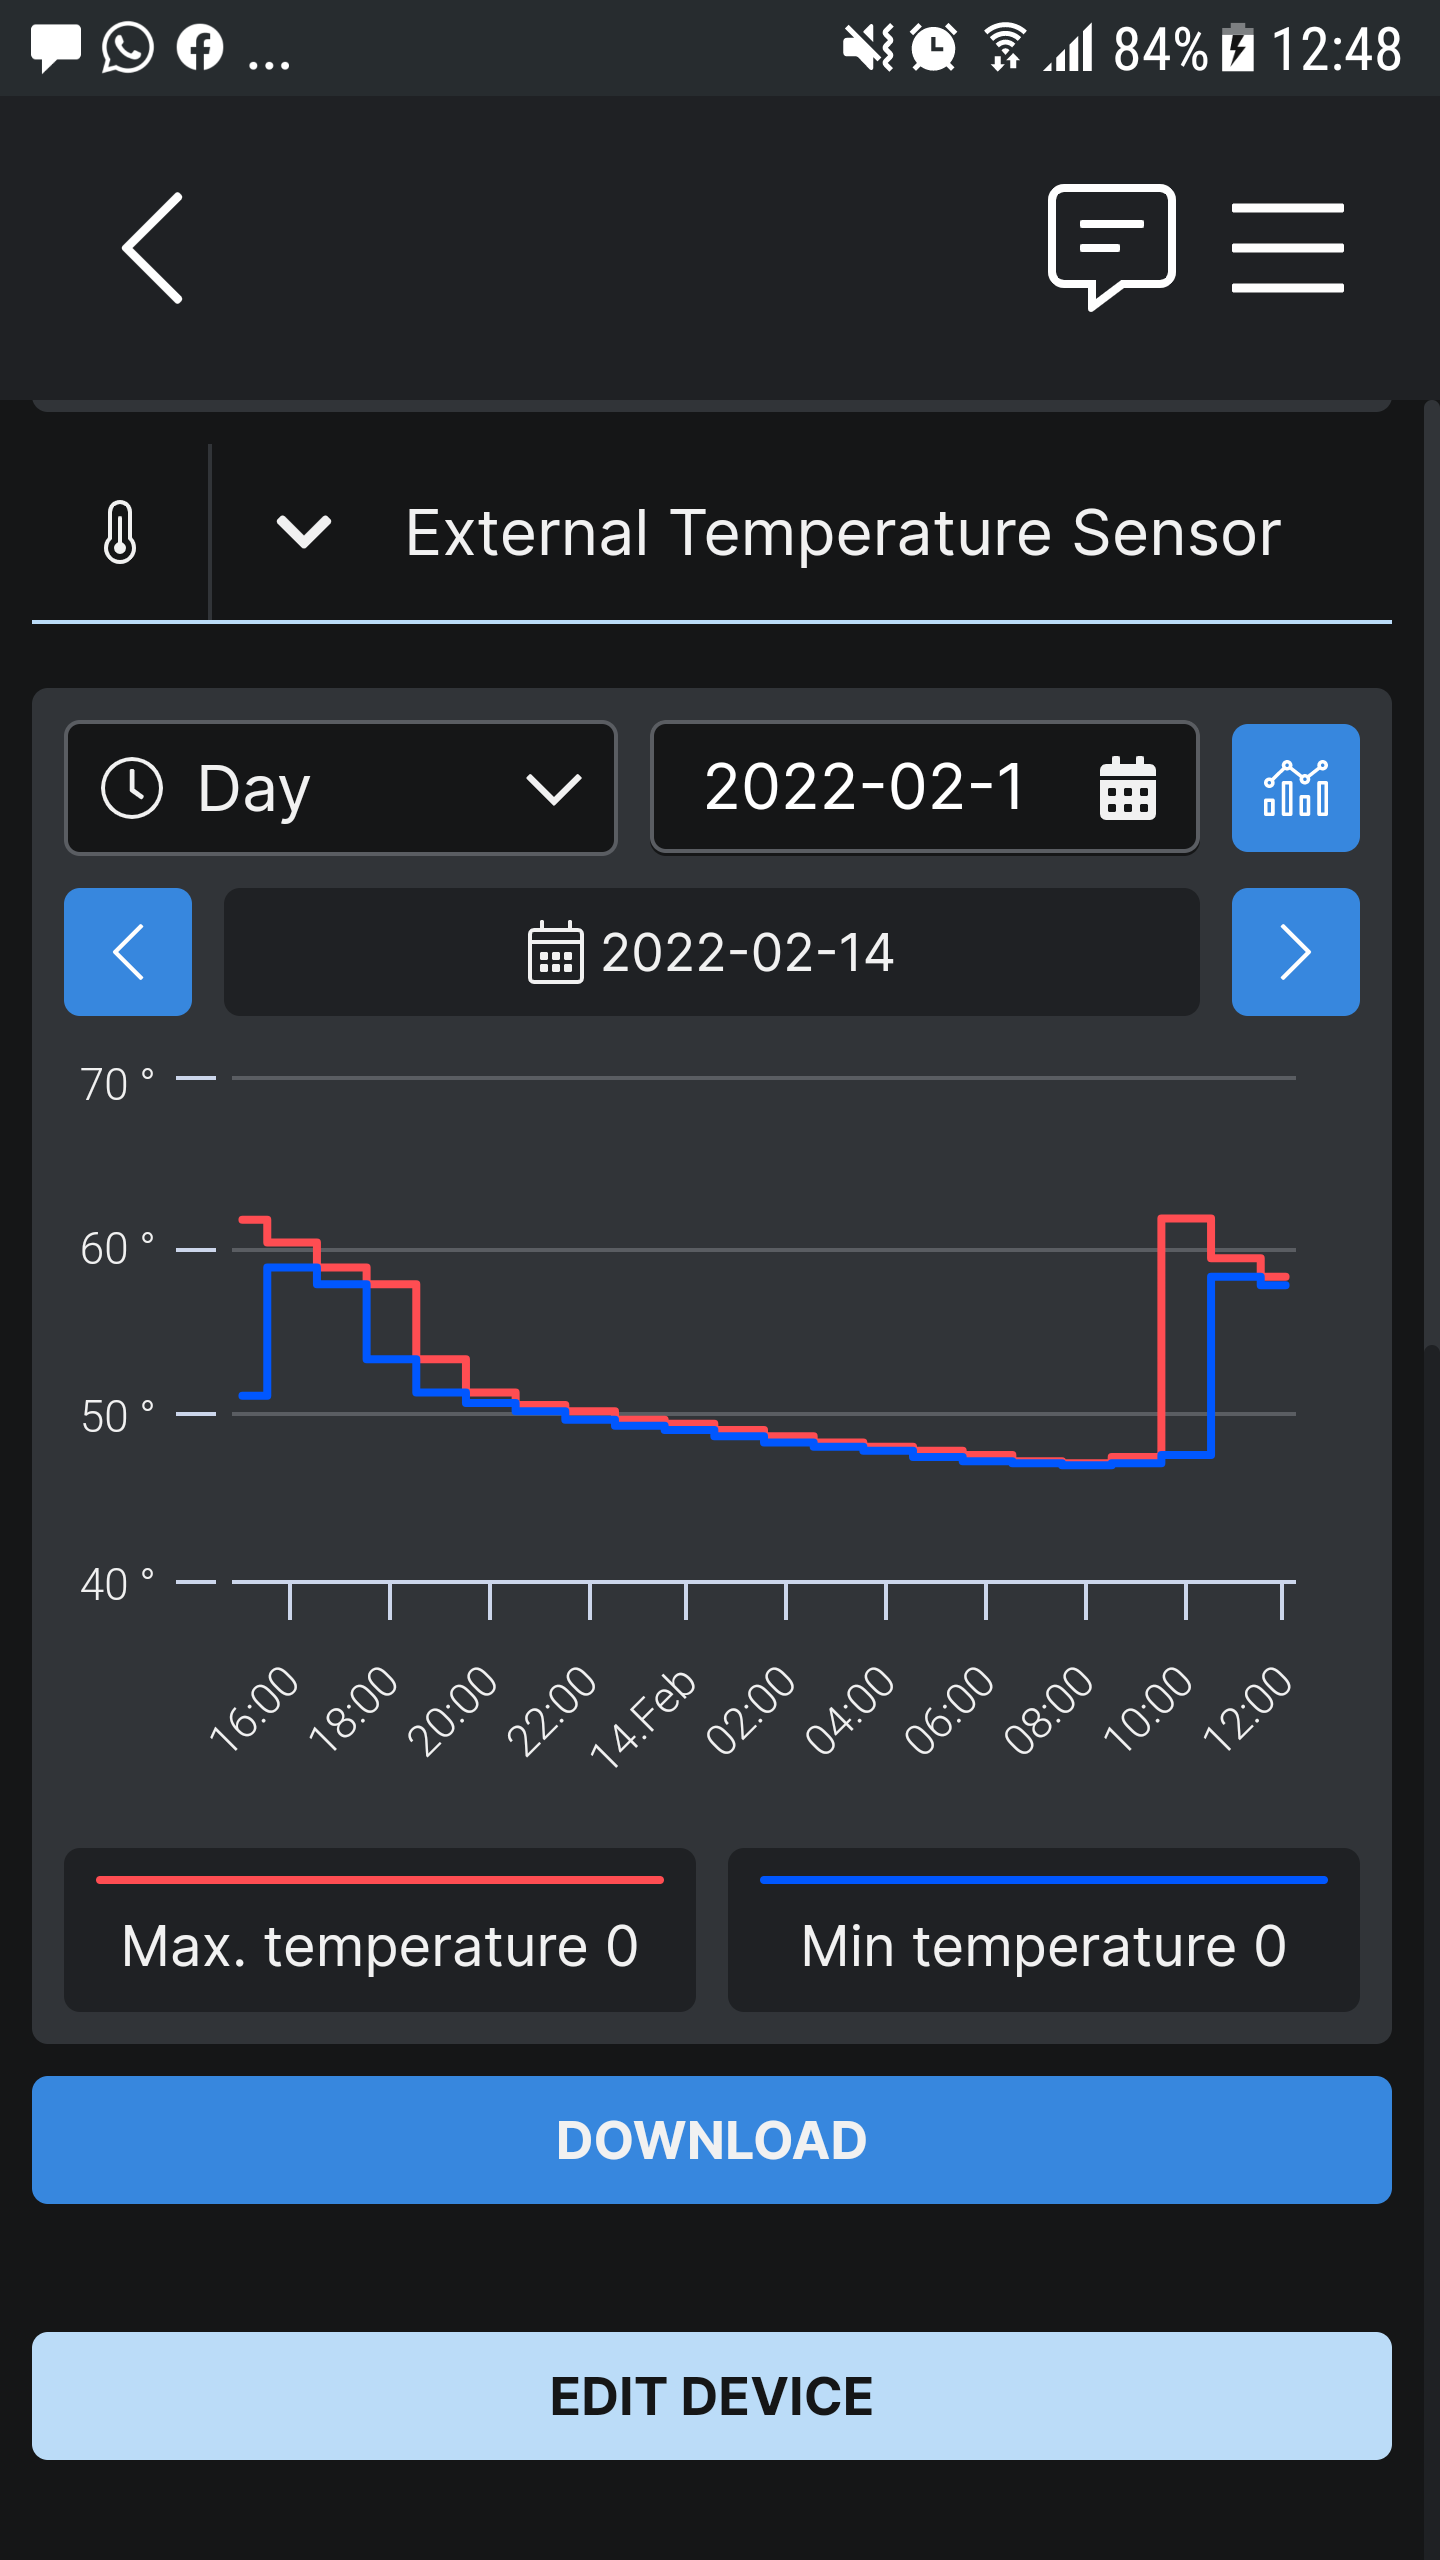
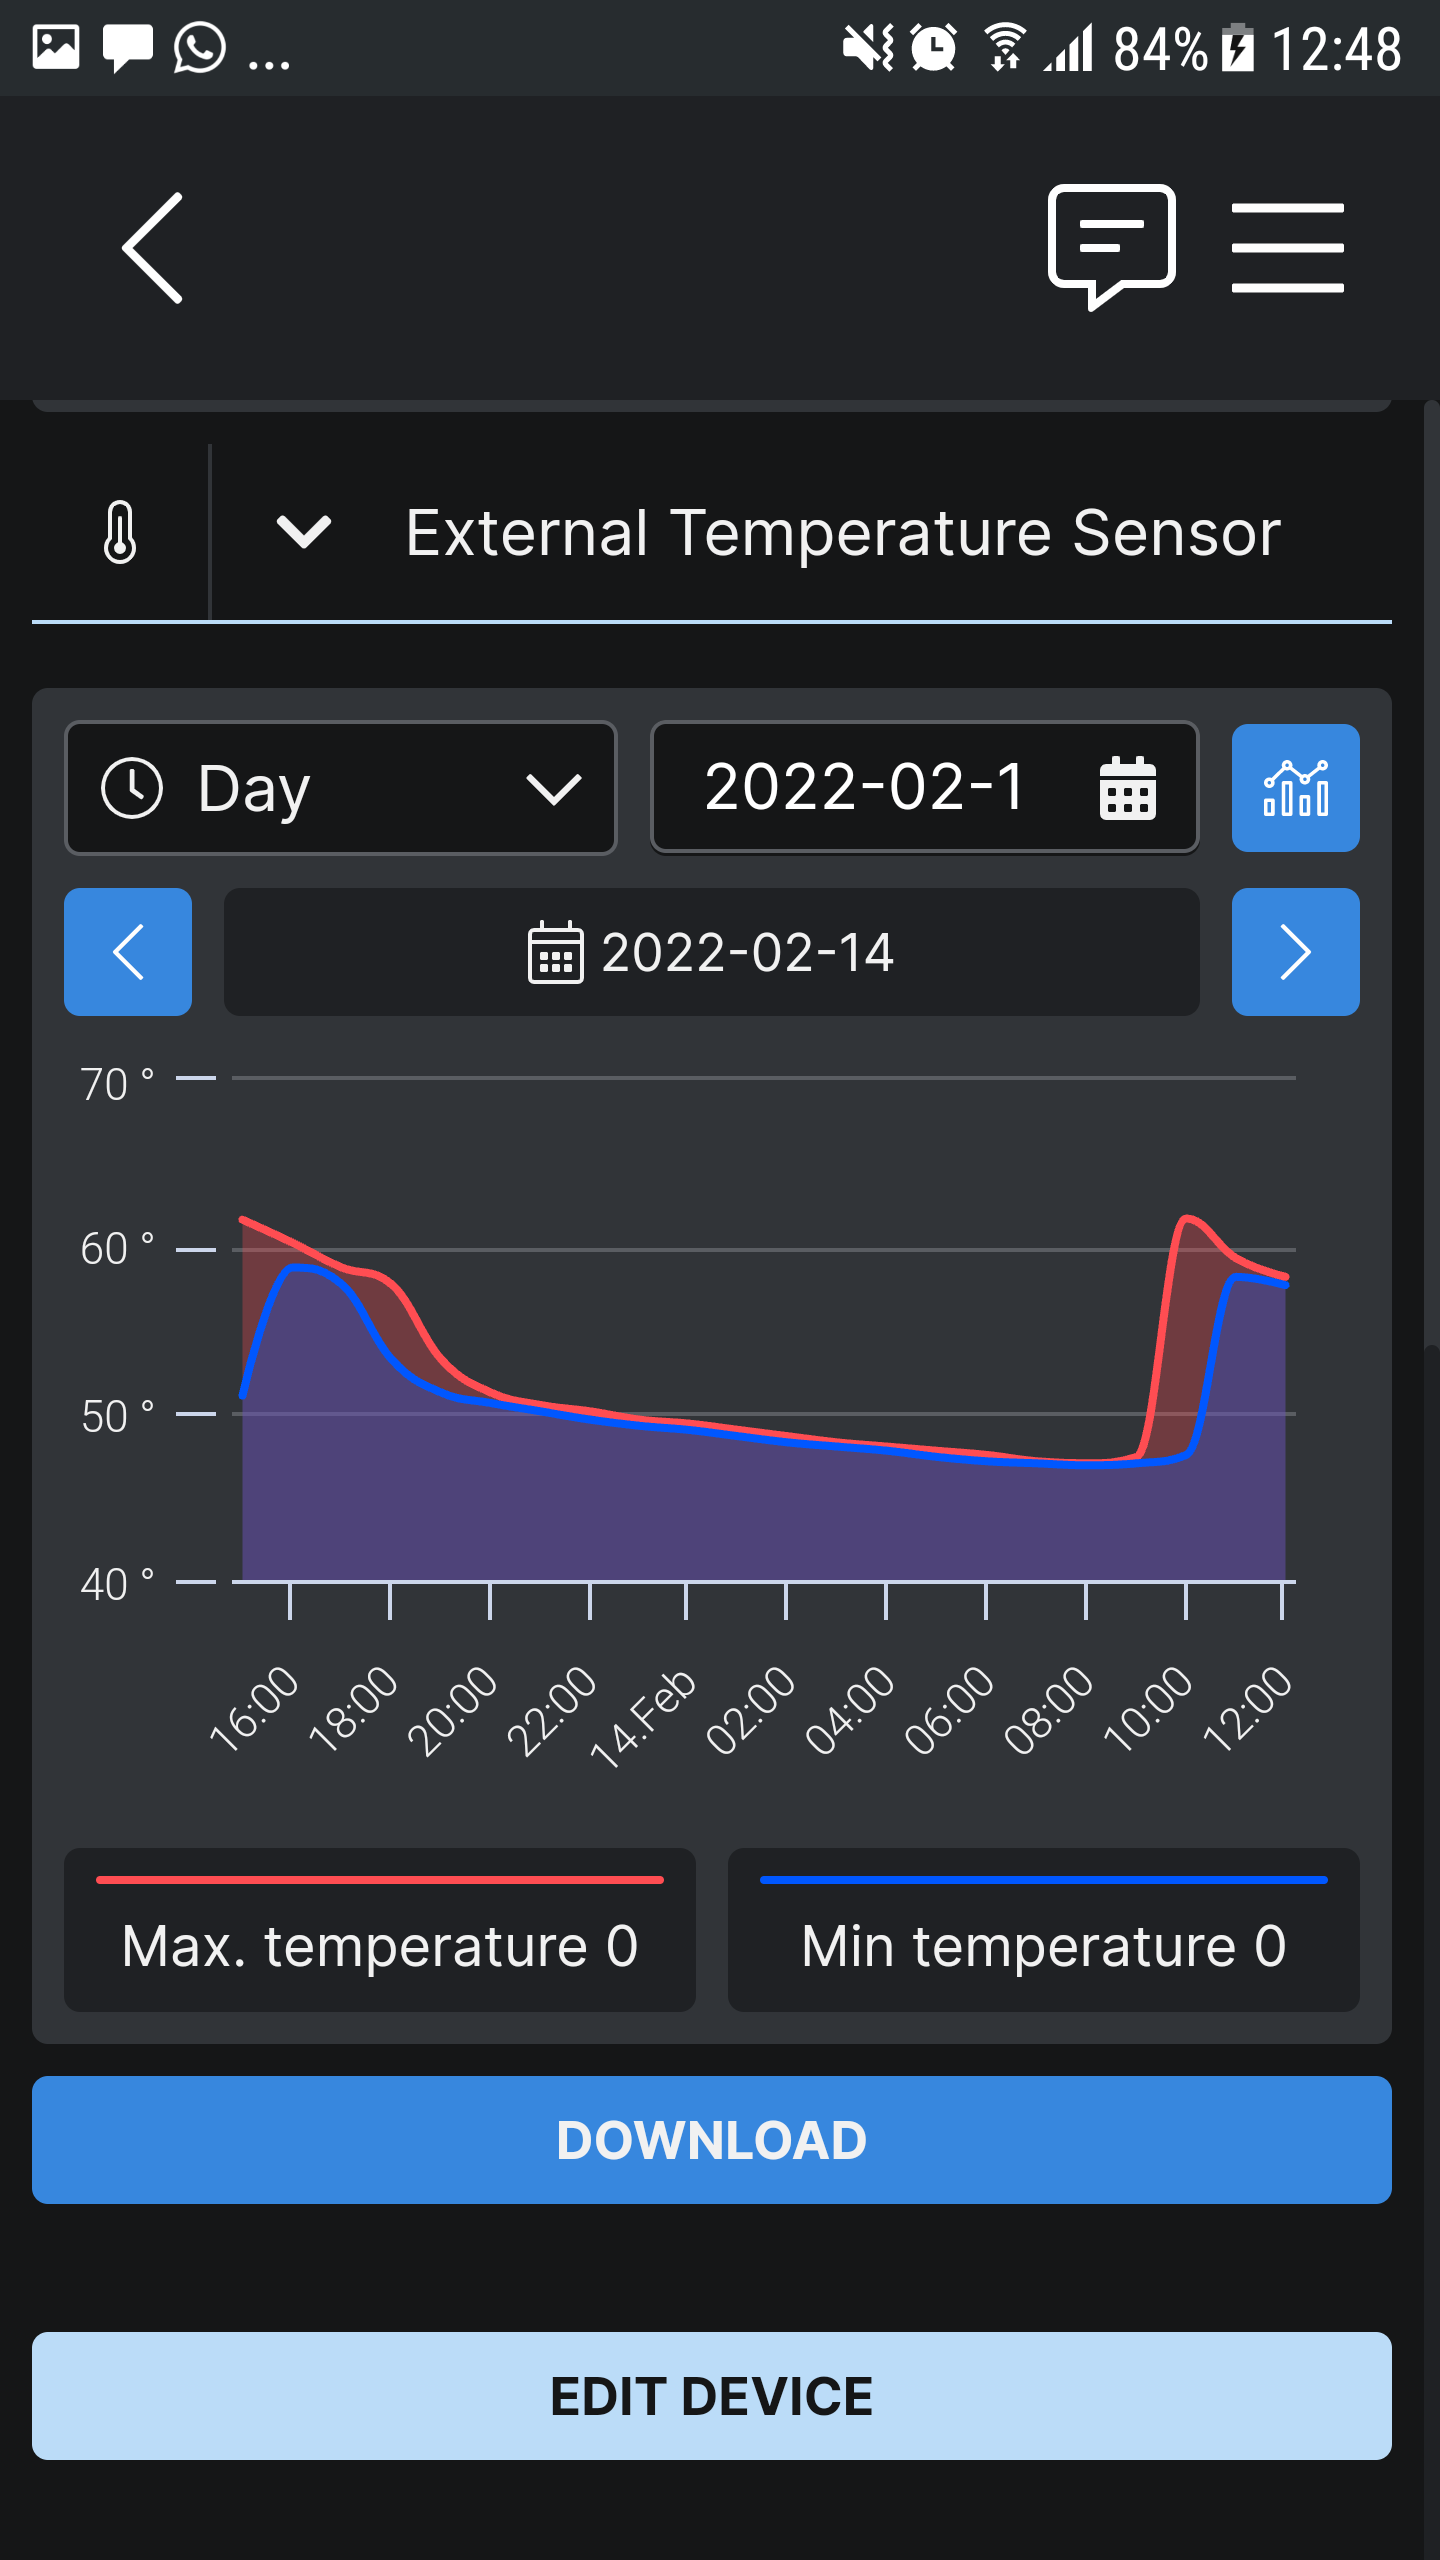
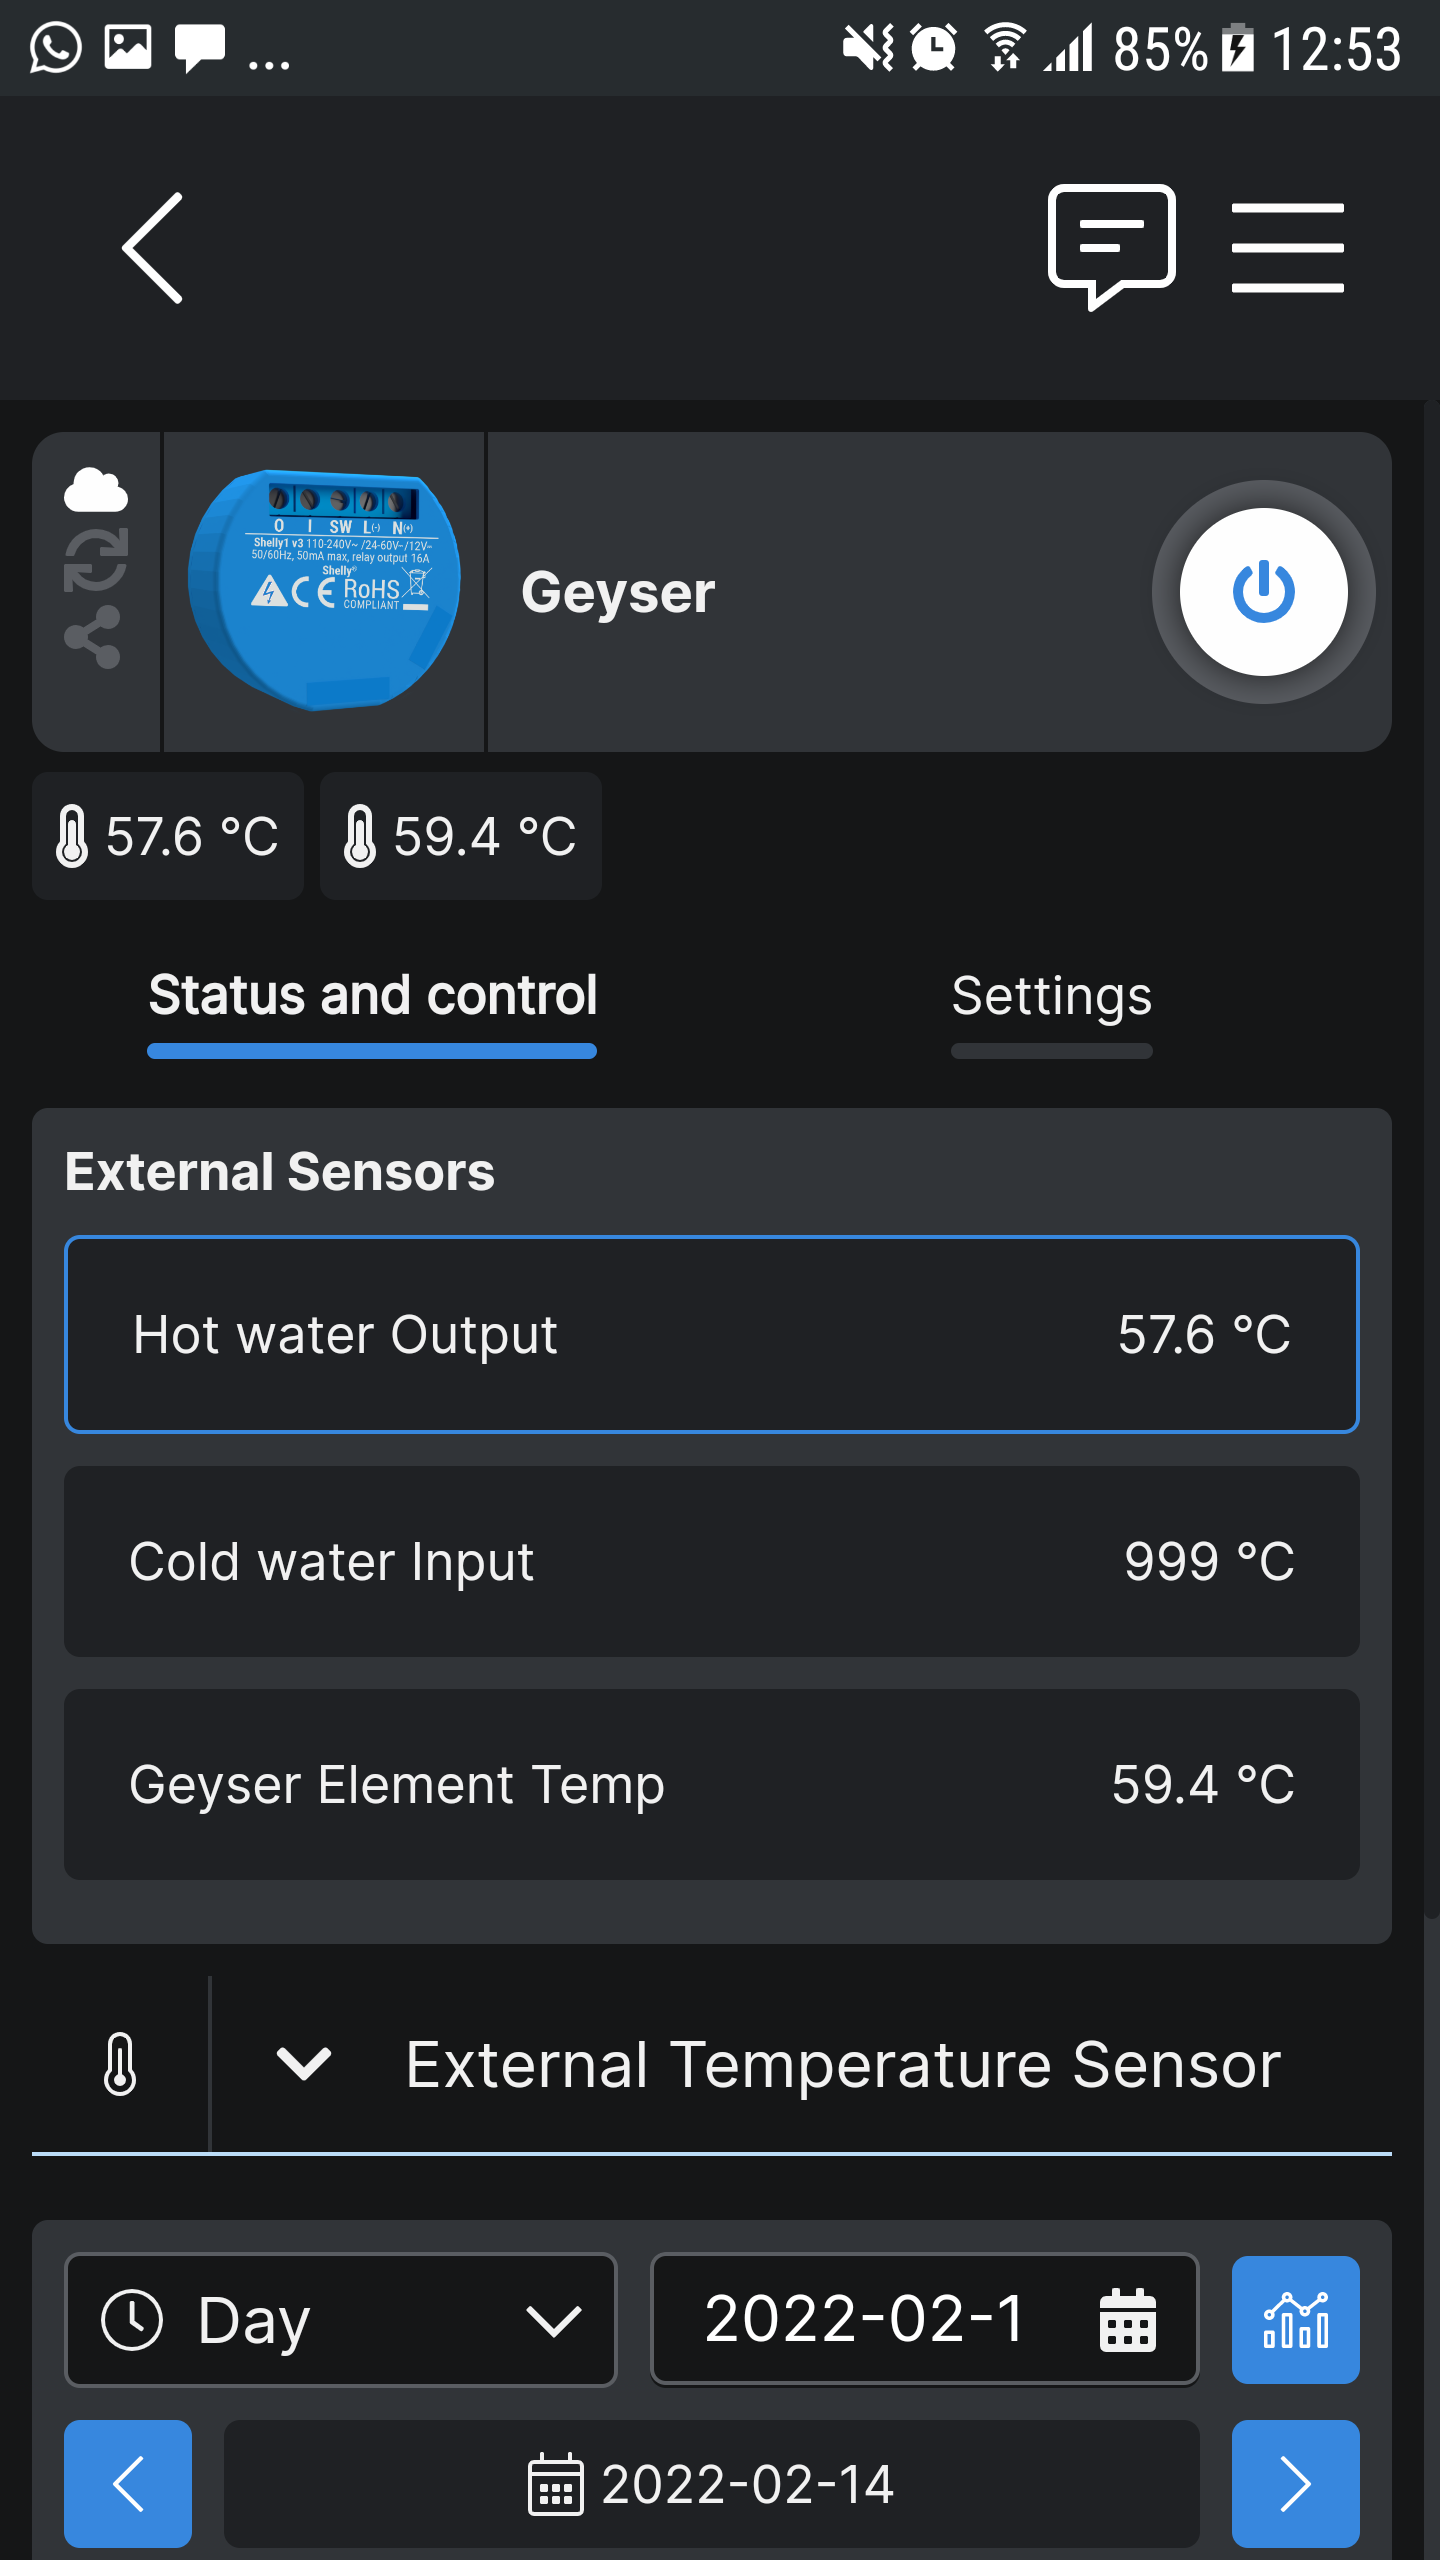
Over the weekend I added a Shelly 1 with Temperature Sensor Add-on with 3 temp probes with a contactor. One temp probe is at the top of the geyser output and the 2nd one at the element and the other one on the cold input. I spotted that one is showing wrong reading now. Think the wire pulled out on that one.
This is how small the Shelly 1 is:
https://media.takealot.com/covers_images/e78e0a1a86844df6b3beff11b1f78b45/s-pdpxl.file
The temp Add-on:

And this what I get from the app that connects to the cloud:

2 Likes